 MySQL: Workbench
How to configure MySQL Workbench
👋 Welcome to the Stackhero documentation!
Stackhero offers a ready-to-use MySQL cloud solution that provides a host of benefits, including:
- Unlimited connections and transfers.
- phpMyAdmin web UI included.
- Effortless updates with just a click.
- Optimal performance and robust security powered by a private and dedicated VM.
Save time and simplify your life: it only takes 5 minutes to try Stackhero's MySQL cloud hosting solution!
How to configure MySQL Workbench
Setting up MySQL Workbench to connect to your Stackhero instance is a straightforward process. Below is a clear, step-by-step guide to help you through the configuration:
-
Launch MySQL Workbench
Begin by opening the MySQL Workbench application on your computer.
-
Create a new connection:
- Navigate to the connection settings interface.
- Provide the necessary details:
- Connection Name: Choose any name that helps you recognise this connection, such as
Stackhero. - Connection Method: Select
Standard (TCP/IP)from the dropdown list. - Hostname: Input your Stackhero instance's hostname. This typically looks like
<XXXXXX>.stackhero-network.com. - Username: Enter
root. - Password: Use the root password provided in your service configuration.
- Port: Specify the port number as indicated in your service configuration.
- Connection Name: Choose any name that helps you recognise this connection, such as
-
Save your connection settings:
- Save the connection details to make future access more convenient.
-
Test your connection:
- Click on the "Test Connection" button to confirm the settings are correct. If the test is successful, you are all set to proceed.
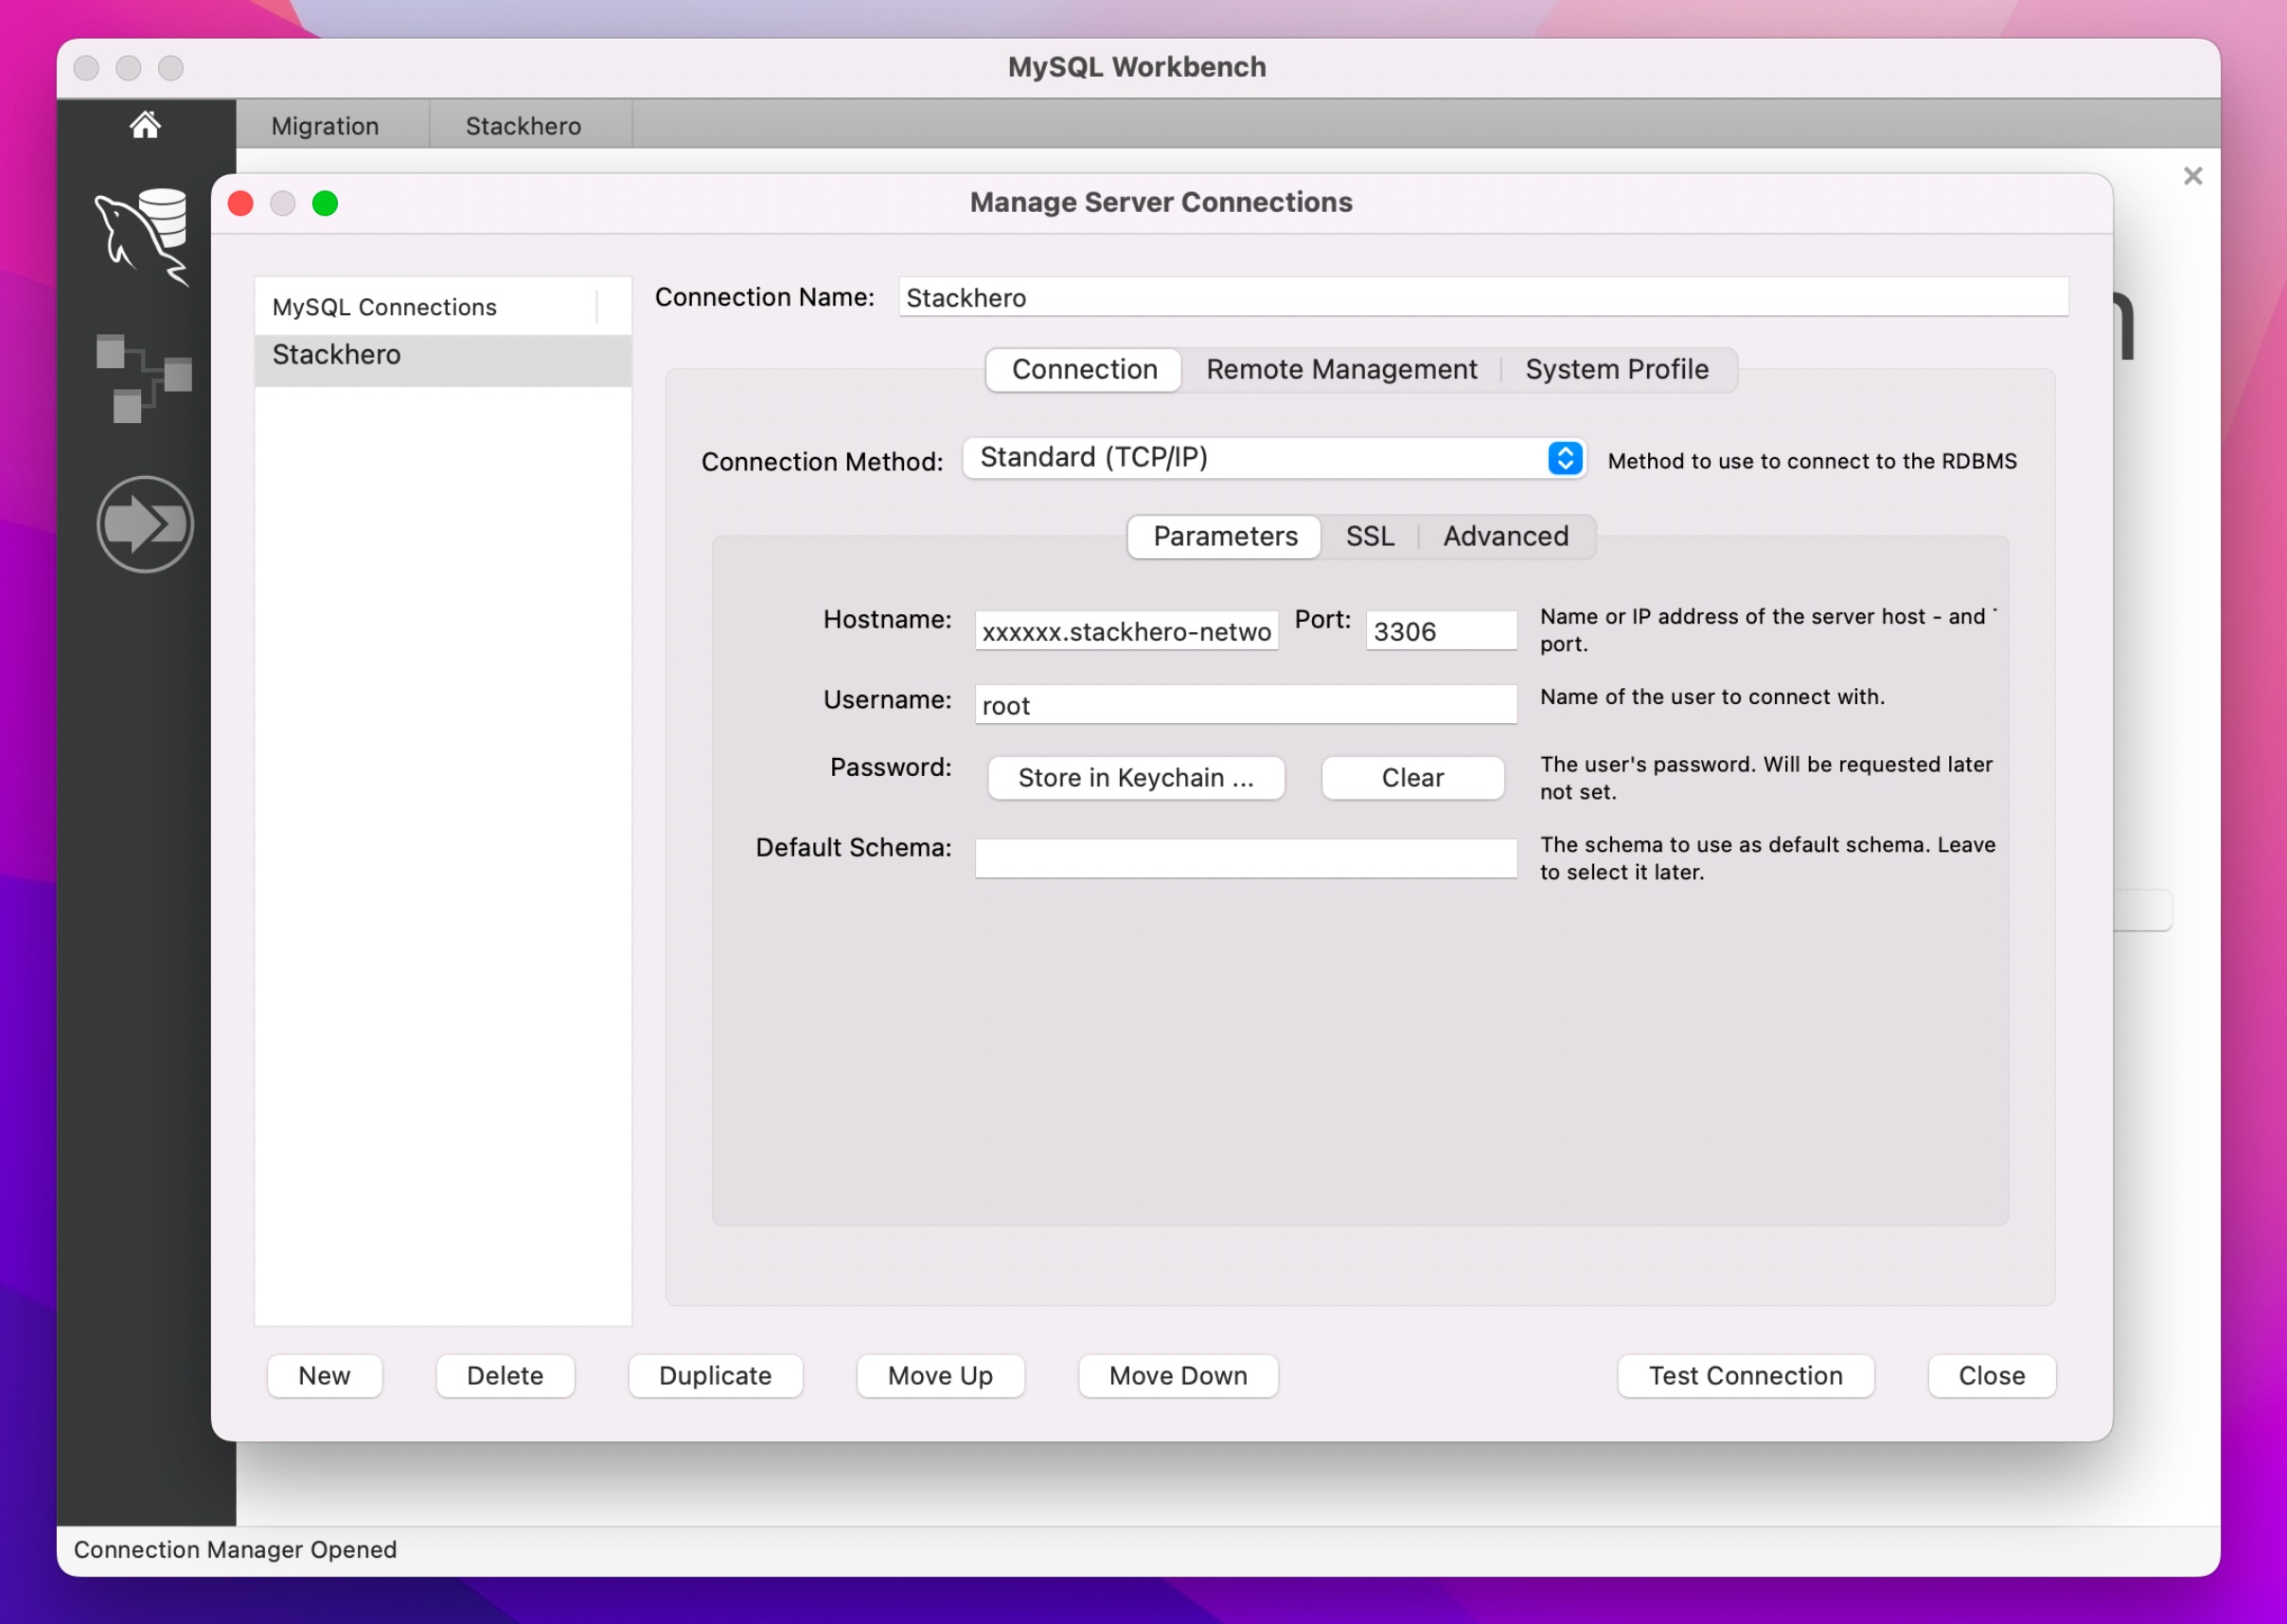 Example of MySQL Workbench Configuration
After completing these steps, your MySQL Workbench should be successfully connected to your Stackhero database instance. This setup allows you to manage your database with ease. If you encounter any issues, double-check the hostname, username, and port against the service configuration for accuracy.