 Python: Deploy to production
How to deploy your Python code to production in minutes
👋 Welcome to the Stackhero documentation!
Stackhero offers a ready-to-use Python cloud solution that provides a host of benefits, including:
- Deploy your application in seconds with a simple
git push.- Use your own domain name and benefit from the automatic configuration of HTTPS certificates for enhanced security.
- Enjoy peace of mind with automatic backups, one-click updates, and straightforward, transparent, and predictable pricing.
- Get optimal performance and robust security thanks to a private and dedicated VM.
Save time and simplify your life: it only takes 5 minutes to try Stackhero's Python cloud hosting solution!
Stackhero's Python cloud hosting service is a powerful and intuitive solution for deploying your Python projects to production in minutes. With its straightforward setup and robust features, you can focus on writing code while Stackhero takes care of the rest.
Key features include:
- Deployment with a simple
git push - Customisable domain with automatic TLS certificates management (HTTPS)
- Dedicated and private VM for maximum security and confidentiality
- Support for HTTP/2, TLS 1.3 (HTTPS), WebSockets, GZIP & Brotli compression, ETag, and TCP/UDP port access
Prerequisites
Before deploying your projects on Stackhero, ensure you have Git installed on your computer.
To save time and avoid complex configuration if your development environment is not ready, consider using Stackhero's Code-Hero.
Code-Hero is a powerful, intuitive, and ready-to-use development platform that you can access directly through your browser on any computer, tablet, or phone. Based on a VSCode fork, it comes pre-installed with all the essential development tools, allowing you to start coding immediately without hassle.
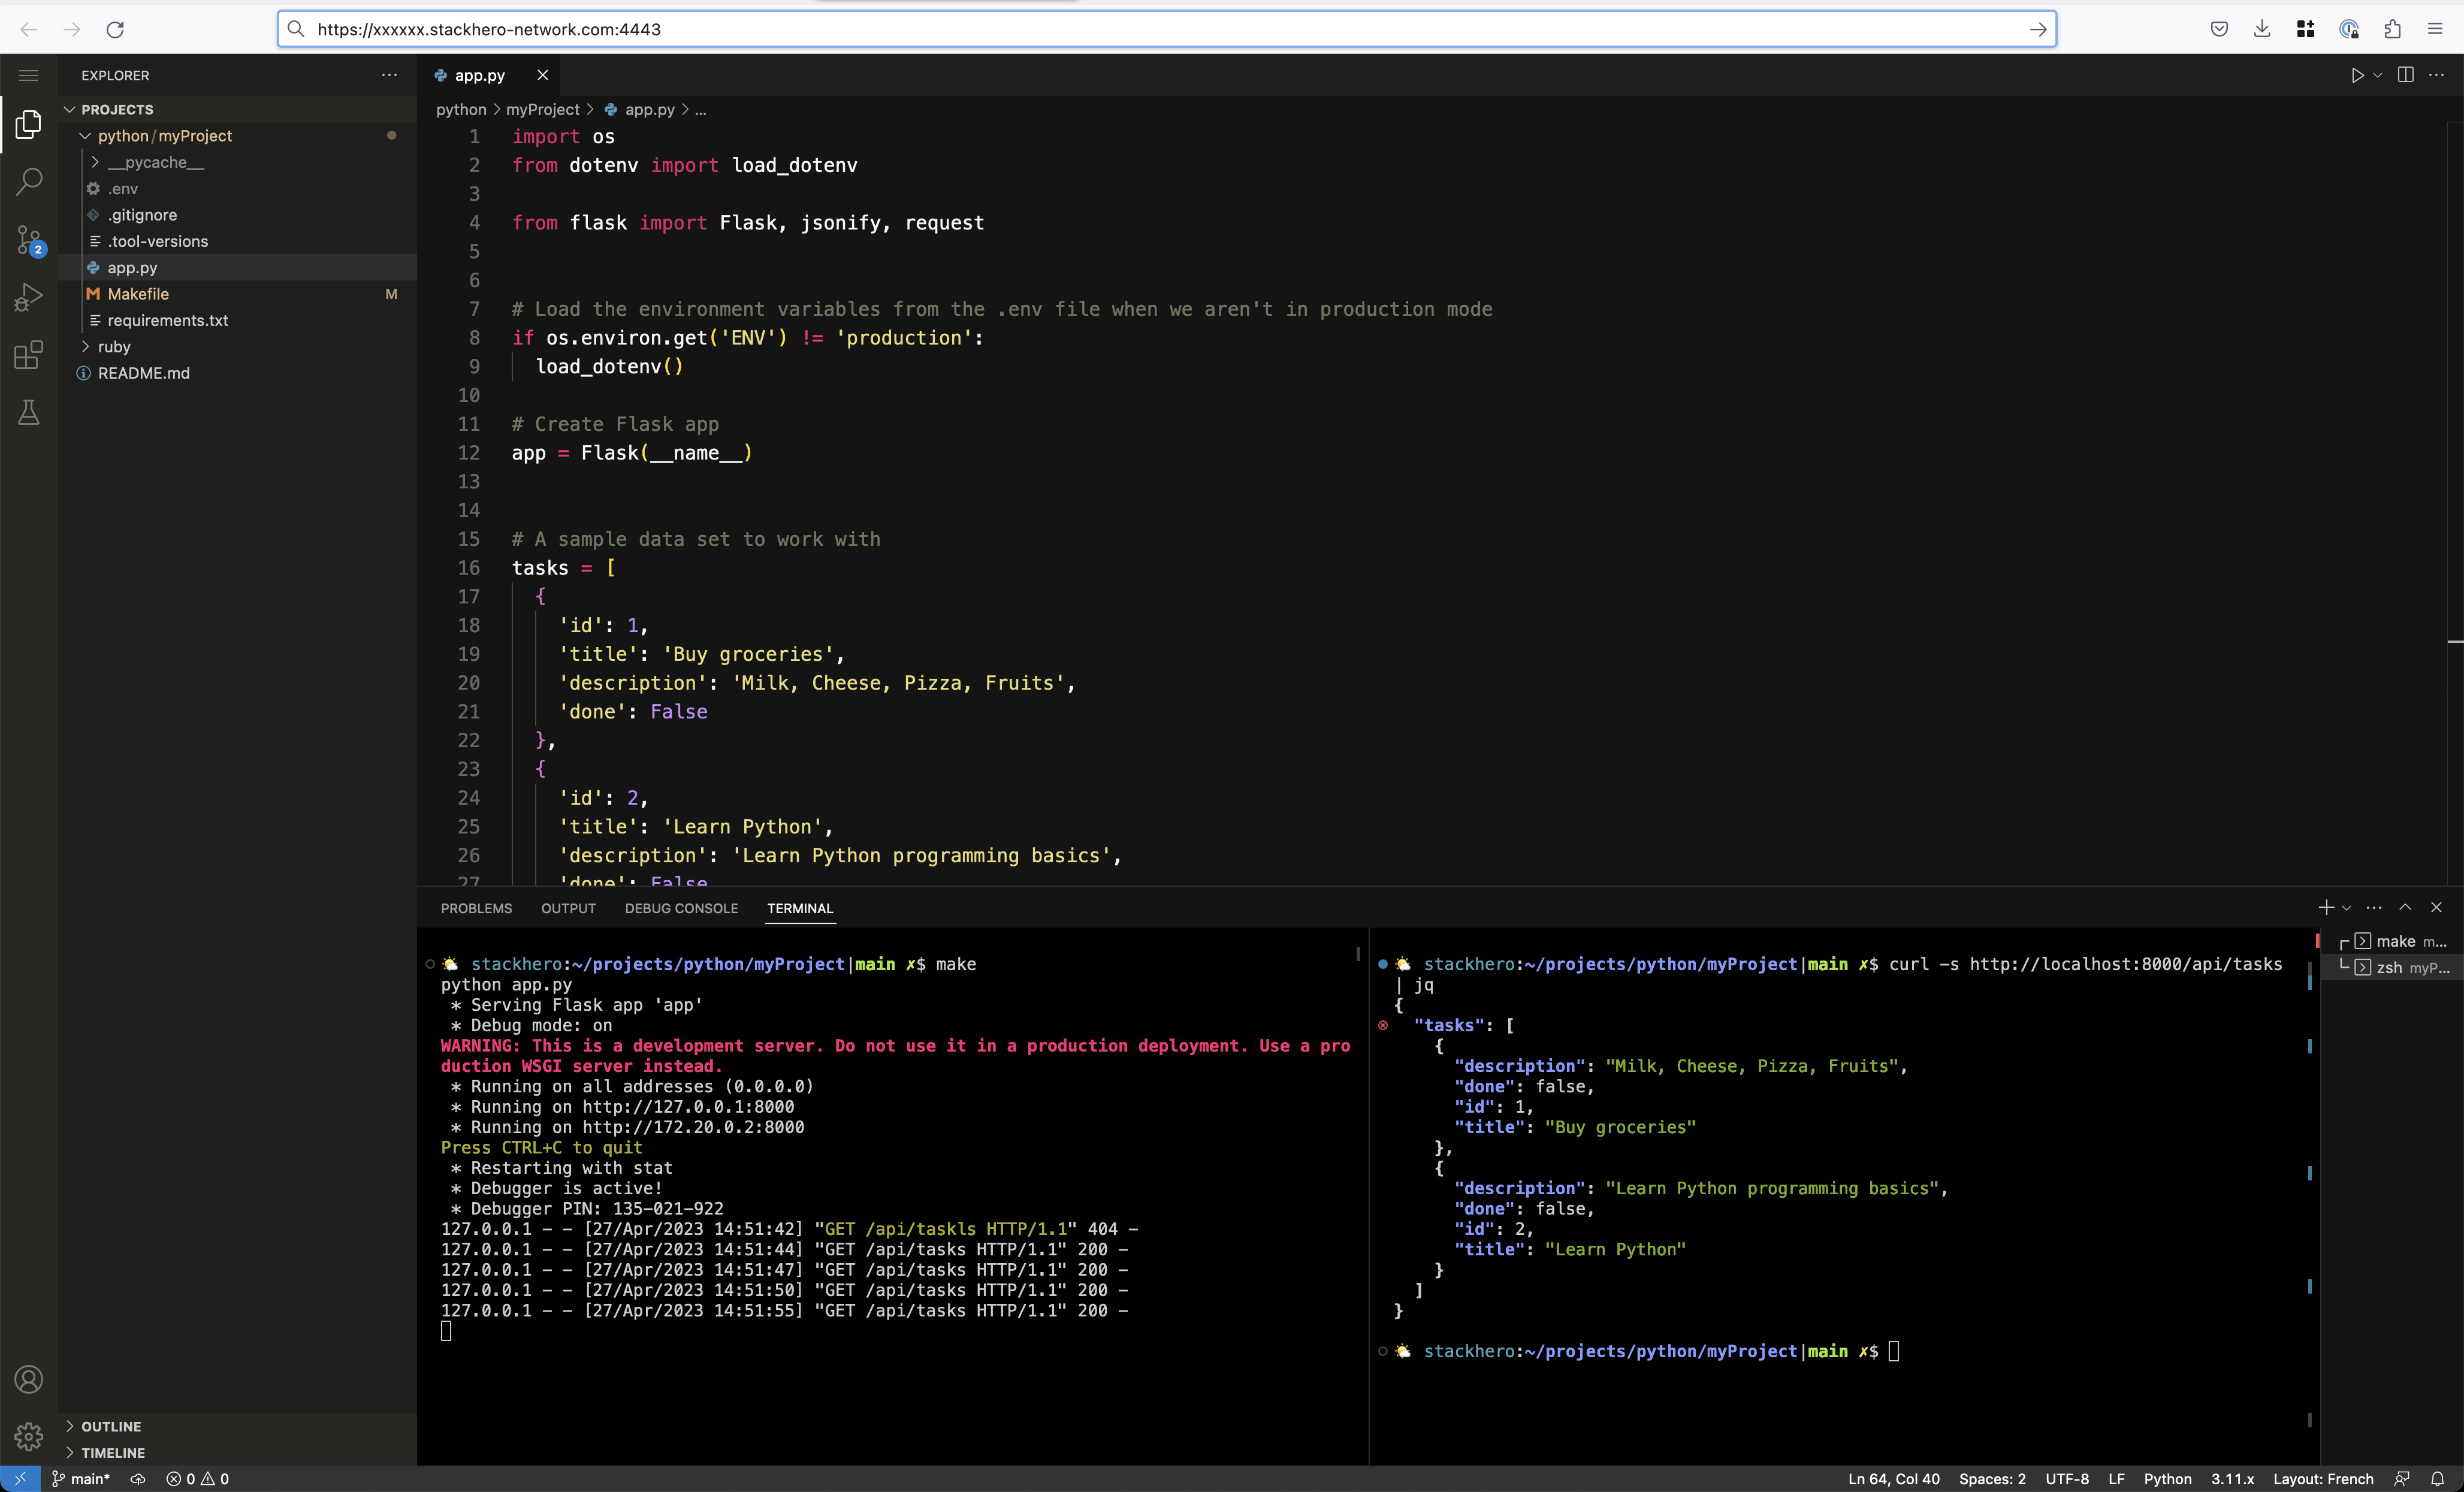 Example of a Code-Hero instance running directly on the browser
Steps to deploy to Stackhero
Deploying your Python application to Stackhero is simple. You can follow these steps:
- Create a Python service on Stackhero.
- Add your SSH public key to your Python service configuration.
- Configure the
git pushcommand on your development platform. - Add a Makefile to your project.
- Deploy your code to production.
If you encounter any issues during deployment, the "Troubleshooting" documentation is likely to provide a solution. It can save you time and help you avoid unnecessary frustration.
Configuring your "Stackhero for Python" service
If you have not started a Stackhero for Python service yet, create one in your Stackhero dashboard (it only takes 2 minutes).
Once your Python service is running, you need to configure it by adding your SSH public key. You can find your public key by running:
cat ~/.ssh/id_*.pub
Don't have SSH keys yet?
You can create them using:
ssh-keygen -t ed25519
To configure your Python service:
- Go to the Stackhero dashboard and select your Python service.
- Click the "Configure" button.
- Paste the content of your public key into the "SSH public keys" section.
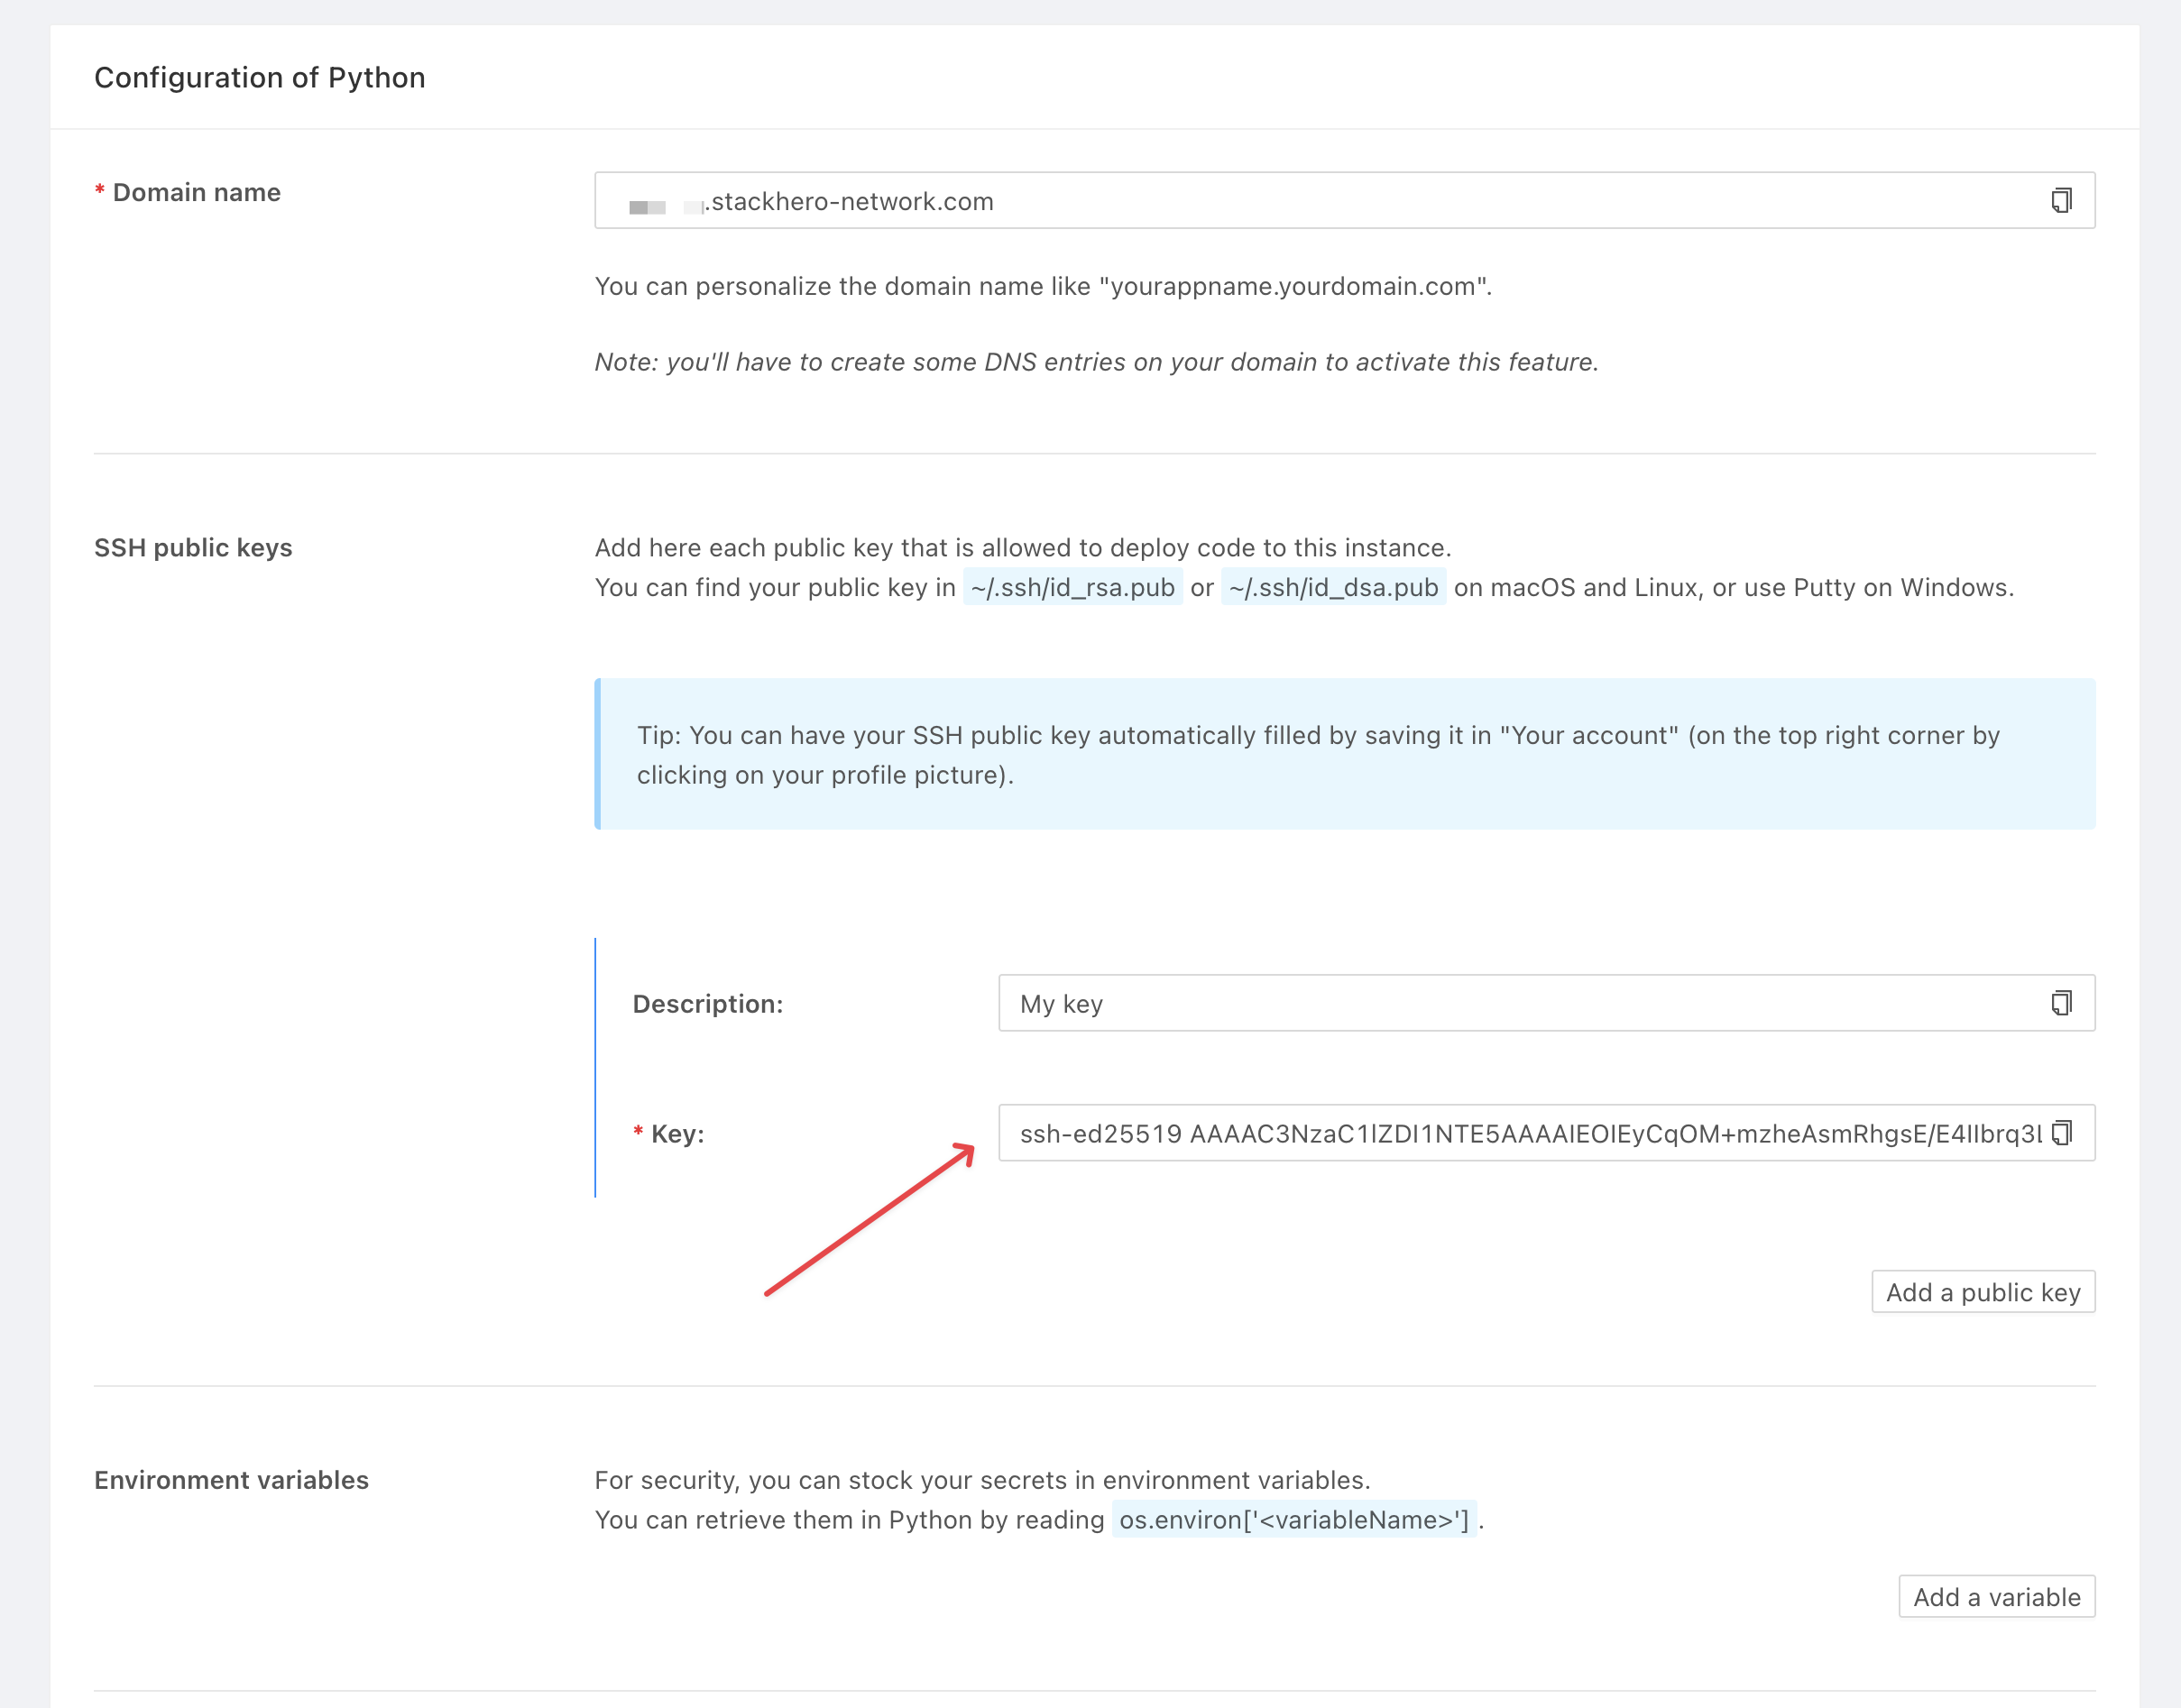 Example of a Python service configuration
Tip: You can set your SSH public key globally so that future services automatically include it in their configuration. To do this, navigate to the Stackhero dashboard, click your profile picture in the top right corner, select "Your profile", and add your SSH public key.
Configuring the git push command for deployment
Deploying to Stackhero uses the Git CLI with the git push command. This method makes deployments simple, fast, and reliable and does not require you to install additional tools.
To enable this feature, copy the value of the git remote command from the main page of your service in the Stackhero dashboard. The command will resemble:
git remote add stackhero ssh://stackhero@<XXXXXX>.stackhero-network.com:222/project.git
 Python Git remote command on Stackhero's dashboard
Creating a Makefile for Stackhero deployment
To deploy your code on Stackhero, you must specify the commands for Stackhero to execute. This is done via a Makefile, which acts as an interface between Stackhero and your application.
If you are unfamiliar with
Makefilefiles and themakecommand, do not worry. Simply follow the instructions provided here.
Create a Makefile at the root of your project and add the following content:
run:
  gunicorn app:app -b 0.0.0.0:8080 --error-logfile -
This Makefile includes three important components:
- The
runrule is mandatory because it is automatically executed by Stackhero. Do not rename it. - The command
gunicorn app:app -b 0.0.0.0:8080 --error-logfile -is an example and should be replaced with the command appropriate for your application. - A tab character must precede the gunicorn command. If you encounter an error stating "*** missing separator", it indicates the tab character is missing.
In this example, a Gunicorn server starts (ensure it is installed and added to your requirements.txt file). The argument -b 0.0.0.0:8080 configures the server to listen on any interface at port 8080. If you change the port, update it in your Python service configuration on the Stackhero dashboard. The app:app part indicates that the server will use the app.py file and the app instance.
Deploying your Python application
Your Python application is now ready for deployment. To deploy your code to Stackhero, run the following command from your project directory:
git push stackhero main
The first time you run this command, you will be prompted to add the SSH key fingerprint. Answer "yes" when prompted. In just a few seconds, your application will be live!
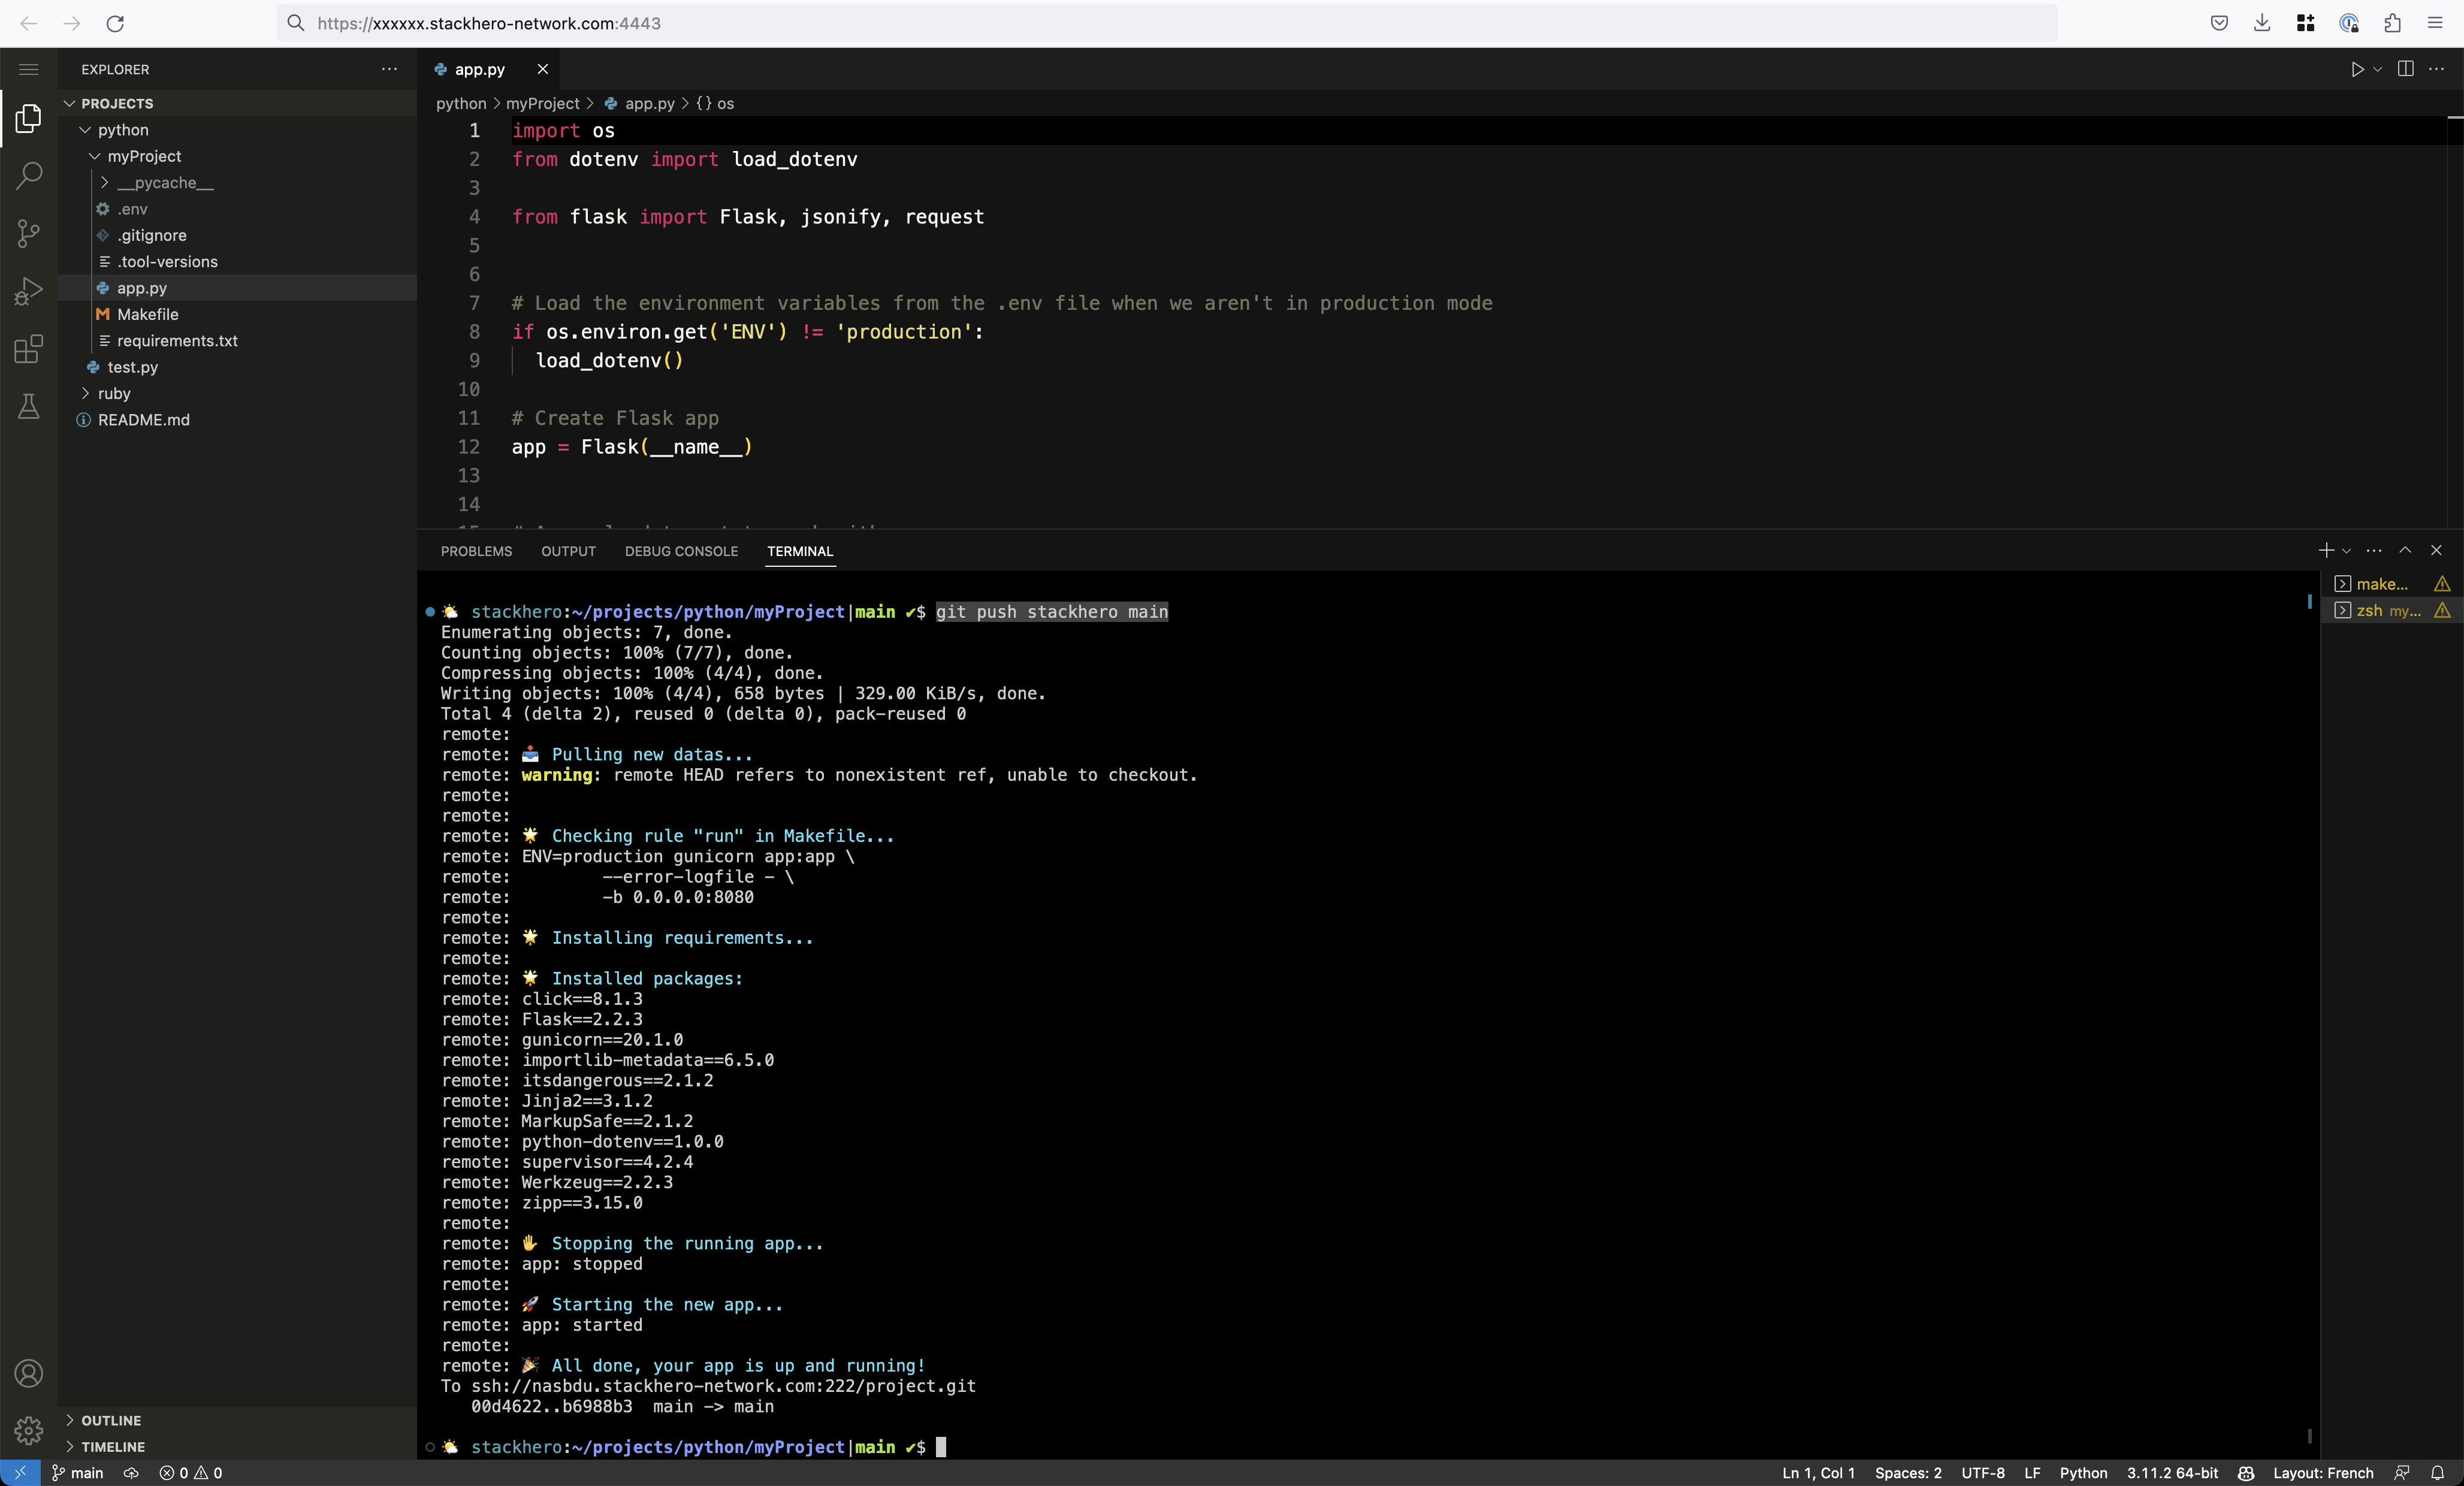 Example of deploying Python code to Stackhero using the git push command
To check your deployed application, navigate to the "website" URL displayed in the Stackhero dashboard (it usually looks like https://XXXXX.stackhero-network.com).
Congratulations, your application is now deployed to production!
Encountering issues during deployment?
Check out the Troubleshooting section for solutions that will help you resolve any problems quickly.
Conclusion
This guide provides a comprehensive yet straightforward overview of deploying Python code to production using Stackhero. It serves as a solid foundation for effectively implementing your applications.
To further expand your knowledge, consider exploring the "Advanced Deployment Usages" documentation. You will learn how to deploy various git branches, specific tags, or commits, as well as manage multiple environments such as "staging" and "production". You will also discover how to work with environment variables and much more.
If you face any problem during the deployment process, the "Troubleshooting" documentation is a valuable resource that can help you resolve issues quickly and efficiently.