 Python: Advanced usages
Going further with your Python deployments
👋 Welcome to the Stackhero documentation!
Stackhero offers a ready-to-use Python cloud solution that provides a host of benefits, including:
- Deploy your application in seconds with a simple
git push.- Use your own domain name and benefit from the automatic configuration of HTTPS certificates for enhanced security.
- Enjoy peace of mind with automatic backups, one-click updates, and straightforward, transparent, and predictable pricing.
- Get optimal performance and robust security thanks to a private and dedicated VM.
Save time and simplify your life: it only takes 5 minutes to try Stackhero's Python cloud hosting solution!
Deploying a branch other than main
Until now, we have used the git push stackhero main command to deploy the main branch to production.
If you need to deploy a different branch, you can use this command where <BRANCH> is the name of the branch you wish to deploy:
git push stackhero <BRANCH>:main
For example, if you want to deploy the production branch, simply run:
git push stackhero production:main
Deploying a tag instead of a branch
You can choose to deploy a tag rather than a branch. To deploy a specific tag, replace <TAG> with your desired tag in the command below:
git push stackhero '<TAG>^{}:main'
For instance, to deploy the tag v1.0.0, you would execute:
git push stackhero 'v1.0.0^{}:main'
The
^{}syntax ensures that you are pushing the tagged commit rather than the tag reference itself.
Deploying a specific commit
In addition to deploying branches or tags, you may also deploy a specific commit by using its hash. Replace <COMMIT_HASH> with the hash of the commit you wish to deploy:
git push -f stackhero <COMMIT_HASH>:main
For example, to deploy the commit with the hash abcde, run:
git push -f stackhero abcde:main
Rolling back to a previous version
If a recent deployment has introduced issues, you can revert to an earlier commit by deploying that commit. First, identify the commit hash by running:
git log
This command displays each commit's date, hash, and description.
For example, the output might look like this:
git log

commit cccc8b3ebdccb9abc1926ef49ee589dae5c5fe06 (HEAD -> main, stackhero/main)
Author: Developer
Date:   Fri Apr 28 09:36:18 +0000

    Break the code

commit bbbb622301772072c3d82f3cc0d91e29e6e84901
Author: Developer
Date:   Wed Apr 26 12:49:28 +0000

    Update the code

commit aaaa1d8b06535b413e0df8298ccf52339dfef3ff
Author: Developer
Date:   Wed Apr 26 12:44:50 +0000

    Improve the code
If the current production deployment is the commit "Break the code" (hash starting with cccc), and you wish to revert to the previous commit "Update the code" (hash starting with bbbb), execute:
git push -f stackhero bbbb622301772072c3d82f3cc0d91e29e6e84901:main
To prevent deploying broken code and increase the stability of your production, it is highly recommended to have a "staging" environment.
Situated between development and production, the staging environment provides a near replica of the production setup. It helps you test your code thoroughly before a live deployment.
Utilizing staging increases your confidence in the functionality and performance of your code, resulting in a more robust production deployment.
This type of environment will be discussed later in the documentation.
Setting up a staging environment
A staging environment is a best practice when used alongside development and production environments. It replicates the production environment so that you can test updates and changes before going live, reducing the risk of issues in production.
A staging environment must closely mirror the production environment.
However, it should use a cloned version of your production database or connected services rather than the live production database.
If your Python service depends on databases or other services, recreate them in a new
<Project> - Stagingstack.
Follow these steps to set up a staging environment with Stackhero:
- On the Stackhero dashboard, rename your existing stack from
<Project>to<Project> - Production. For example, if your project is calledChat Bot, the stack becomesChat Bot - Production. - Create a new stack named
<Project> - Staging. For theChat Botproject, the stack becomesChat Bot - Staging. - Start a Python service within the staging stack.
- Retrieve the
git remotecommand and follow the instructions in the Deploying to staging environment documentation.
This configuration ensures you have a fully functional staging environment for testing updates before production deployment.
Deploying to staging environment
Maintaining separate staging and production environments is highly recommended. To manage multiple environments, start by renaming the current remote repository. For example, rename the remote stackhero to stackhero-production with:
git remote rename stackhero stackhero-production
Next, create a new Python service for your staging environment. Retrieve the git remote add command and modify it by replacing <XXXXXX> with your service's domain:
-
Original command:
git remote add stackhero ssh://stackhero@<XXXXXX>.stackhero-network.com:222/project.git -
Modified command:
git remote add stackhero-staging ssh://stackhero@<XXXXXX>.stackhero-network.com:222/project.git
You can then deploy to either environment using the following commands:
-
Deploy to staging:
git push stackhero-staging main -
Deploy to production:
git push stackhero-production main
To enhance the deployment process, we suggest utilizing the improved Makefile version.
With this improved
Makefile, deploying to production or staging becomes as simple as runningmake deploy-productionormake deploy-staging.
Improved version of Makefile
Below is an improved Makefile that supports multiple rules:
make dev(or simplymake): Start the application in development mode.make deploy: Deploy the application to the remote namedstackhero. This works well when you have a single Stackhero instance.make deploy-production: Deploy the application to the remote namedstackhero-production.make deploy-staging: Deploy the application to the remote namedstackhero-staging.
This
Makefileis designed to handle situations where the code has not changed by avoiding the "Everything up-to-date" error.
Copy and paste the following content as your new Makefile:
# Rule to execute by default when invoking "make" without an argument
.DEFAULT_GOAL := dev


# Stackhero for Python will execute the "run" rule on your instance.
# This is the command to run on both your production and staging environments.
run:
  ENV=production gunicorn app:app \
    --error-logfile - \
    -b 0.0.0.0:8080


# The command to use in the development environment
dev:
  python app.py


# Rule "deploy" to deploy to the instance "stackhero".
# Suitable if you have only one instance.
deploy:
  @$(MAKE) -s deploy-script DEPLOY_REMOTE=stackhero DEPLOY_BRANCH=main


# The "deploy-*" rules deploy to an instance named "stackhero-*".
# For example, running "make deploy-production" deploys to "stackhero-production",
# or "make deploy-staging" deploys to "stackhero-staging".
deploy-%:
  @$(MAKE) -s deploy-script DEPLOY_REMOTE=stackhero-$* DEPLOY_BRANCH=main


# Internal deployment rule. Do not modify it.
deploy-script:
  @echo "Deploying branch \"${DEPLOY_BRANCH}\" to \"${DEPLOY_REMOTE}\"..."
  @echo

  @if [ -n "$$(git status --porcelain)" ]; then \
    echo "Can't deploy because there are uncommitted changes:"; \
    echo "\e[0m"; \
    git status -s; \
    echo ""; \
    echo "\e[0;31m"; \
    echo "You can use this command to commit the changes:"; \
    echo "git add -A . && git commit -m \"Your message\""; \
    echo "\e[0m"; \
    exit 1; \
  fi

  @git push --dry-run ${DEPLOY_REMOTE} ${DEPLOY_BRANCH} 2>&1 | grep -q -F "Everything up-to-date"; \
  EXIT_CODE=$$?; \
  if [ $$EXIT_CODE -eq 0 ]; then \
    echo -n "Nothing new to deploy... Force deploy (this will create a new commit)? (y/N) "; \
    read answer && \
    case $$answer in \
      y|Y|yes|YES) \
      git commit --allow-empty -m "Force update for deploy purpose to \"${DEPLOY_REMOTE}\"" ; \
      ;; \
    *) \
      echo "Nothing to deploy!"; \
      exit 1; \
      ;; \
    esac \
  fi

  git push ${DEPLOY_REMOTE} ${DEPLOY_BRANCH}
Handling secrets (environment variables)
At some point, you will need to store secrets such as tokens and passwords for databases or third-party services. It is important to store these securely. Avoid embedding them directly in your repository or code as this creates a significant security risk.
Using environment variables offers two key benefits:
- Your secrets are never stored in your Git repository, reducing the risk of unauthorised access.
- You can use different credentials for various environments, such as using a production database in production and a development database during development.
Setting up environment variables for development
In a development environment, create a .env file at the root of your project. This file should be excluded from Git to ensure it is never committed.
To automatically read the .env file, you can use the python-dotenv module:
pip install python-dotenv
pip freeze > requirements.txt
Then, create a .env file at the root of your project and add your variables:
ENV="development"
DATABASE_PASSWORD="secretPassword"
THIRD_API_PRIVATE_KEY="secretKey"
# ...
Finally, ensure the .env file is excluded from Git by adding it to your .gitignore:
echo ".env" >> .gitignore
Setting up environment variables for staging and production
The .env file is not secure enough for staging and production environments. Instead, Stackhero allows you to securely store your environment variables directly in your Python service configuration.
You can set these variables in the Stackhero dashboard by selecting your Python service and then clicking on the "Configure" button.
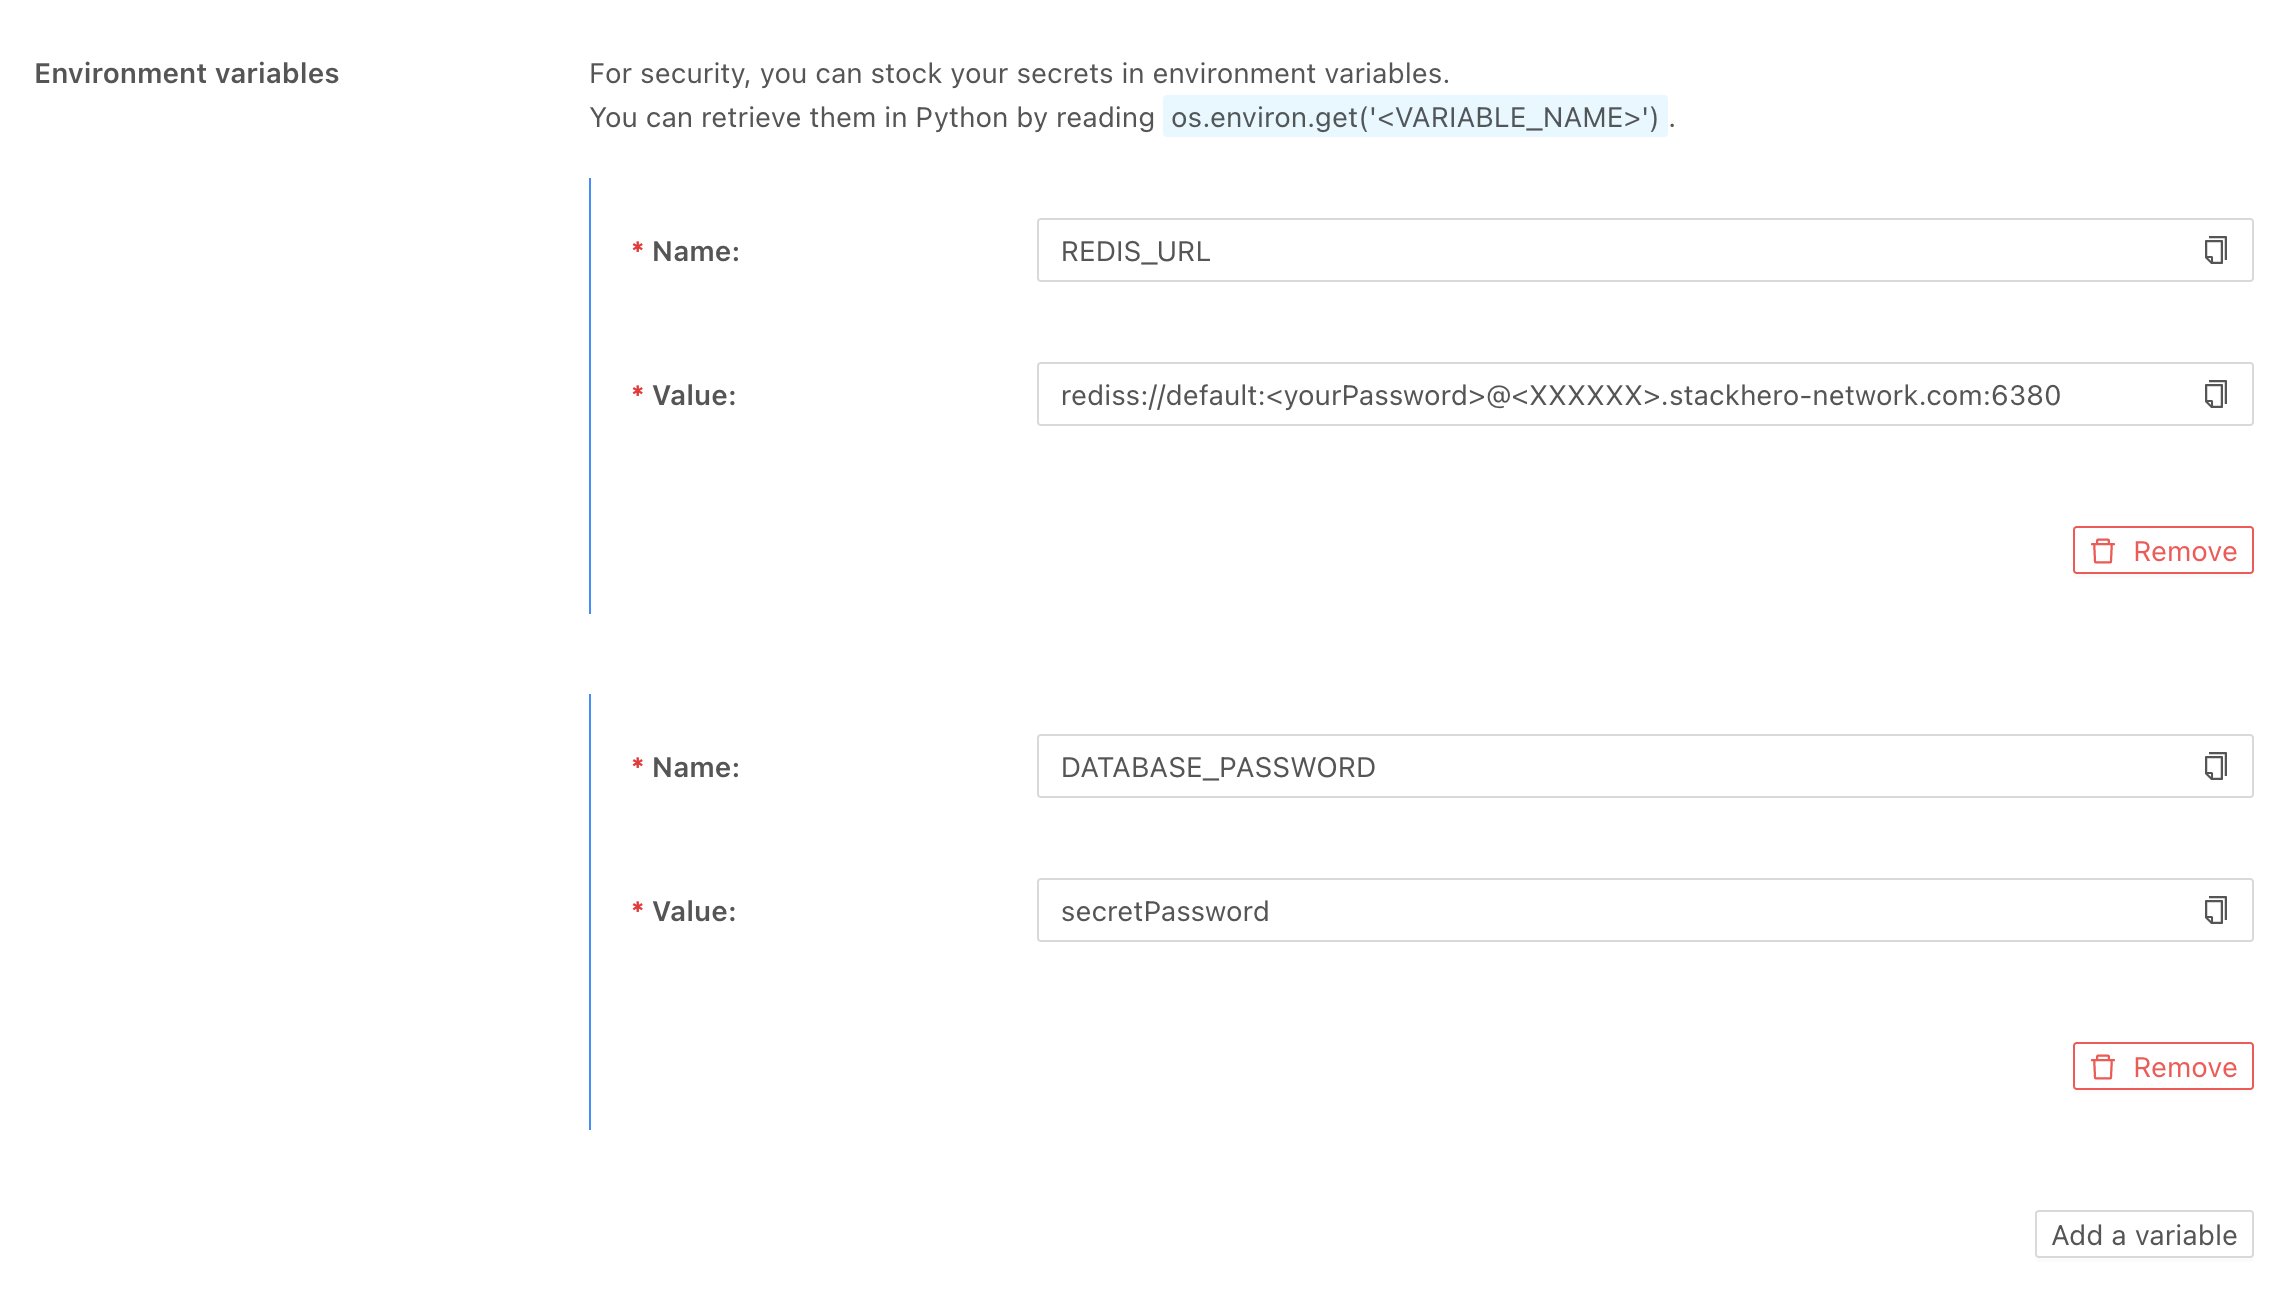 Python environment variables on Stackhero
Accessing environment variables in Python
Accessing environment variables in Python is simple. Just use os.environ.get() as shown below:
import os

print(os.environ.get('ENV'))
For example, connecting to a Redis server using an environment variable can be done like this:
import os
import redis

r = redis.from_url(os.environ.get("REDIS_URL"))
In a development environment, set the REDIS_URL in your .env file as follows:
REDIS_URL="redis://localhost:6379"
For production and staging, define REDIS_URL on the Stackhero dashboard under the Python service configuration:
REDIS_URL="rediss://default:<yourPassword>@<XXXXXX>.stackhero-network.com:6380"
Managing Python packages
It is a best practice to manage Python packages using a requirements.txt file. This file lists all necessary packages and their versions to run your code reliably.
Keeping this file up to date ensures:
- All required packages are installed.
- Only compatible package versions are used.
When deploying to your Stackhero instance, the packages specified in requirements.txt are automatically installed.
To generate or update requirements.txt, run the following command after installing new packages:
pip freeze > requirements.txt
Opening UDP/TCP ports
Most Python applications use HTTP ports 80 (HTTP) and 443 (HTTPS).
If your application needs to open additional ports or uses other protocols (TCP or UDP), you can adjust the "Ports Redirections" setting in your Python service on the Stackhero dashboard.
For each additional port, specify the entry port (public facing), the destination port (used by your Python application), and the protocol (TCP or UDP).
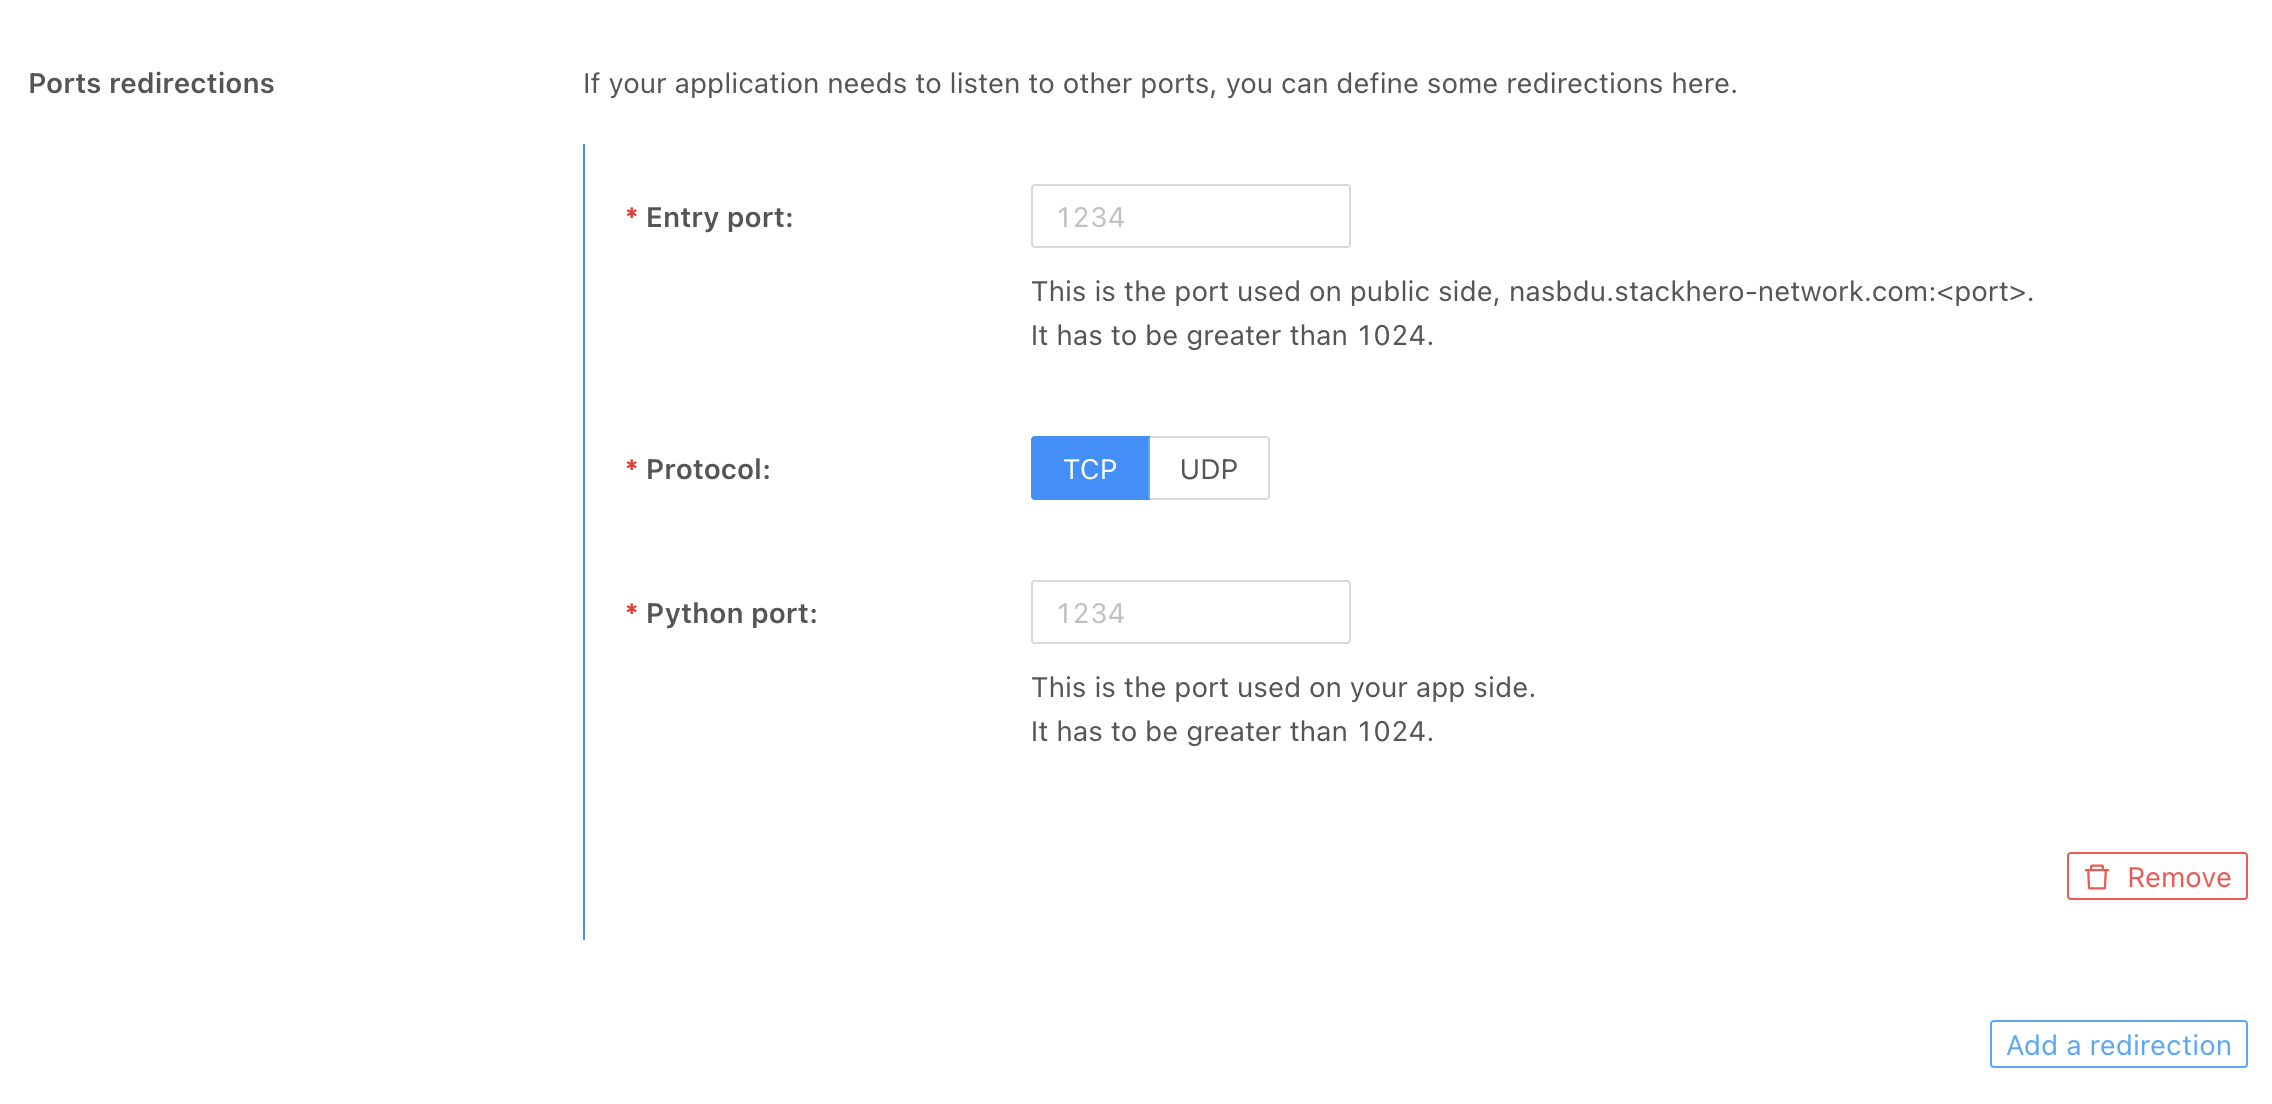 Ports redirections in the Stackhero dashboard
File storage
For storing files such as user photos or documents, it is generally best to use an object storage solution.
Object storage allows you to share files across multiple services or instances and separates your storage from your code, following best practices.
We recommend MinIO, a fast and powerful solution compatible with the Amazon S3 protocol.
If you prefer local file storage, you can use the persistent storage provided with your Python instance located at /persistent/storage/. However, this approach is not recommended in most cases.
WARNING: Never store data outside the
/persistent/storage/folder!Storing data outside this folder can lead to data loss when your instance is rebooted, updated, or when you push new code.
Apple/macOS: save your SSH private key password
On macOS, it may be inconvenient to enter your SSH private key password each time you push your code. While security is paramount, you can securely save your password using Apple's Keychain rather than removing it from your key.
To store the password for a key named id_ed25519, execute:
ssh-add --apple-use-keychain ~/.ssh/id_ed25519
After this, you will not be prompted for your key password, saving time and effort.
If you use an RSA key instead, replace
id_ed25519withid_rsain the command:ssh-add --apple-use-keychain ~/.ssh/id_rsa