 Python: Creating a REST API
How to create a REST API using Flask
👋 Welcome to the Stackhero documentation!
Stackhero offers a ready-to-use Python cloud solution that provides a host of benefits, including:
- Deploy your application in seconds with a simple
git push.- Use your own domain name and benefit from the automatic configuration of HTTPS certificates for enhanced security.
- Enjoy peace of mind with automatic backups, one-click updates, and straightforward, transparent, and predictable pricing.
- Get optimal performance and robust security thanks to a private and dedicated VM.
Save time and simplify your life: it only takes 5 minutes to try Stackhero's Python cloud hosting solution!
This documentation is a beginner-friendly guide on creating a REST API in Python.
In this example, we use Flask, a lightweight and easy-to-use micro-framework that enables you to quickly create web applications.
Prerequisites
Before you begin, ensure your computer is equipped with the following tools:
- Python
- pip
- git
- asdf
If your development environment isn't set up yet, refer to the Development platform guide for detailed instructions. Alternatively, you can use the online Code-Hero platform. Code-Hero provides an online IDE and terminal, with all the essential tools pre-installed, so you can start coding immediately without any installation.
 Python REST API running in Code-Hero, accessible directly from the browser
Creating a new project
The first step is to create a new project directory. For this guide, we'll name it myRestApi:
mkdir myRestApi
cd myRestApi
Next, set the Python version to the latest available using asdf, and initialise the Git repository:
asdf install python latest \
  && asdf local python latest

echo "__pycache__/" >> .gitignore

git init
git add -A .
git commit -m "First commit"
Installing Flask dependency
For this example, we only need one dependency: Flask.
Flask is a lightweight web framework that enables rapid development of web applications. It is designed to be simple and easy to use, allowing developers to build and deploy web services quickly. Built-in support for routing, templating, and handling HTTP requests makes Flask an excellent choice for creating REST APIs.
Install Flask (and python-dotenv) using pip:
pip install Flask python-dotenv
We are installing the
Flaskandpython-dotenvmodules here. You will soon see why we usepython-dotenv(spoiler: it is for managing environment variables).
After installation, freeze the package versions to a requirements.txt file:
pip freeze > requirements.txt
Freezing your dependencies ensures that your production server or colleagues use the same versions as you. Just a few seconds of work can prevent many future headaches.
Implementing the REST API using Flask
Now, let's dive into the code!
Create a file named app.py and insert the following code:
import os
from dotenv import load_dotenv
from flask import Flask, jsonify, request

# Load environment variables from the .env file when not in production
if os.environ.get('ENV') != 'production':
    load_dotenv()

# Create the Flask app
app = Flask(__name__)

# Sample data set
tasks = [
    {
        'id': 1,
        'title': 'Buy groceries',
        'description': 'Milk, Cheese, Pizza, Fruits',
        'done': False
    },
    {
        'id': 2,
        'title': 'Learn Python',
        'description': 'Learn Python programming basics',
        'done': False
    }
]

# Route '/api/tasks' (GET) to list all tasks
@app.route('/api/tasks', methods=['GET'])
def get_tasks():
    return jsonify({'tasks': tasks})

# Route '/api/tasks/<task_id>' (GET) to get a specific task by its ID
@app.route('/api/tasks/<int:task_id>', methods=['GET'])
def get_task(task_id):
    task = [task for task in tasks if task['id'] == task_id]
    if len(task) == 0:
        return jsonify({'error': 'Task not found'}), 404
    return jsonify({'task': task[0]})

# Route '/api/tasks' (POST) to create a new task
@app.route('/api/tasks', methods=['POST'])
def create_task():
    if not request.json or 'title' not in request.json:
        return jsonify({'error': 'Title is required'}), 400
    task = {
        'id': tasks[-1]['id'] + 1,
        'title': request.json['title'],
        'description': request.json.get('description', ""),
        'done': False
    }
    tasks.append(task)
    return jsonify({'task': task}), 201

# Start the API server
if __name__ == '__main__':
    if os.environ.get('ENV') == 'production':
        app.run()
    else:
        app.run(host='0.0.0.0', port=8080, debug=True)
To start the server, run:
python app.py
With the
host='0.0.0.0'option, you can also access your API using your browser when using Code-Hero. Simply navigate tohttp://<XXXXXX>.stackhero-network.com:8080/api/tasks, replacing<XXXXXX>with your Code-Hero domain.
Testing your REST API
Once the server is running, you can interact with it using cURL. Here are some examples:
-
Retrieve all tasks:
curl -s http://localhost:8080/api/tasks { "tasks": [ { "description": "Milk, Cheese, Pizza, Fruits", "done": false, "id": 1, "title": "Buy groceries" }, { "description": "Learn Python programming basics", "done": false, "id": 2, "title": "Learn Python" } ] } -
Retrieve task with ID 2:
curl -s http://localhost:8080/api/tasks/2 { "task": { "description": "Learn Python programming basics", "done": false, "id": 2, "title": "Learn Python" } } -
Create a new task:
curl -s -X POST -H "Content-Type: application/json" \
-d '{"title": "New task", "description": "Created with cURL"}' \
http://localhost:8080/api/tasks
{
  "task": {
    "description": "Created with cURL",
    "done": false,
    "id": 3,
    "title": "New task"
  }
}
Tip: Pipe the output to
jqto beautify the JSON. For example,curl -s http://localhost:8080/api/tasks/2 | jqproduces a more readable result.
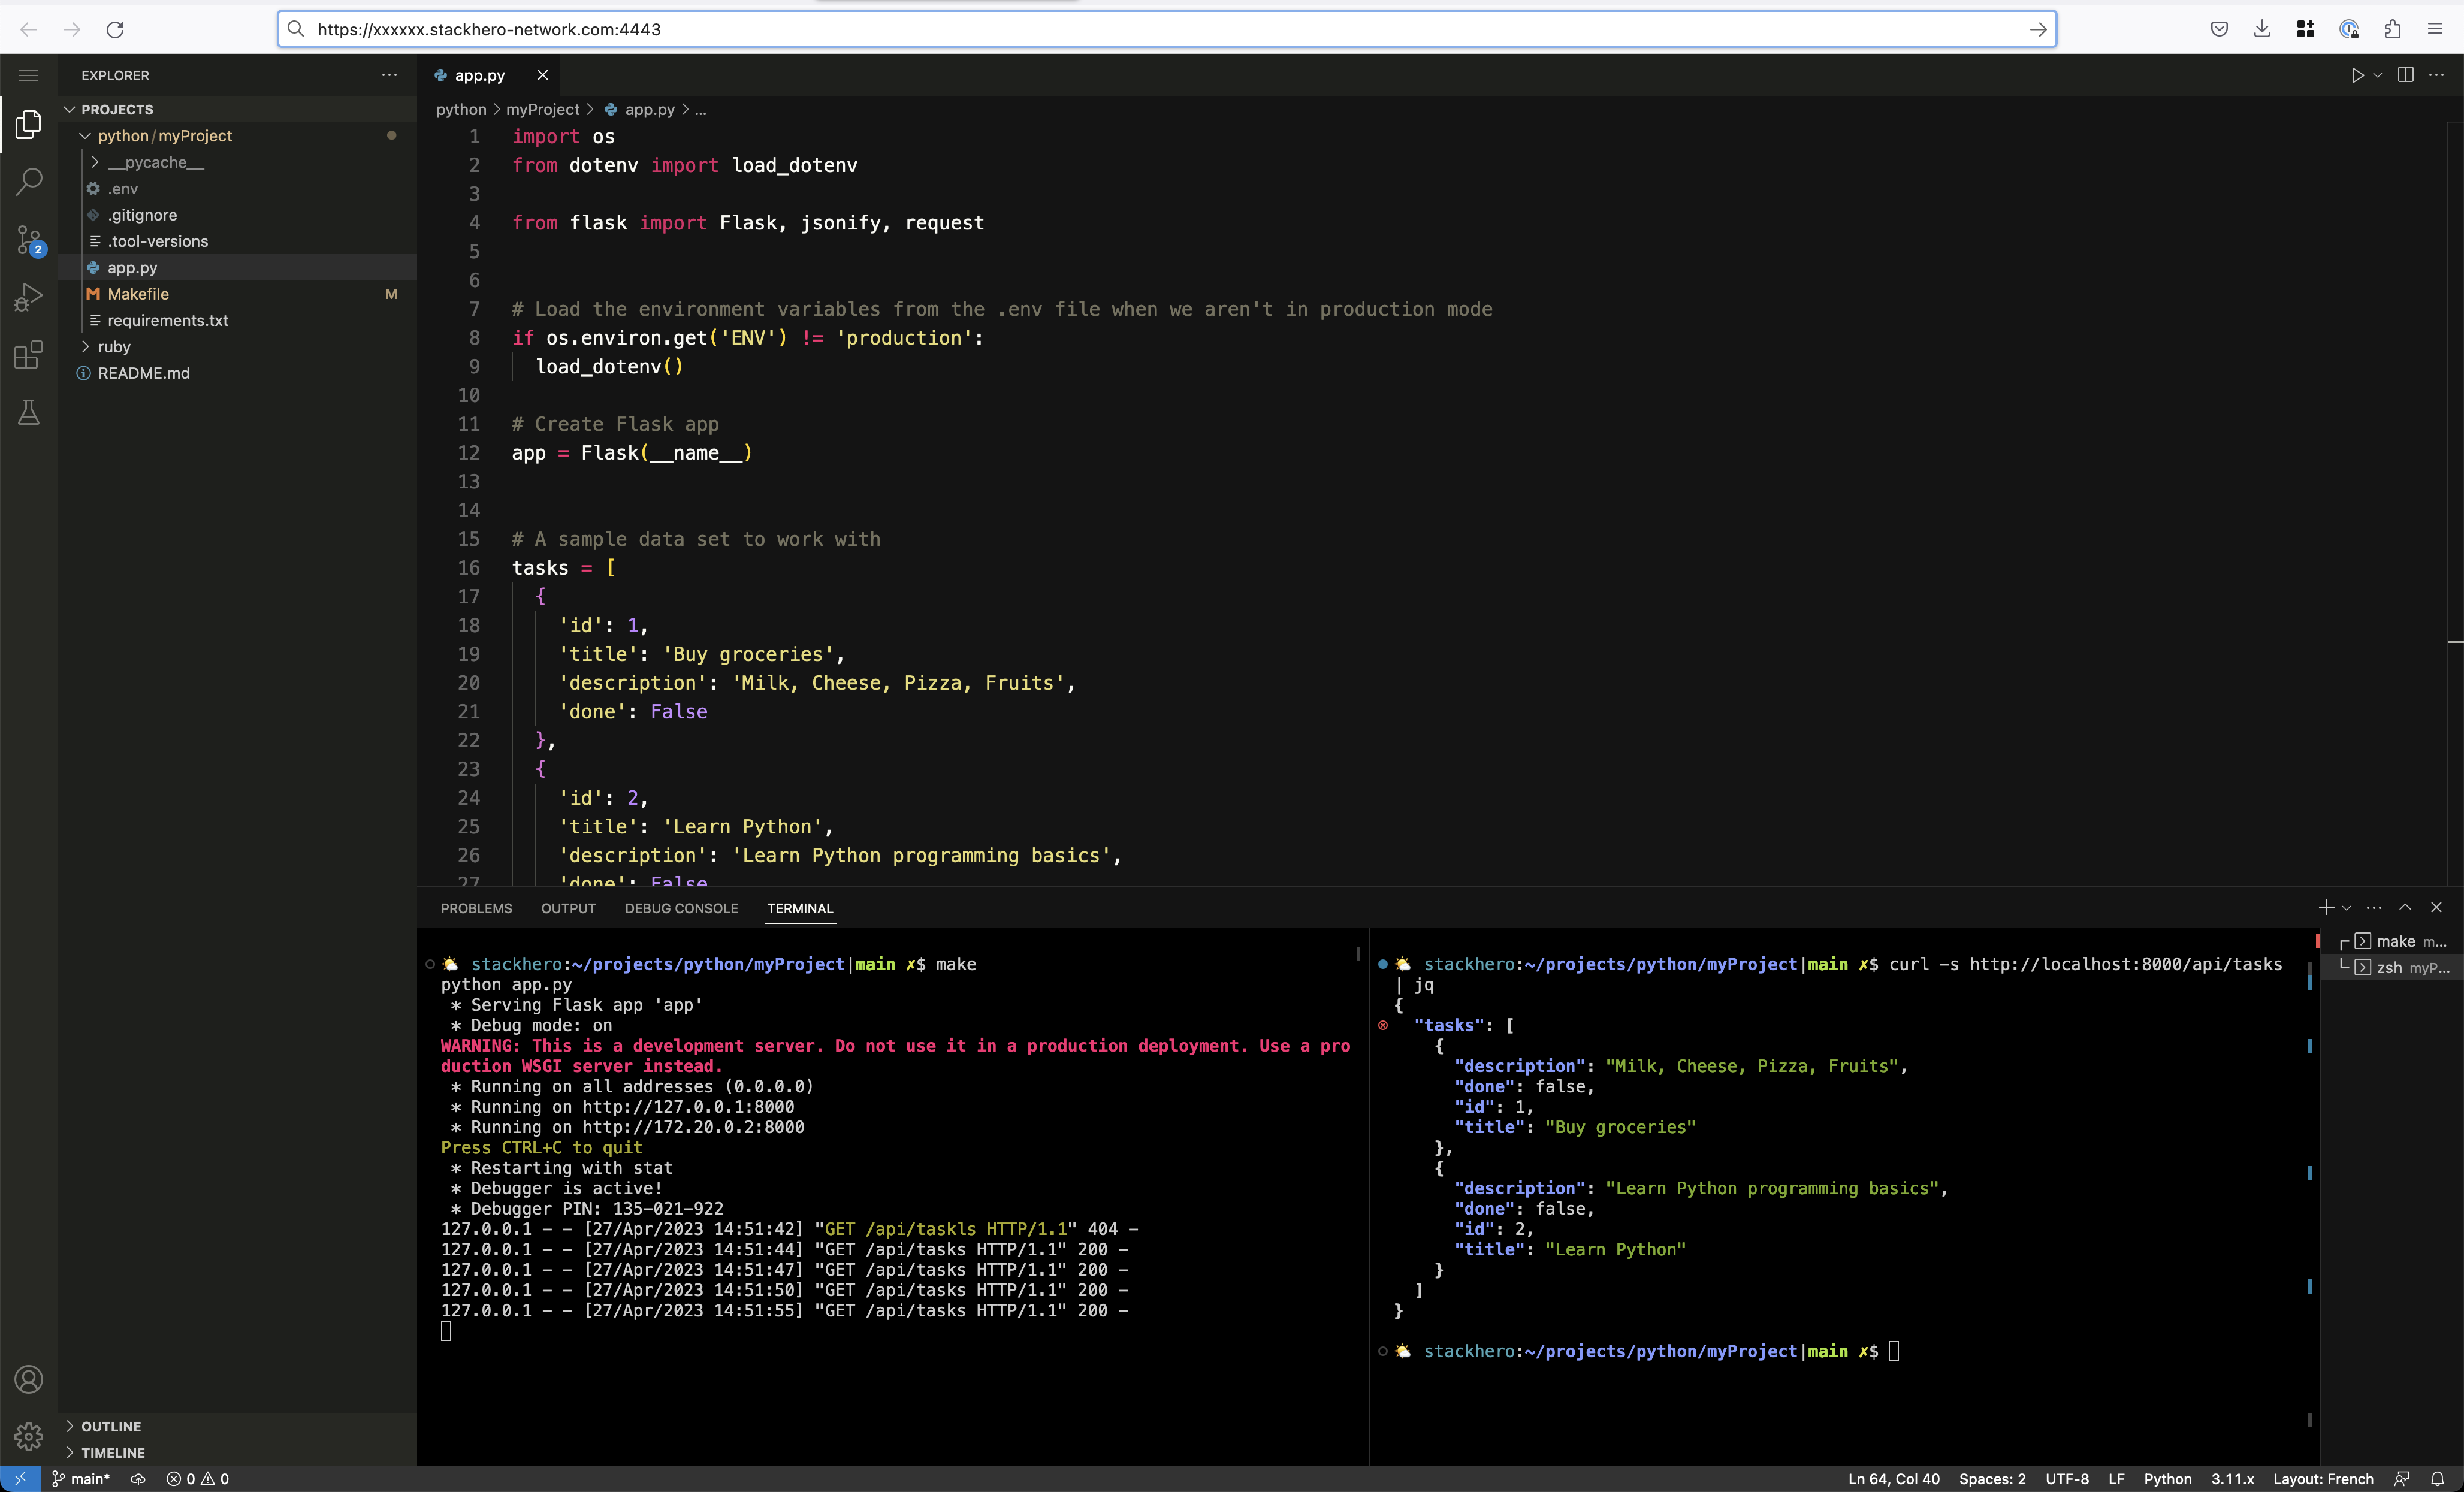
 Example of Python REST API using Flask, running in Stackhero Code-Hero, with the server (1) and the client using cURL (2)
Handling environment variables
Environment variables are vital for protecting sensitive information, such as database credentials or API keys. There are two main benefits to using environment variables:
- Your secrets are not stored in your Git repository, ensuring unauthorised individuals cannot access your sensitive data even if they gain access to your source code.
- You can use different credentials for different environments (for example, production versus development).
To manage environment variables, we use the python-dotenv module. First, install it if you haven't already:
pip install python-dotenv
pip freeze > requirements.txt
Next, create a .env file at the root of your project and add your development environment variables. For example:
ENV="development"
DATABASE_PASSWORD="secretPassword"
THIRD_API_PRIVATE_KEY="secretKey"
Finally, add the .env file to your .gitignore to maintain security:
echo ".env" >> .gitignore
To access these environment variables in Python, simply use os.environ.get():
import os

print(os.environ.get('ENV'))
The
.envfile is used only for the development environment. For staging or production, set the environment variables on the Stackhero dashboard in your Python service configuration.
Preparing Python and Flask for production deployment
While this guide uses Flask's built-in development server, for production it is essential to use a production-ready WSGI server such as Gunicorn. Follow these steps:
-
Install Gunicorn:
pip install gunicorn pip freeze > requirements.txt -
Start your app using Gunicorn with the
app:appargument (where the firstappis the filename and the secondappis the Flask instance):ENV=production gunicorn app:app \ --error-logfile - \ -b 0.0.0.0:8080 -
Create a
Makefileto simplify switching between development and production modes:.DEFAULT_GOAL := dev # By default, Stackhero for Python executes the "run" rule. We override it to run the 'prod' rule. run: prod prod: ENV=production gunicorn app:app \ --error-logfile - \ -b 0.0.0.0:8080 dev: python app.py
You can run your server in development mode using make dev (or simply make), and in production mode using make prod.
Deploying your Python code to production
The simplest way to deploy your Python project is to use the Stackhero Python cloud hosting service. Key features include:
- Deployment with a simple
git push - Customisable domain with automatic TLS certificate management (HTTPS)
- Runs on a private and dedicated VM for maximum security
- Supports HTTP/2, TLS 1.3 (HTTPS), WebSockets, GZIP & Brotli compression, ETag, and TCP/UDP port access
Configuring the "Stackhero for Python" service
To deploy your code to Stackhero, follow these steps:
-
Retrieve your public key using:
cat ~/.ssh/id_*.pub -
In the Stackhero dashboard, go to your "Stackhero for Python" service and click the "Configure" button.
-
Copy the public key from the first step and paste it into the "SSH public keys" or "Key" field.
-
Validate the configuration by clicking the "Validate" button at the bottom of the page.
 "Stackhero for Python" public key configuration
Don't have SSH keys? Create them by running:
ssh-keygen -t ed25519
Finally, configure your repository to deploy to Stackhero. In your project folder, add a Git remote using the command provided in your Stackhero service (replace <XXXXXX> with your service's domain):
git remote add stackhero ssh://stackhero@<XXXXXX>.stackhero-network.com:222/project.git
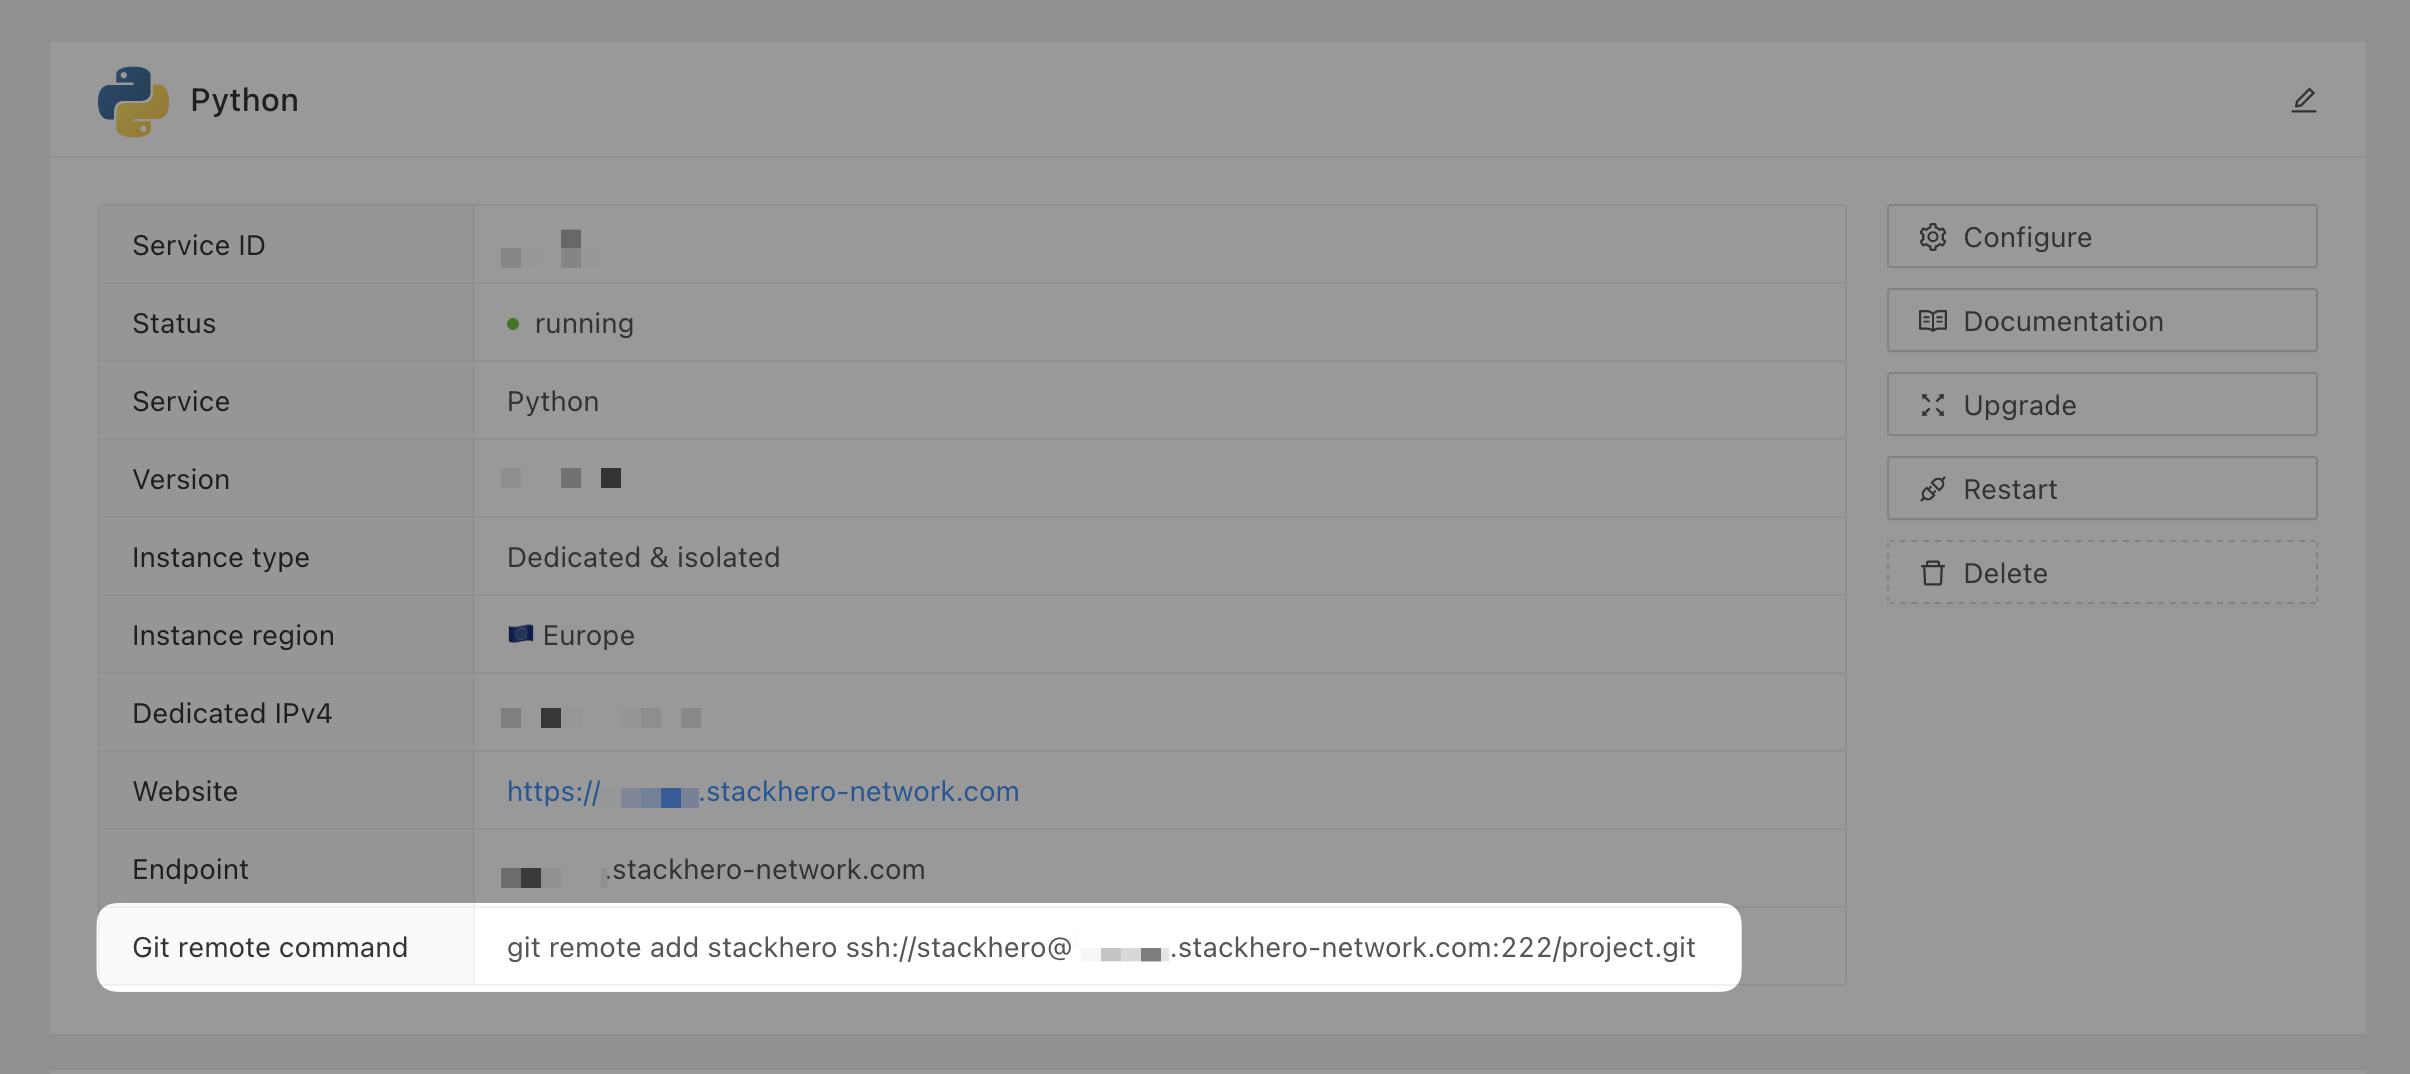 Git remote command
Deploying to production
Once everything is configured, deploy your code to production with a single command:
git push stackhero main
Ensure you add and commit your changes before pushing your code to production. In Stackhero Code-Hero, you can quickly commit changes using the Command Palette (press
Ctrl+Shift+Pon Windows/Linux orCmd+Shift+Pon macOS and typeGit: Commit).
After deployment, visit your API URL at https://<XXXXXX>.stackhero-network.com/api/tasks (replace <XXXXXX> with your service's domain) to see your Flask API in action.
Conclusion
By following this guide, you now understand how to create a REST API using Flask. With this knowledge, you can confidently develop and expand your RESTful applications, integrating them with various front-end and back-end services.