 Mosquitto: API authentication
How to authenticate thousands of devices using an external API
👋 Welcome to the Stackhero documentation!
Stackhero offers a ready-to-use Mosquitto MQTT cloud solution that provides a host of benefits, including:
- Unlimited message exchanges and transfers.
- Unlimited devices authentication via an external API.
- Advanced ACLs on topics, users and actions.
- Customisable domain name secured with HTTPS (for example, https://mqtt.your-company.com).
- Effortless updates with just a click.
- Optimal performance and robust security powered by a private and dedicated VM.
Save time and simplify your life: it only takes 5 minutes to try Stackhero's Mosquitto MQTT cloud hosting solution!
When it comes to device authentication, you have two main approaches. You can either use a simple method or delegate authentication to an external API.
The simplest method works well if you have fewer than 20 devices and do not require advanced ACL controls. In this case, you can create an individual login and password for each device in your service configuration on the Stackhero dashboard.
Alternatively, you can delegate authentication to an external API. This approach offers dynamic credential management and allows you to implement robust ACLs. ACLs (Access Control Lists) let you define precise permissions for publishing or subscribing to specific topics for each user.
How MQTT API authentication works
Using external API authentication is particularly useful when you have more than 20 IoT devices or when you need detailed topic ACL management.
When a device connects to MQTT, Mosquitto sends an HTTP POST request to your API. The request includes a JSON payload containing the device's username and password. If your API returns an HTTP status code 200, the device is authorised. Any status code other than 200 (such as 401) results in the device being denied access.
During ACL validation, four parameters are transmitted: username, clientid, topic, and acc. Your API should verify that the username is allowed to perform the operation defined by acc on the topic. The acc parameter is defined as follows:
- read access (1)
- write access (2)
- read and write access (3)
- subscribe access (4)
For example, if the user userA attempts to subscribe to the topic sensors/temperatures, your API will receive the following JSON:
{
  "username": "userA",
  "clientid": "userA",
  "topic": "sensors/temperatures",
  "acc": 4
}
When you use user authentication via an API, you can still define users manually in the Stackhero dashboard. In that case, the manually defined users will be given priority.
MQTT API authentication in Node.js
To demonstrate how external API authentication works in practice, we have created an example API server using Node.js. You can explore the complete repository here: https://github.com/stackhero-io/mosquittoGettingStarted.
MQTT API authentication with Node-RED
Stackhero for Node-RED includes a Mosquitto server. Nevertheless, for advanced usage, having a standalone Mosquitto service is recommended. This example shows how to use the API authentication system with a standalone Mosquitto service and a Node-RED service. If you use the Mosquitto service included with your Node-RED, this guide does not apply to you.
Stackhero for Node-RED provides an example of an MQTT API connection in the flow named "MQTT authentication." This flow is also used with the integrated Mosquitto server in Stackhero for Node-RED.
Configuring Mosquitto to use Node-RED as authentication API
To use Node-RED as your API authentication endpoint, update your Mosquitto configuration as follows:
- Enable the
API authenticationoption. - Set the
Hostfield to your Node-RED domain. - Choose
HTTPSas theProtocoland enter443for thePort. - Specify the
User routeas/mqttAuthentication/userGet. - Specify the
ACLs routeas/mqttAuthentication/aclCheck.
For debugging, you might set the "Authentication cache time" to 1 second. Once your setup is operating smoothly, the recommended value is 30 seconds.
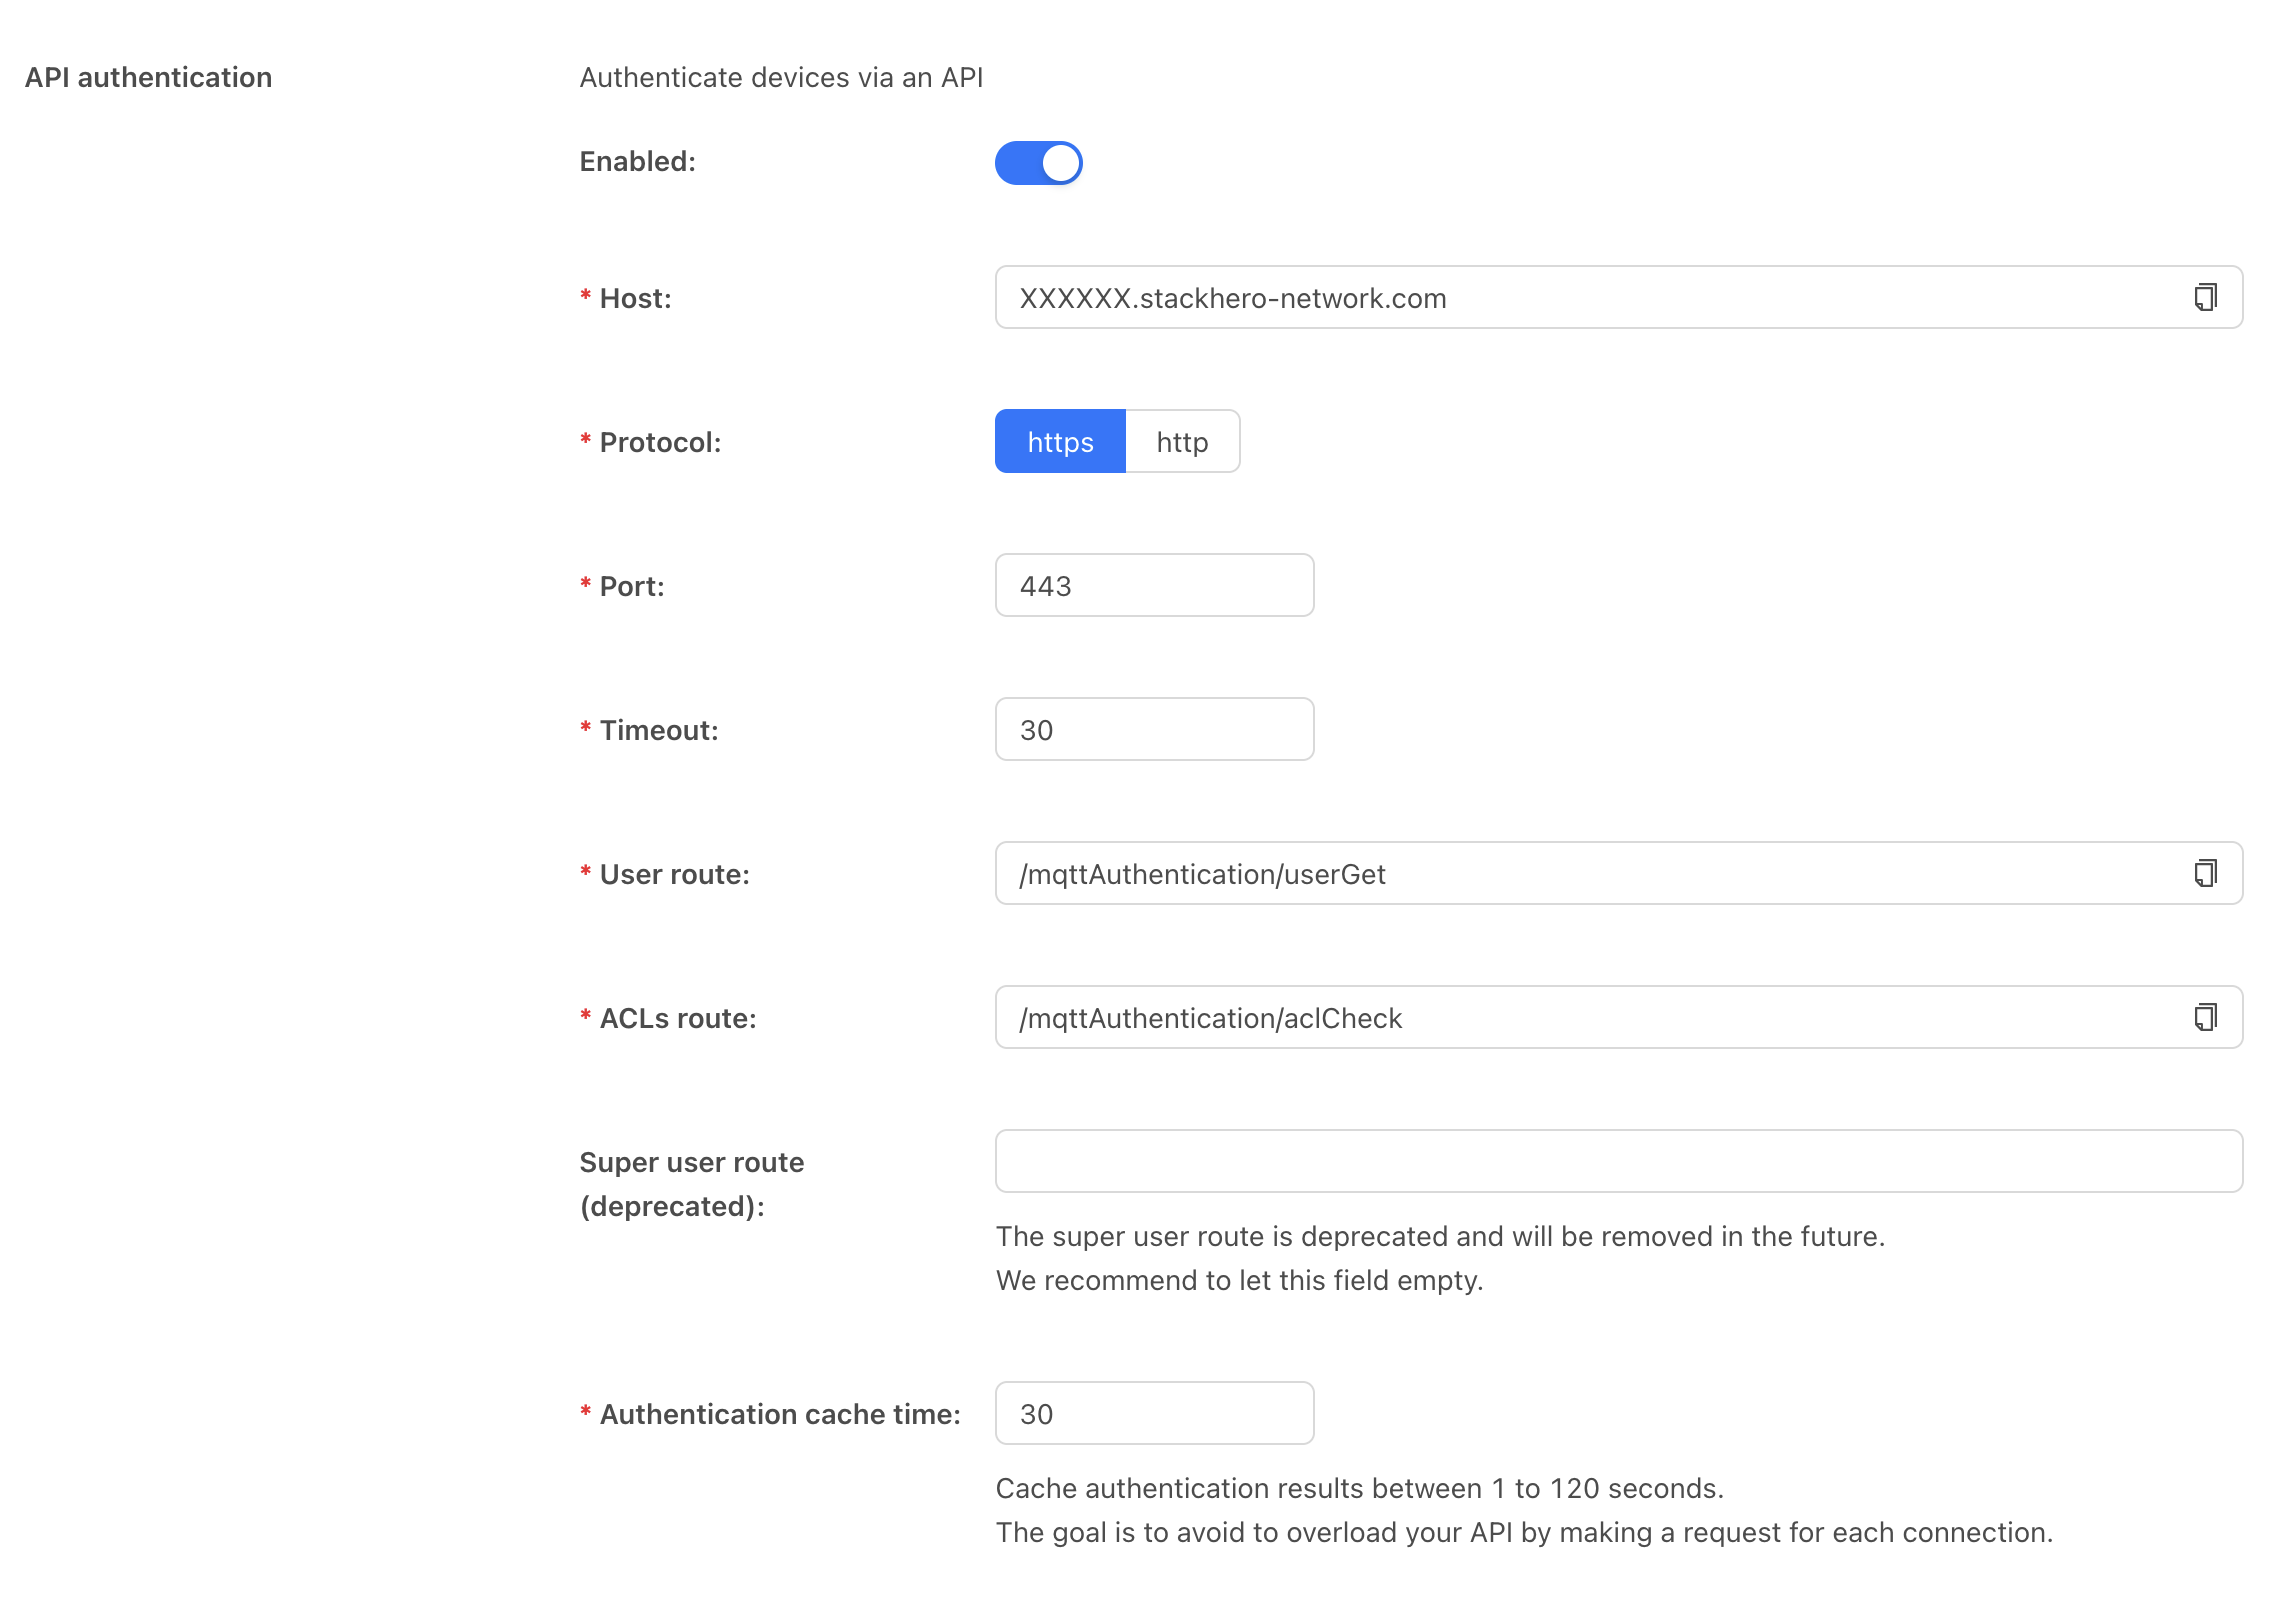 Mosquitto configuration example
Configuring Node-RED as an MQTT authentication API
After updating the Mosquitto configuration, launch Node-RED and open the MQTT authentication flow. Edit the Users node to configure your user credentials. The provided examples include several username and password combinations. Feel free to add as many users as necessary.
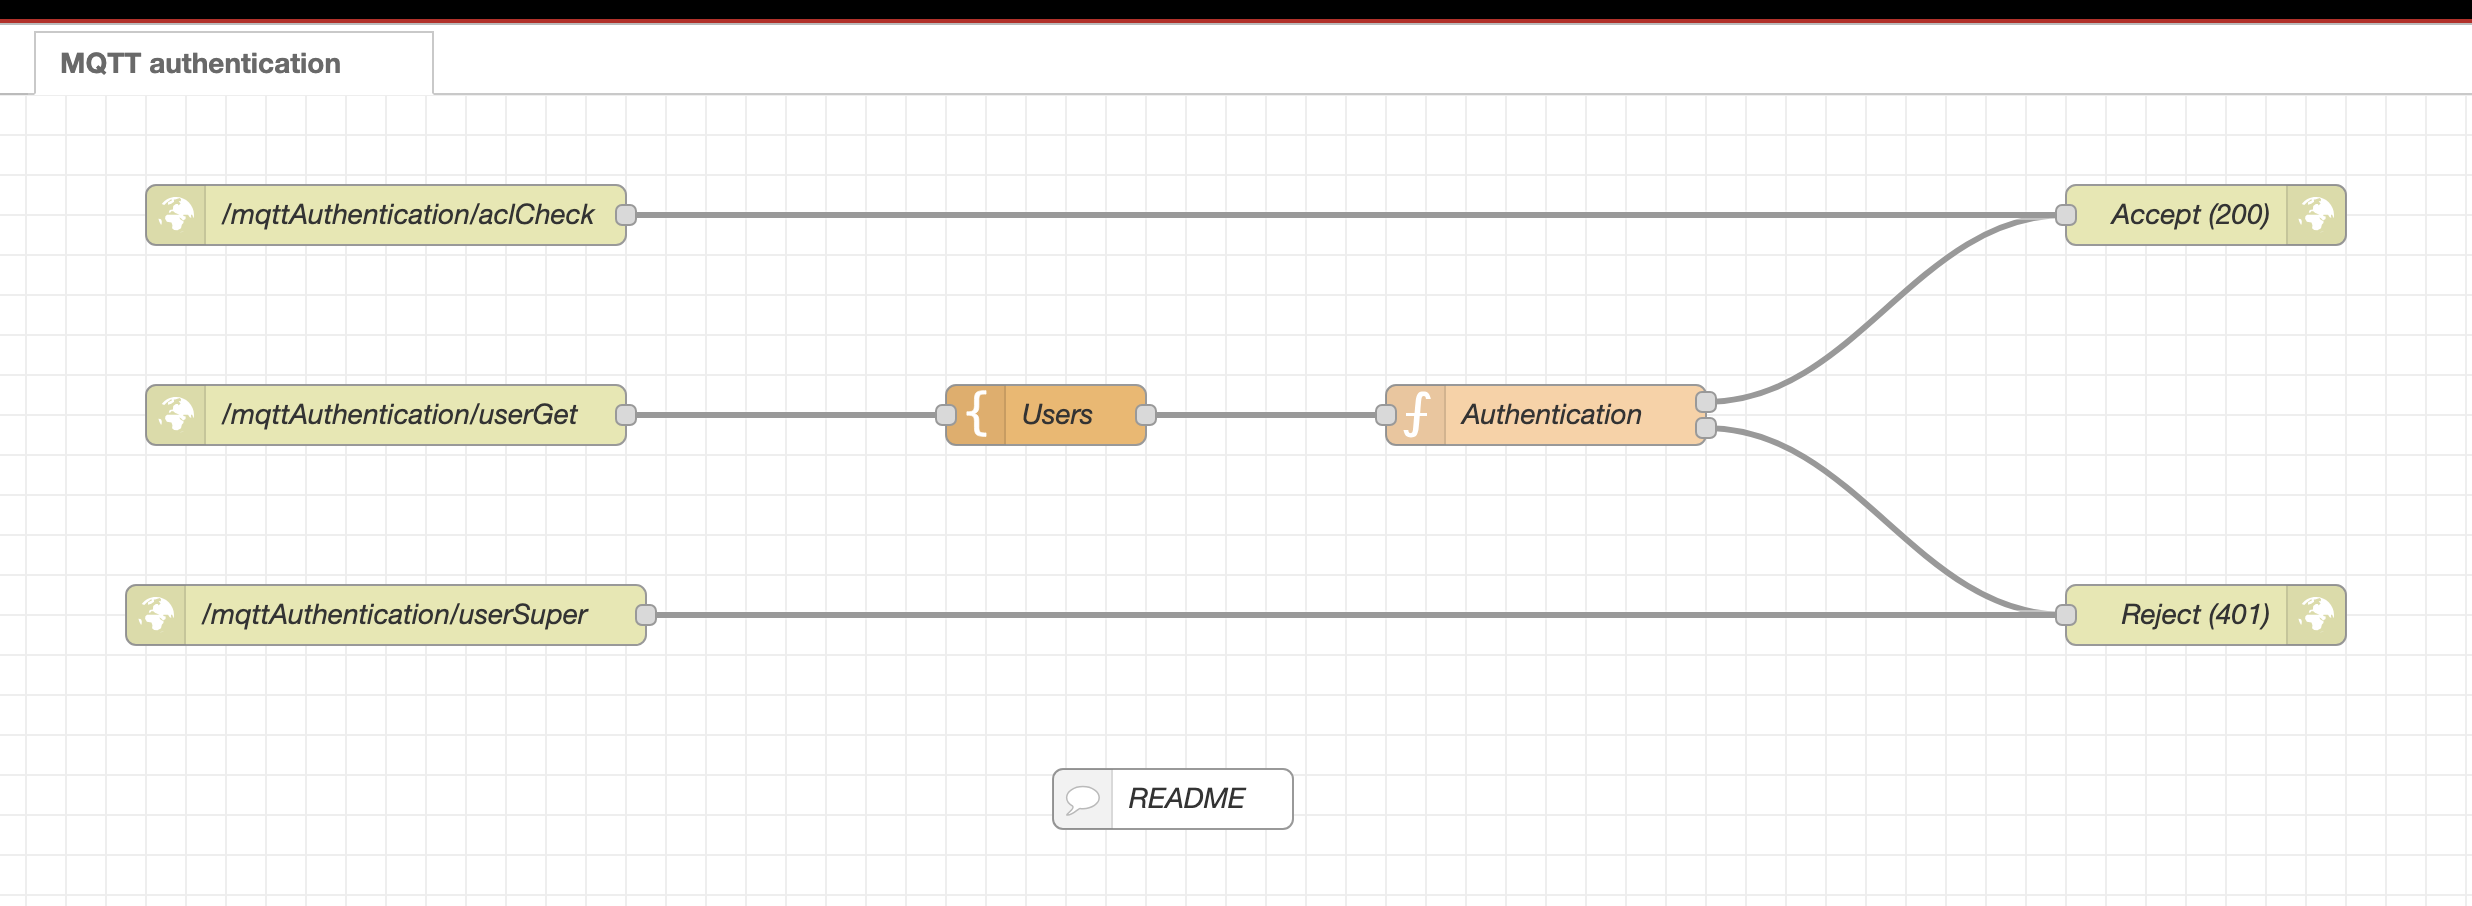 Node-RED MQTT authentication flow