 Ruby: Getting Started
Getting Started with Ruby on Rails
👋 Welcome to the Stackhero documentation!
Stackhero offers a ready-to-use Ruby cloud solution that provides a host of benefits, including:
- Deploy your application in seconds with a simple
git push.- Use your own domain name and benefit from the automatic configuration of HTTPS certificates for enhanced security.
- Enjoy peace of mind with automatic backups, one-click updates, and straightforward, transparent, and predictable pricing.
- Get optimal performance and robust security thanks to a private and dedicated VM.
Save time and simplify your life: it only takes 5 minutes to try Stackhero's Ruby cloud hosting solution!
Welcome to the getting started guide for Ruby on Rails. In this guide, you are introduced to one of the most popular web application frameworks designed to simplify and accelerate your development process.
Ruby on Rails (often simply called Rails) is a server-side web application framework built with Ruby. It follows the model-view-controller (MVC) architectural pattern and embraces the Convention over Configuration (CoC) and Don't Repeat Yourself (DRY) principles. These features make Rails a powerful, efficient, and flexible option for web development.
Below, we walk you through the essential steps to launch a new Ruby on Rails project. You will learn how to install Ruby and Rails, set up your first project, and even build a simple "Hello World" application. Additional guidance is provided for different development environments, including using the online platform Stackhero Code-Hero.
Understanding the difference between Ruby and Rails
Ruby is a dynamic, open-source programming language similar to PHP, JavaScript, or Python. It emphasizes simplicity and productivity with elegant syntax that is easy to read and write.
Rails is a robust server-side web application framework that runs on Ruby. It provides a structured, standardized approach to building web applications by offering tools and libraries to simplify common development tasks.
Many developers choose Ruby on Rails over using Ruby alone because its comprehensive framework streamlines development and enhances productivity.
Setting up a Ruby project
Starting a new Ruby project is straightforward. Follow these steps to get going:
-
First, make sure you have the latest version of Ruby installed on your system. You can verify this by executing the following command in your terminal:
asdf install ruby latest \
  && asdf global ruby latest
If you have not installed
asdfyet, you will need to do so before proceeding. Please refer to the official asdf documentation for detailed installation instructions.Alternatively, you can use Stackhero Code-Hero, an online development solution where all necessary tools are pre-installed. This platform allows you to start coding immediately without manual installation.
-
Next, install Rails. Rails is distributed as a RubyGem which makes installation straightforward:
gem install rails -
Then, create a new Rails application named
my_appand specify the Ruby version using these commands:rails new my_app cd my_app asdf local ruby latest -
To launch the Rails server, run the following command:
bin/rails server Ruby on Rails welcome screen
These steps create a new Ruby project while setting the appropriate Ruby version. This lays a solid foundation for your application development.
Important: When executing the
rails newcommand, a local Git repository is automatically created for your Ruby project. However, it is not yet linked to a remote version control service.For proper version control and data safety, you are encouraged to connect your project to a hosting service such as GitLab, GitHub, or Bitbucket.
If you need a repository hosting service, Stackhero offers a GitLab cloud service that can be set up in just 2 minutes.
Special case with Stackhero Code-Hero
When using an online development solution like Stackhero Code-Hero, you need to adjust your config/environments/development.rb file. Add the following configuration near the final end keyword. Replace <XXXXXX>.stackhero-network.com with your actual server hostname:
config.hosts << "<XXXXXX>.stackhero-network.com"
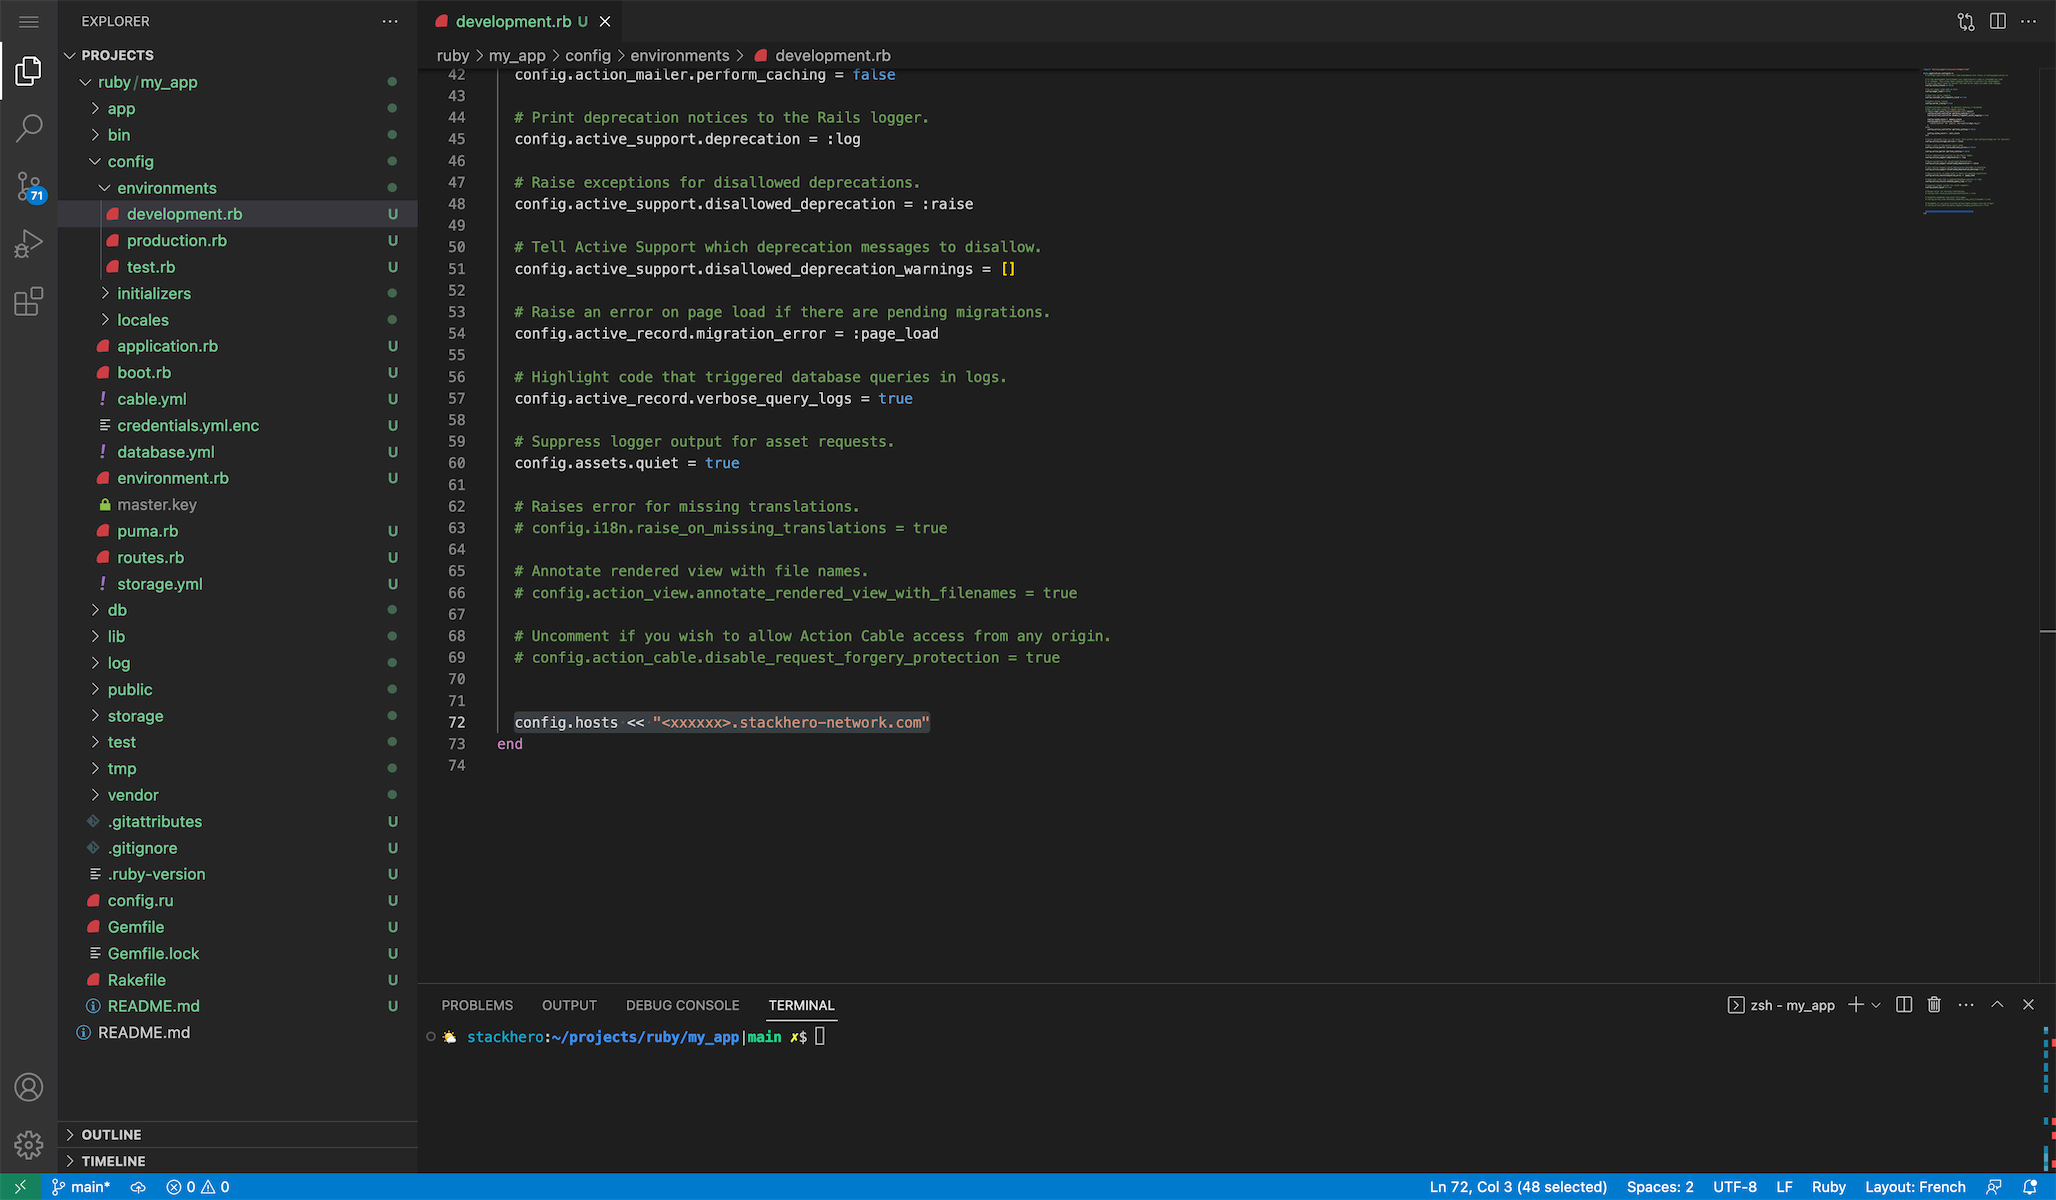 Hosts configurations example
Finally, start the Rails server with this command:
bin/rails server -b 0.0.0.0
This command ensures that the Rails server is accessible from any IP address, which is especially useful when working remotely via Stackhero Code-Hero.
Crafting your first "hello world" application with Ruby on Rails
Let's walk through the process of creating a simple "Hello World" application using Ruby on Rails.
-
First, set up a new route for your application. Open the
config/routes.rbfile and define a root route that points to thehello#indexaction:Rails.application.routes.draw do root "hello#index" end -
Next, generate the
Hellocontroller to manage the logic for this route. Run the following command in your terminal:bin/rails generate controller Hello index --skip-routesWith this configuration, any request made to the URL path
/will be handled by theHelloController. -
To display the "Hello World" message, create a view. Open the file at
app/views/hello/index.html.erband replace any existing content with the following code:<h1>Hello World!</h1> -
Finally, start the Rails server by running the command below in your terminal. Then, connect to your development URL (for example,
http://<XXXXXX>.stackhero-network.com:3000) to view your application:bin/rails server -b 0.0.0.0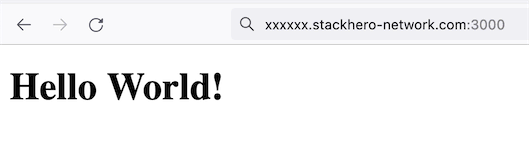 First "Hello World" page in Ruby on Rails
Congratulations. You have just created your first Ruby on Rails application!
Managing environment variables
Environment variables are essential for safeguarding sensitive data such as API keys and database passwords.
The dotenv-rails gem offers a convenient way to manage environment variables in your development environment. Here are the steps:
-
Add the gem to your Gemfile in the appropriate groups:
# Gemfile gem 'dotenv-rails', groups: [:development, :test] -
Install the gem by running:
bundle install -
Create a
.envfile at the root of your project and define your environment variables. For example:RAILS_ENV=development -
To protect your sensitive data, ensure that the
.envfile is excluded from your Git repository. Add the following line to your.gitignore:echo '.env*' >> .gitignore
After completing these steps, restart your Rails server. The environment variables defined in the .env file will now be automatically accessible in your application.
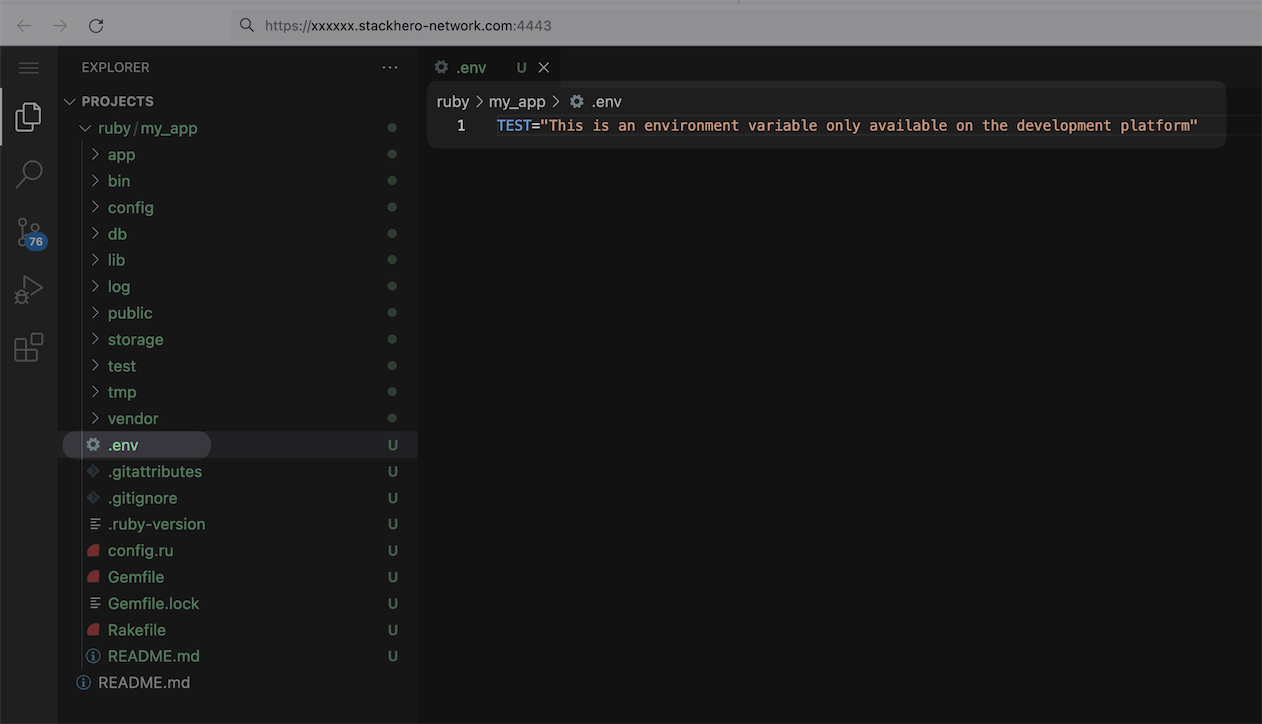 Environment variables for your development platform