 Node.js: Deploy with GitHub actions
Learn how to deploy your Node.js code using GitHub Actions
👋 Welcome to the Stackhero documentation!
Stackhero offers a ready-to-use Node.js cloud solution that provides a host of benefits, including:
- Deploy your application in seconds with a simple
git push.- Use your own domain name and benefit from the automatic configuration of HTTPS certificates for enhanced security.
- Enjoy peace of mind with automatic backups, one-click updates, and straightforward, transparent, and predictable pricing.
- Get optimal performance and robust security thanks to a private and dedicated VM.
Save time and simplify your life: it only takes 5 minutes to try Stackhero's Node.js cloud hosting solution!
GitHub Actions lets you automate tasks like deploying your Node.js code to production servers. In this guide, we will walk you through securely and reliably deploying your Node.js application to both staging and production environments using GitHub Actions.
We recommend maintaining two branches: staging and production. When code is pushed to these branches, it automatically deploys to the corresponding Stackhero service.
Having a staging instance is not mandatory. You can follow this guide with just a production instance. However, to ensure smooth deployments and build confidence before going live, it is highly recommended that you maintain both staging and production environments. This approach is an industry standard that can help prevent common deployment issues.
Before you begin, ensure you have a GitHub account with a repository hosting your code.
Creating the Node.js services
First, sign in to your Stackhero dashboard and create two Stackhero services: one for staging and one for production. For clarity, you may name these services "Staging" and "Production".
Don't have a Stackhero account yet? You can create one in just two minutes for free and set up your Node.js cloud services in only a few clicks.
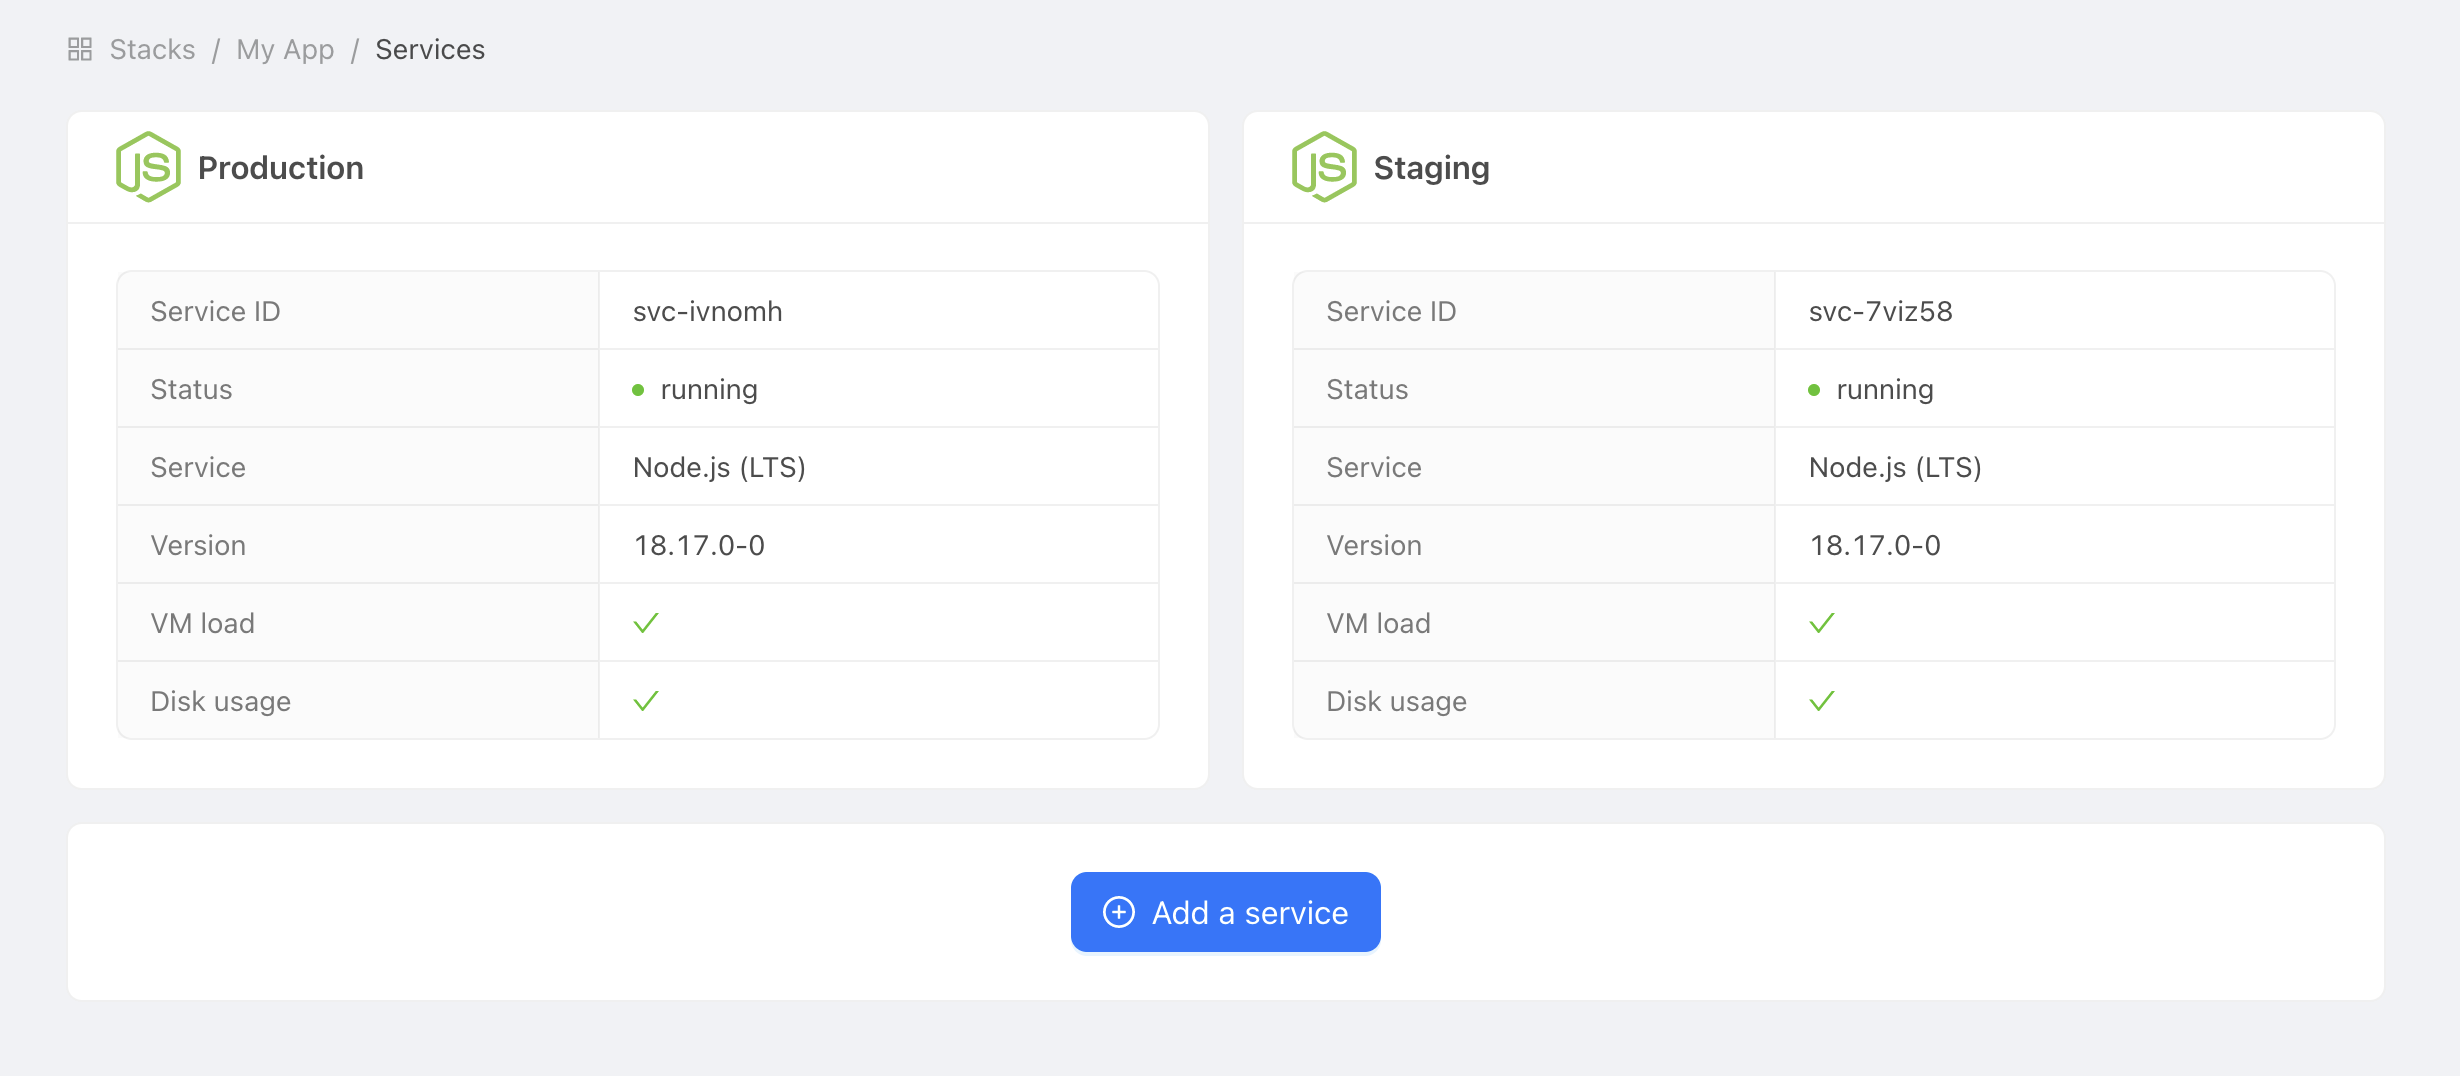 Example of Node.js services
Configure SSH keys
SSH keys enable GitHub Actions to securely connect to your Node.js service when deploying your code. This step is essential for protecting your Stackhero services.
On your computer, generate new SSH keys with this command:
ssh-keygen -C "" -f /tmp/ssh_key -N ""
Set the public key
Retrieve the public key you just generated by running:
cat /tmp/ssh_key.pub
Then, in the Stackhero dashboard, select your production Node.js service and click the Configure button.
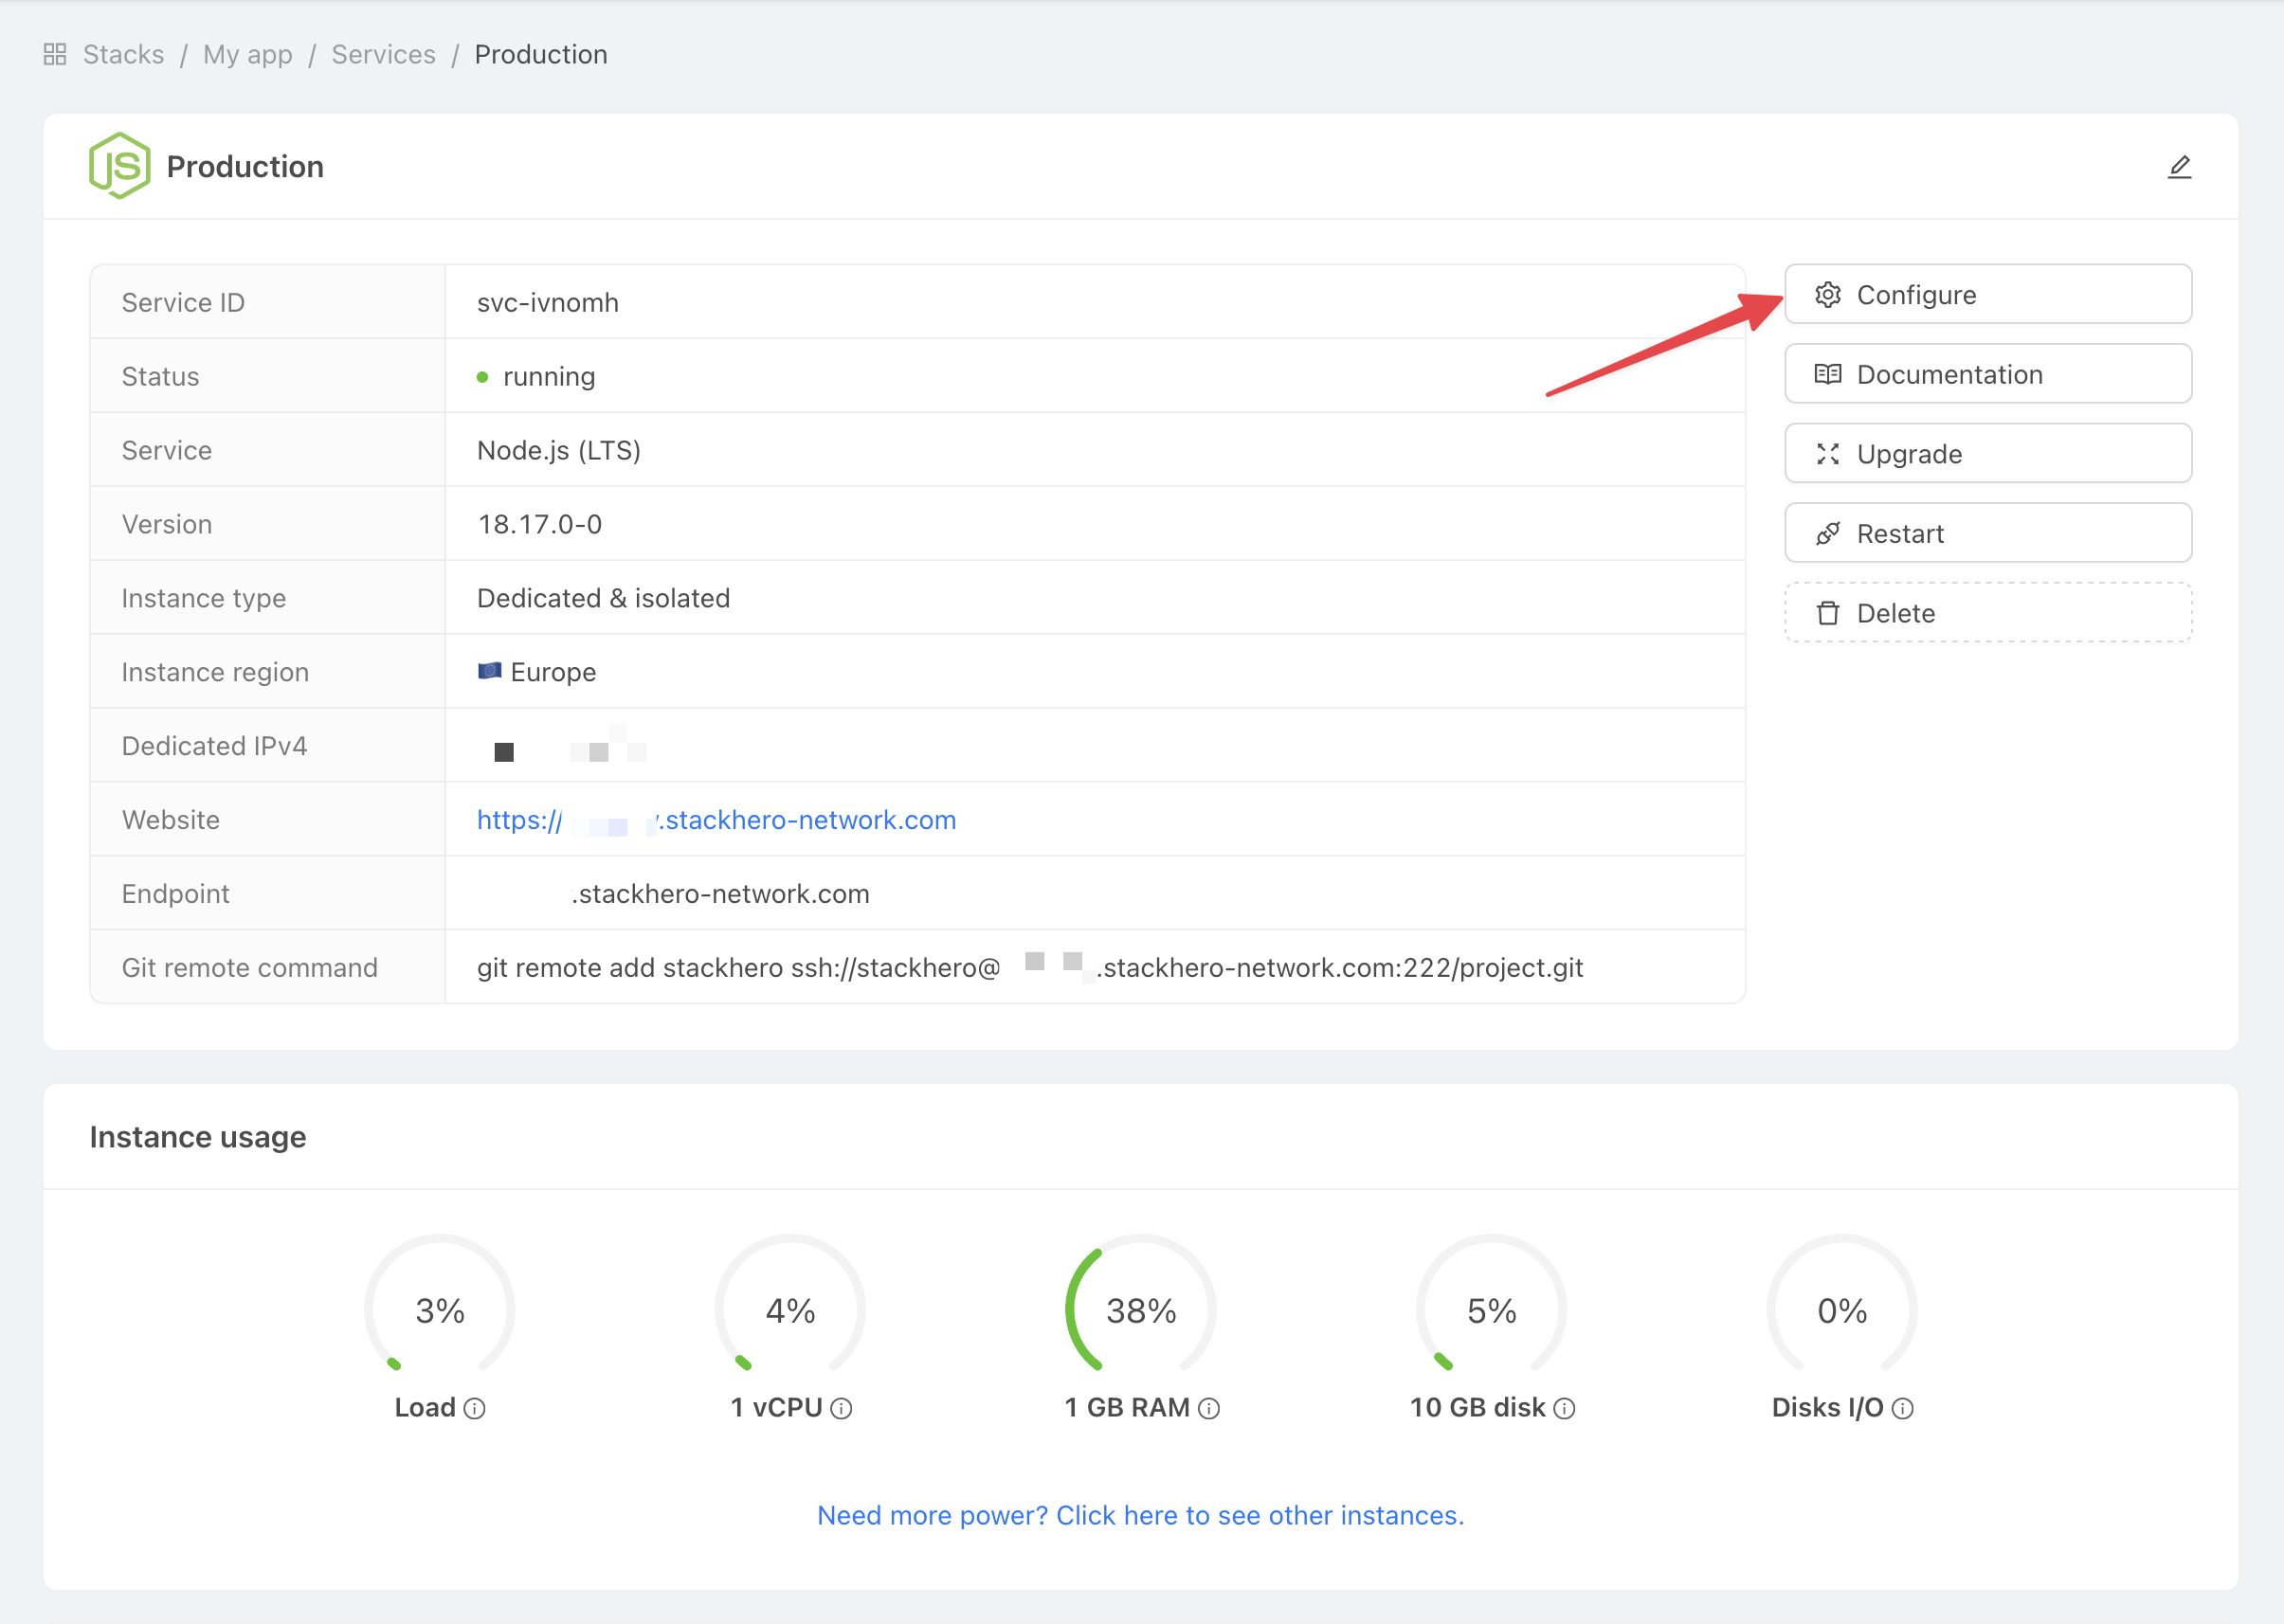 Get service settings
Next:
- In SSH public keys, click on Add a public key.
- For Description, enter
GitHub Action. - For Key, paste the public key you retrieved.
 Get service settings
Set the private key
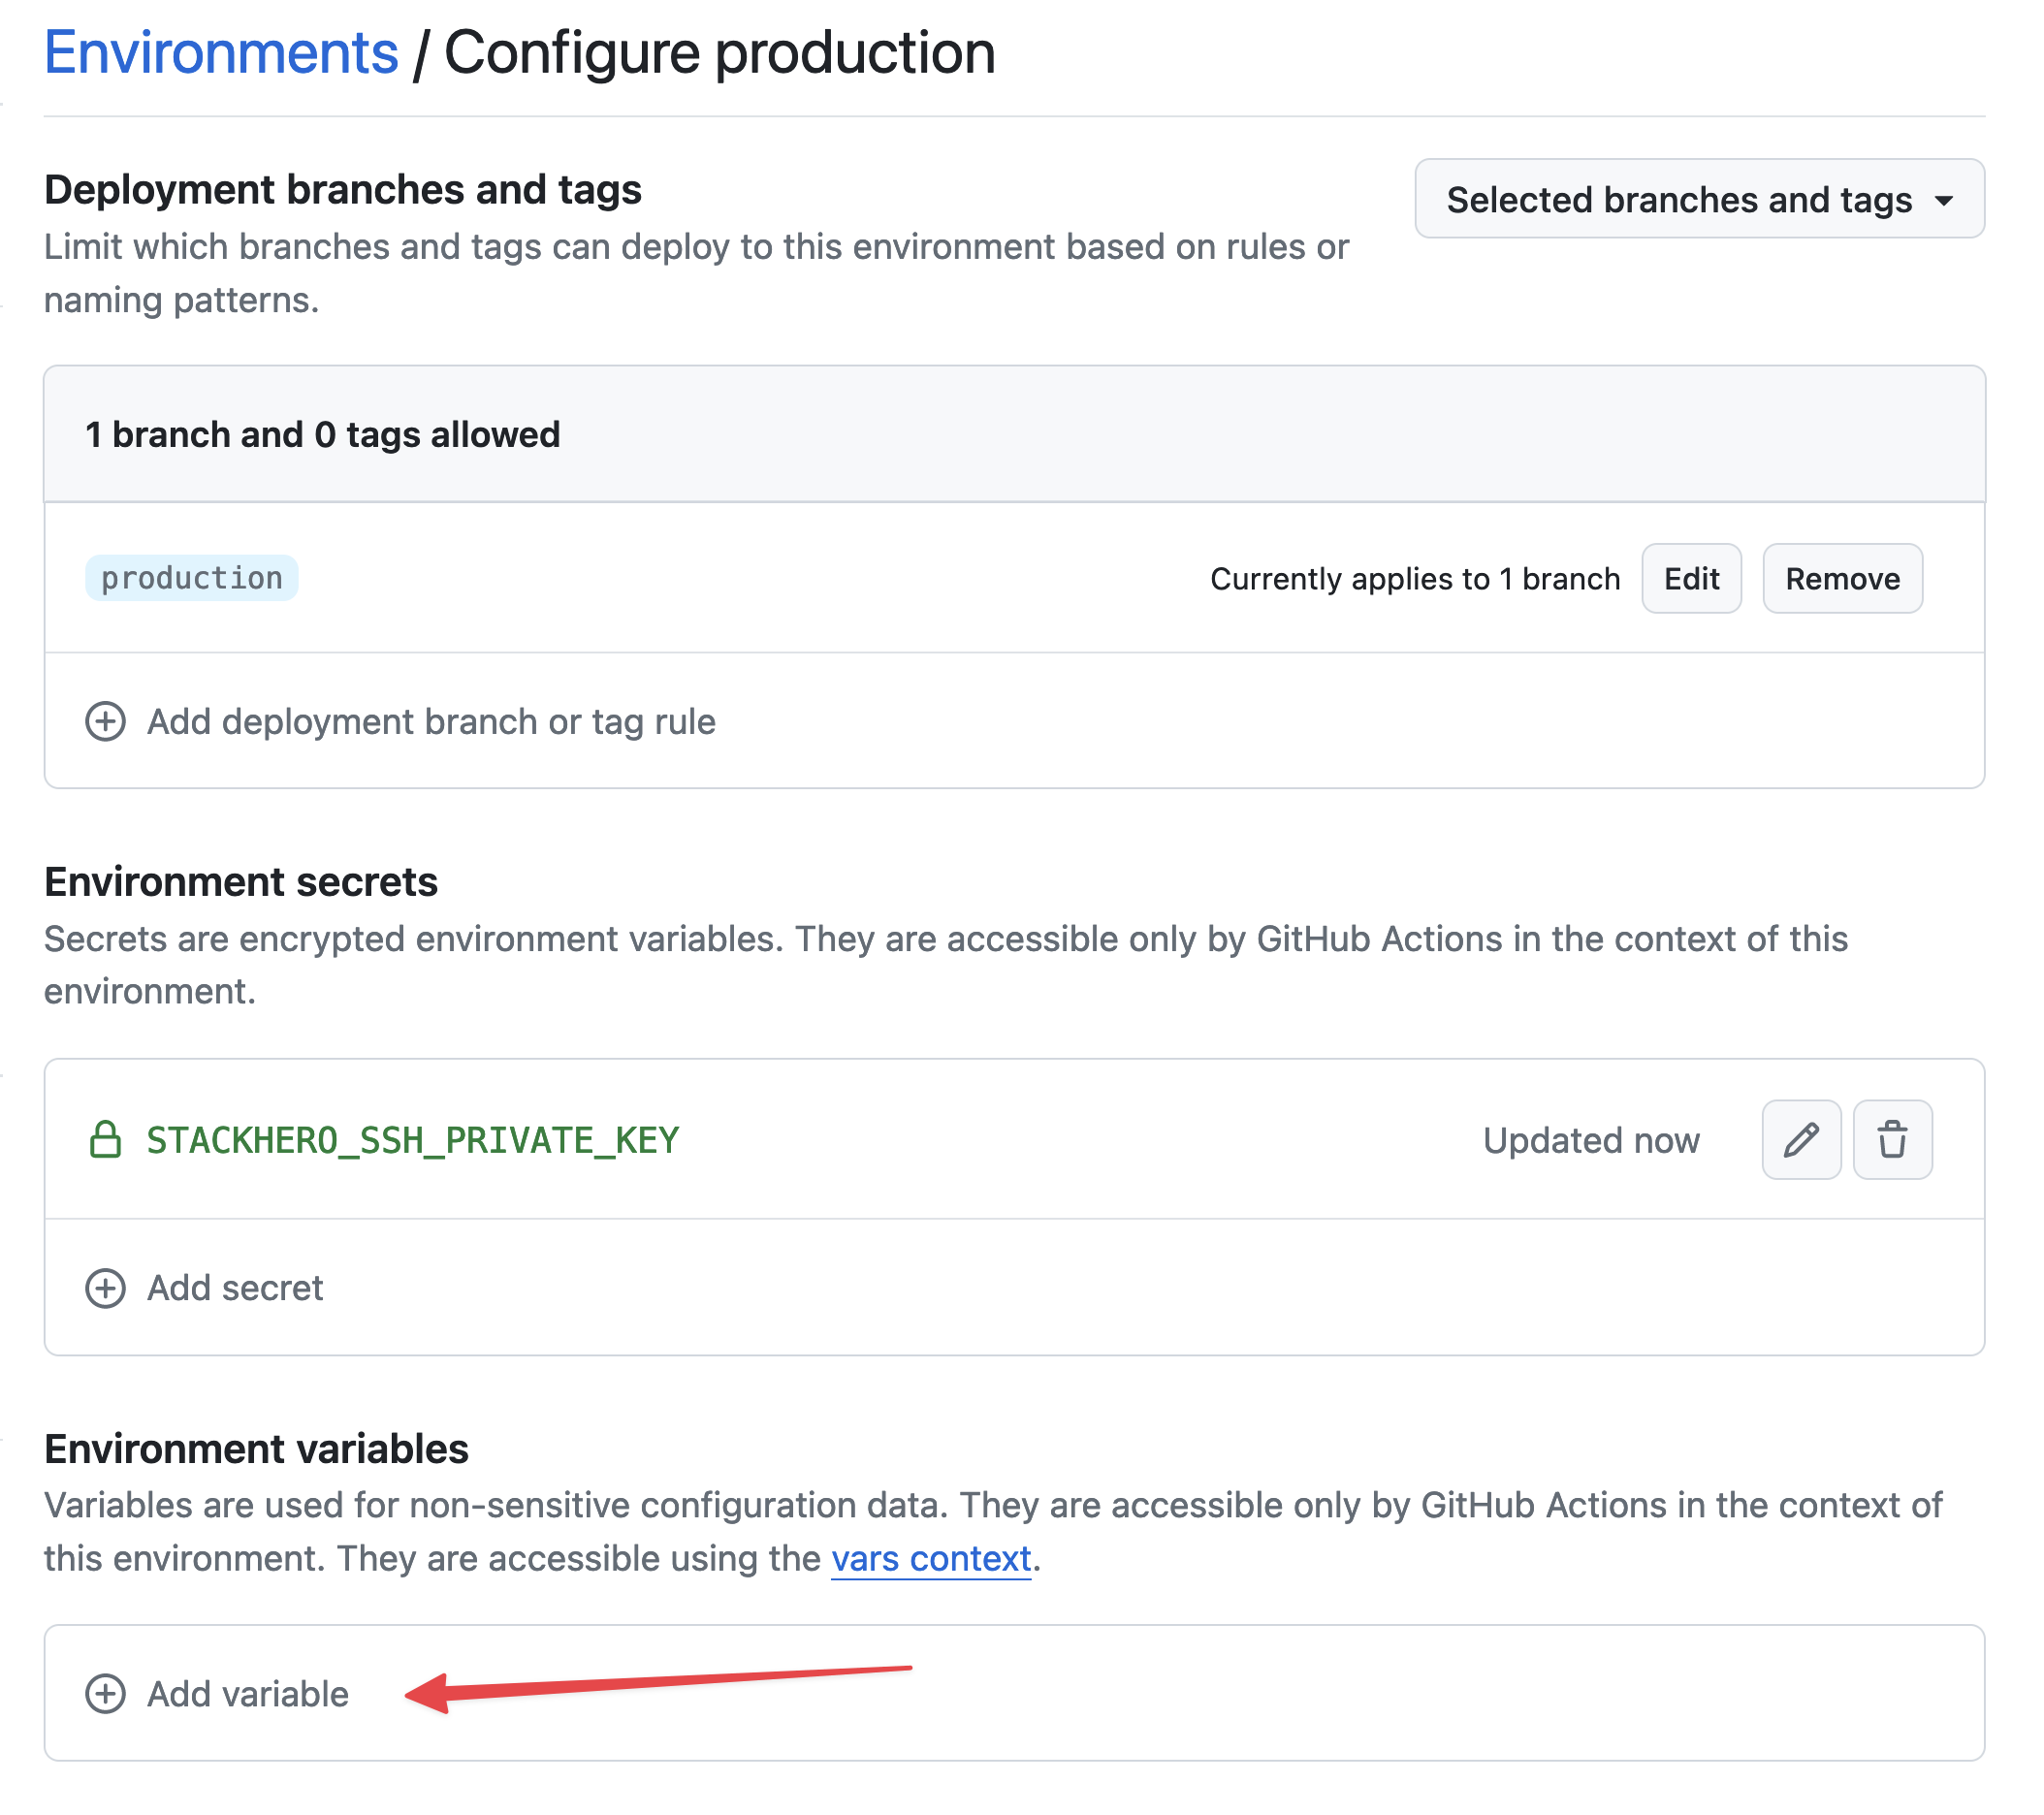
Switch to the GitHub website and open your project repository. Then, click on Settings and select Environments. Click New environment.
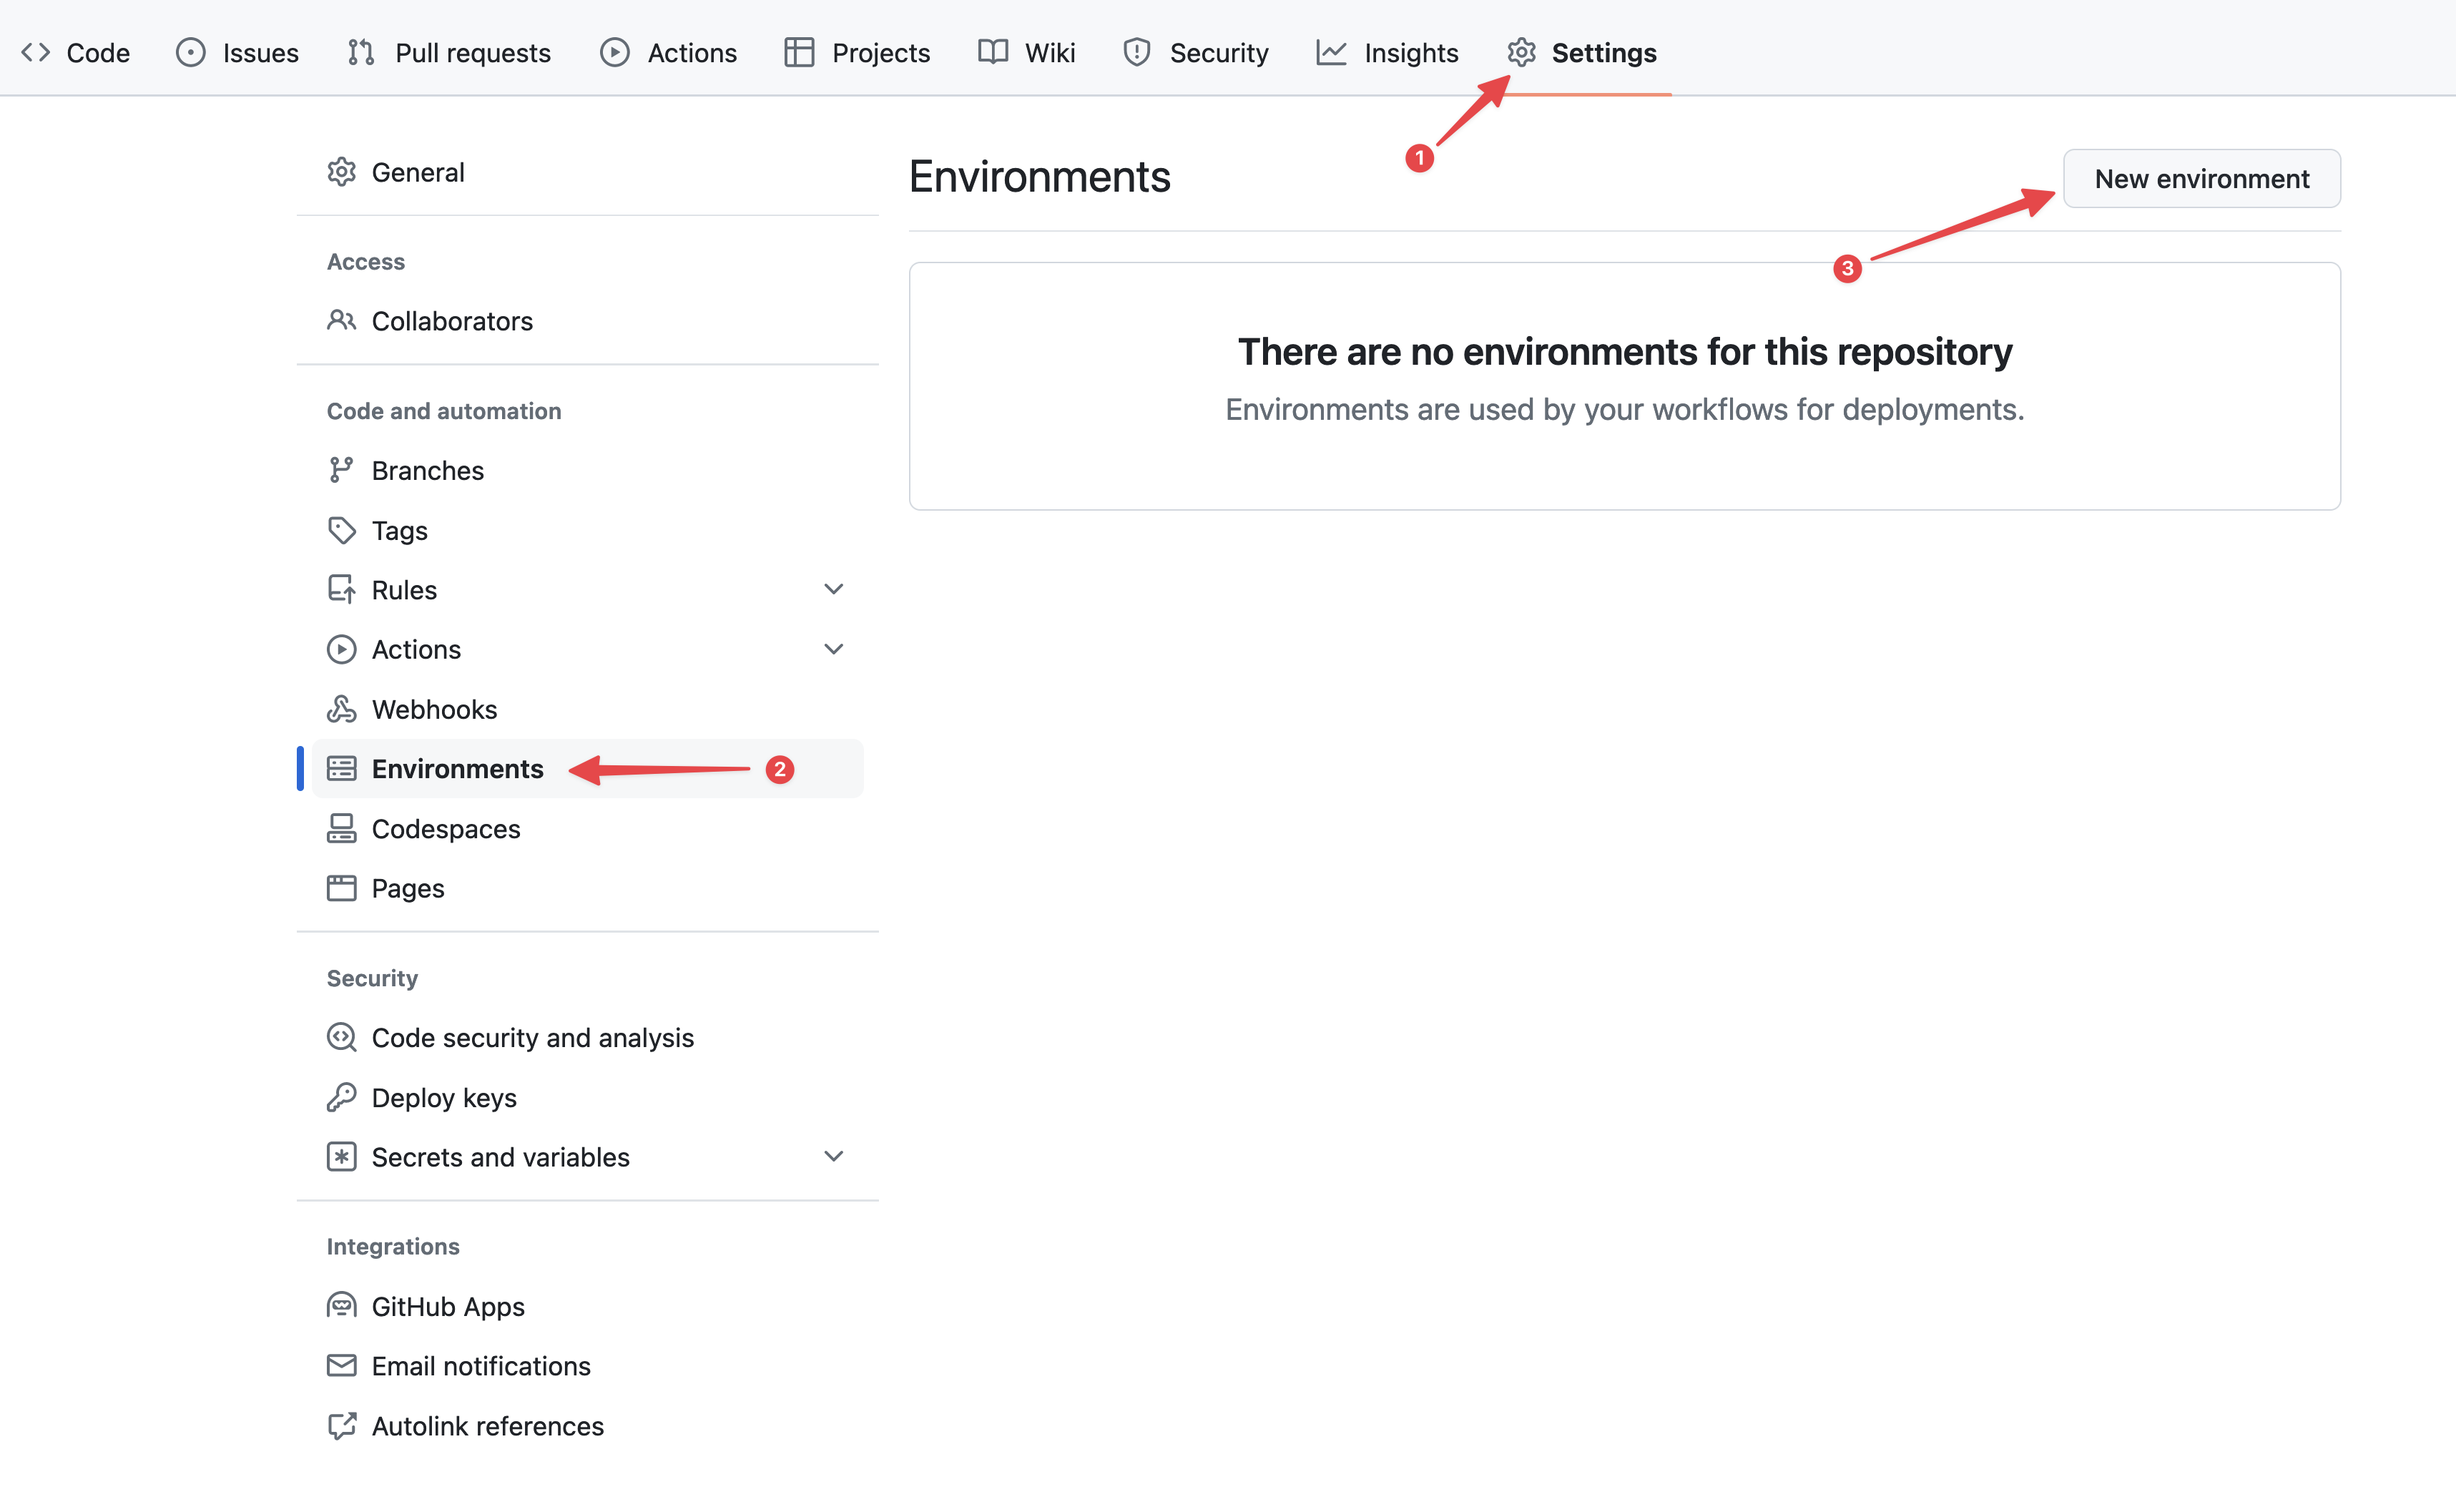 Configuring GitHub environments
Enter "production" for the Name and confirm your action.
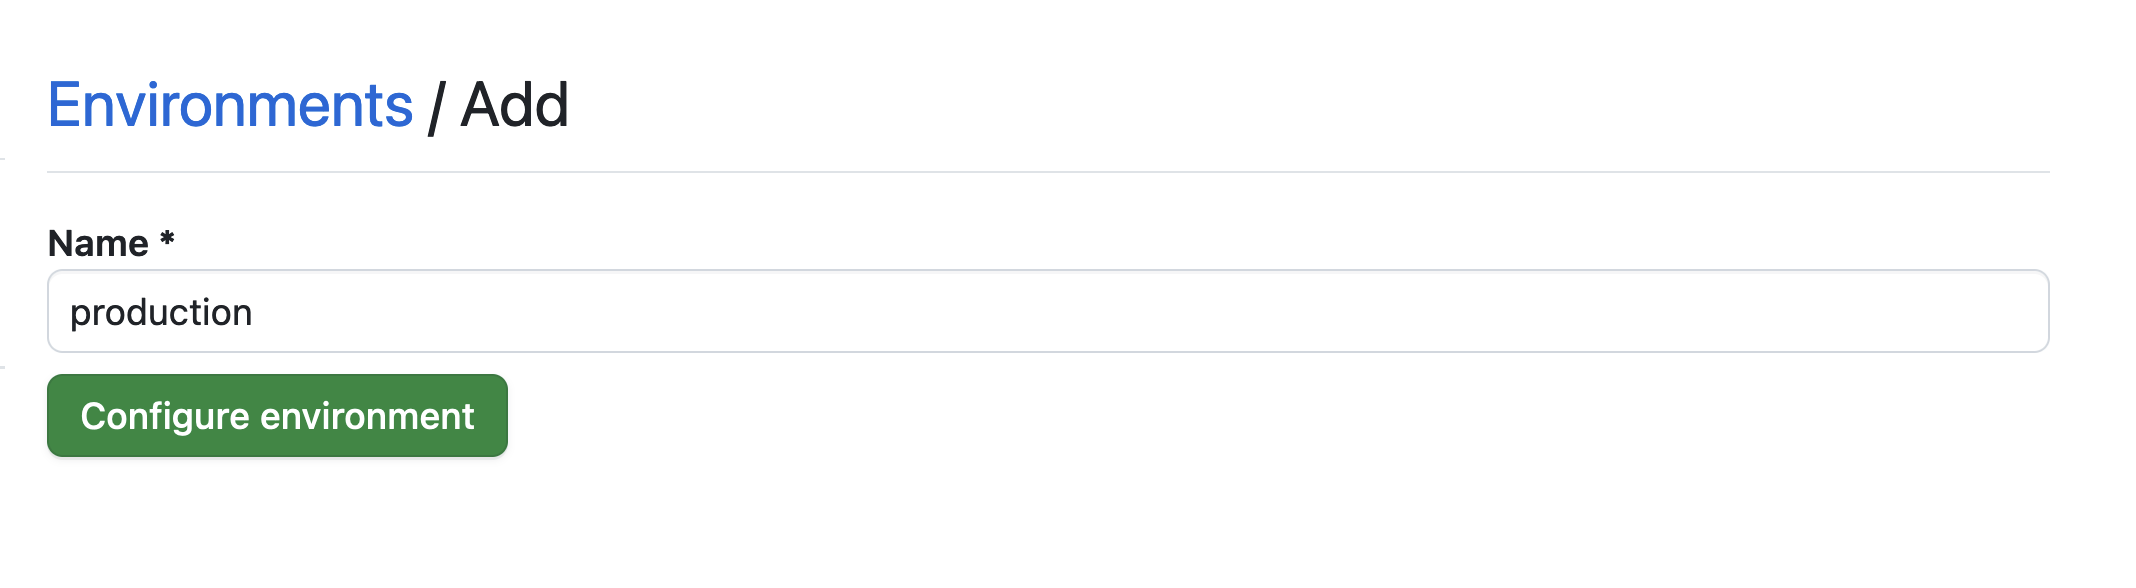 Setting the environment
Click on the No restriction button, then choose Selected branches and tags.
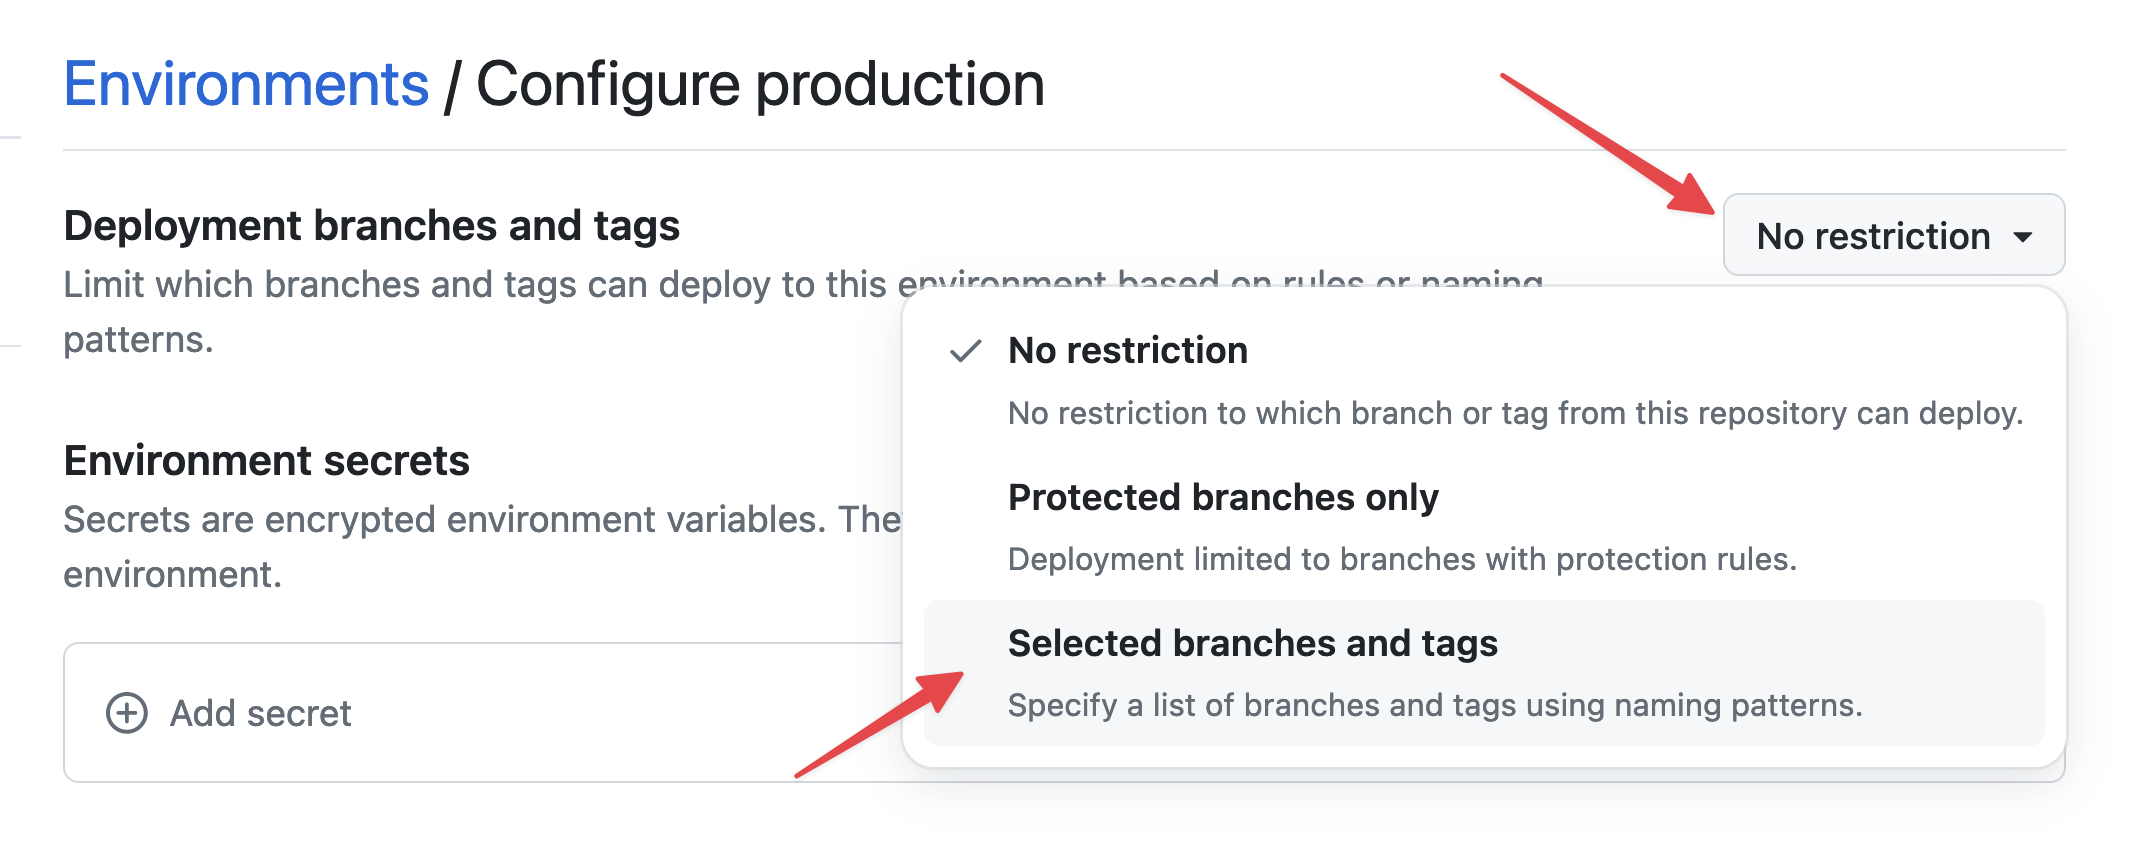 Setting environment restrictions
Now click on Add deployment branch or tag rule, enter "production" in the Name pattern field, and click Add rule.
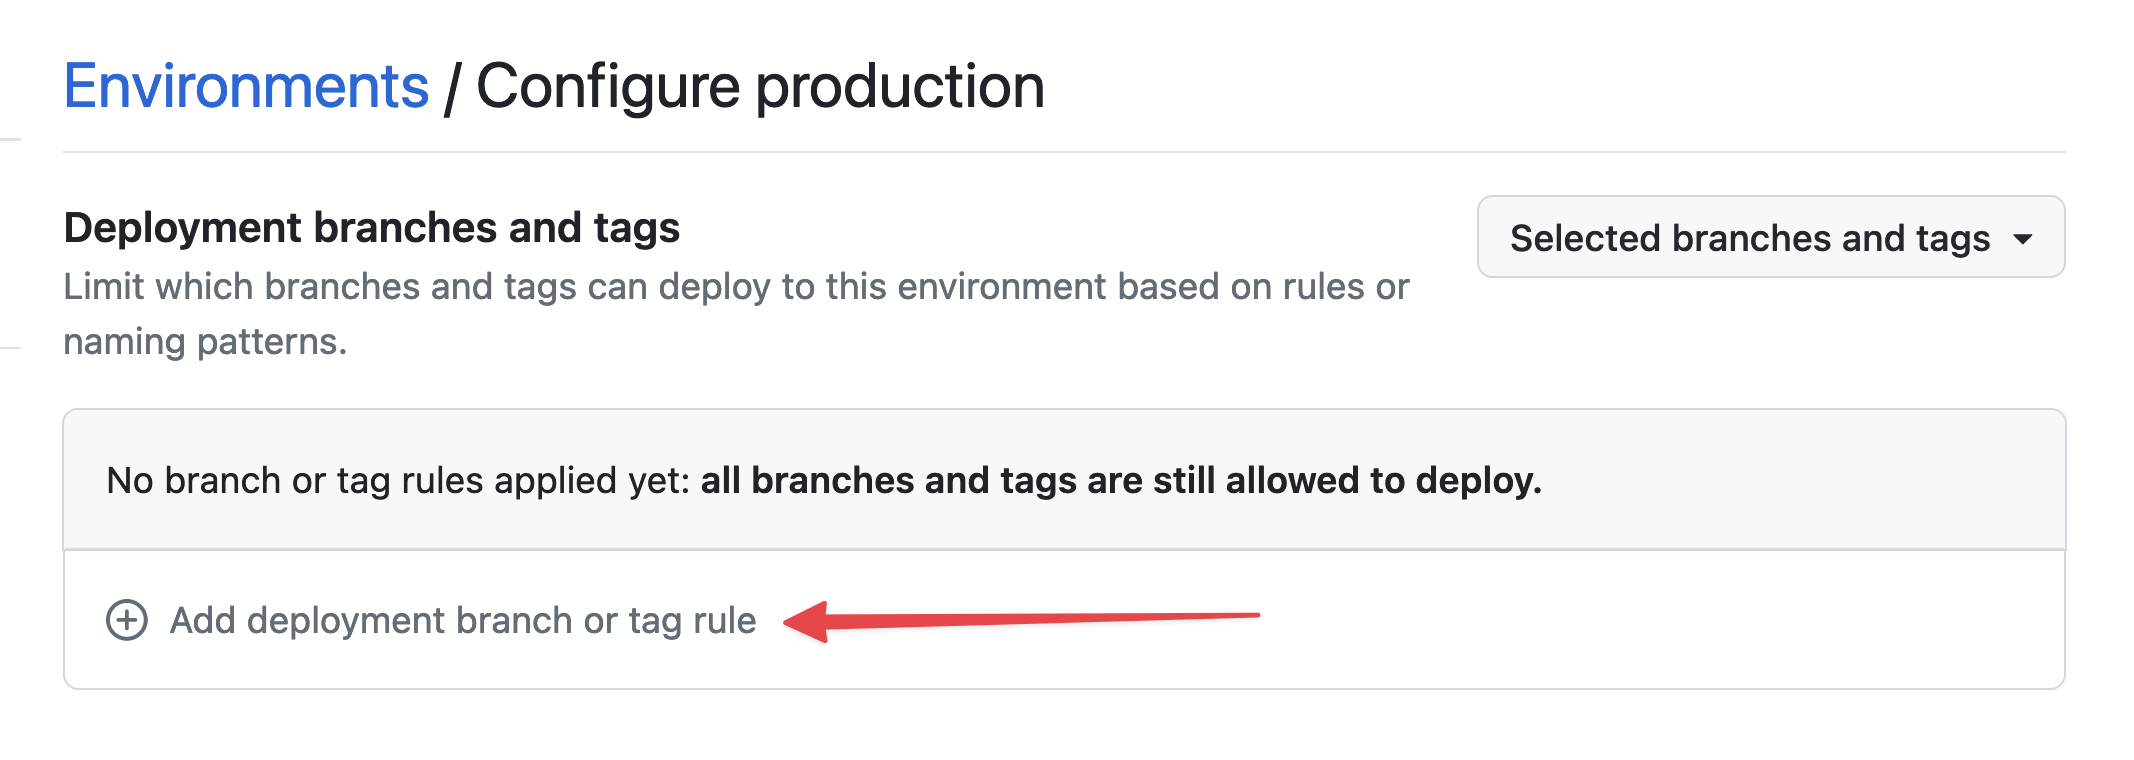 Setting environment branch
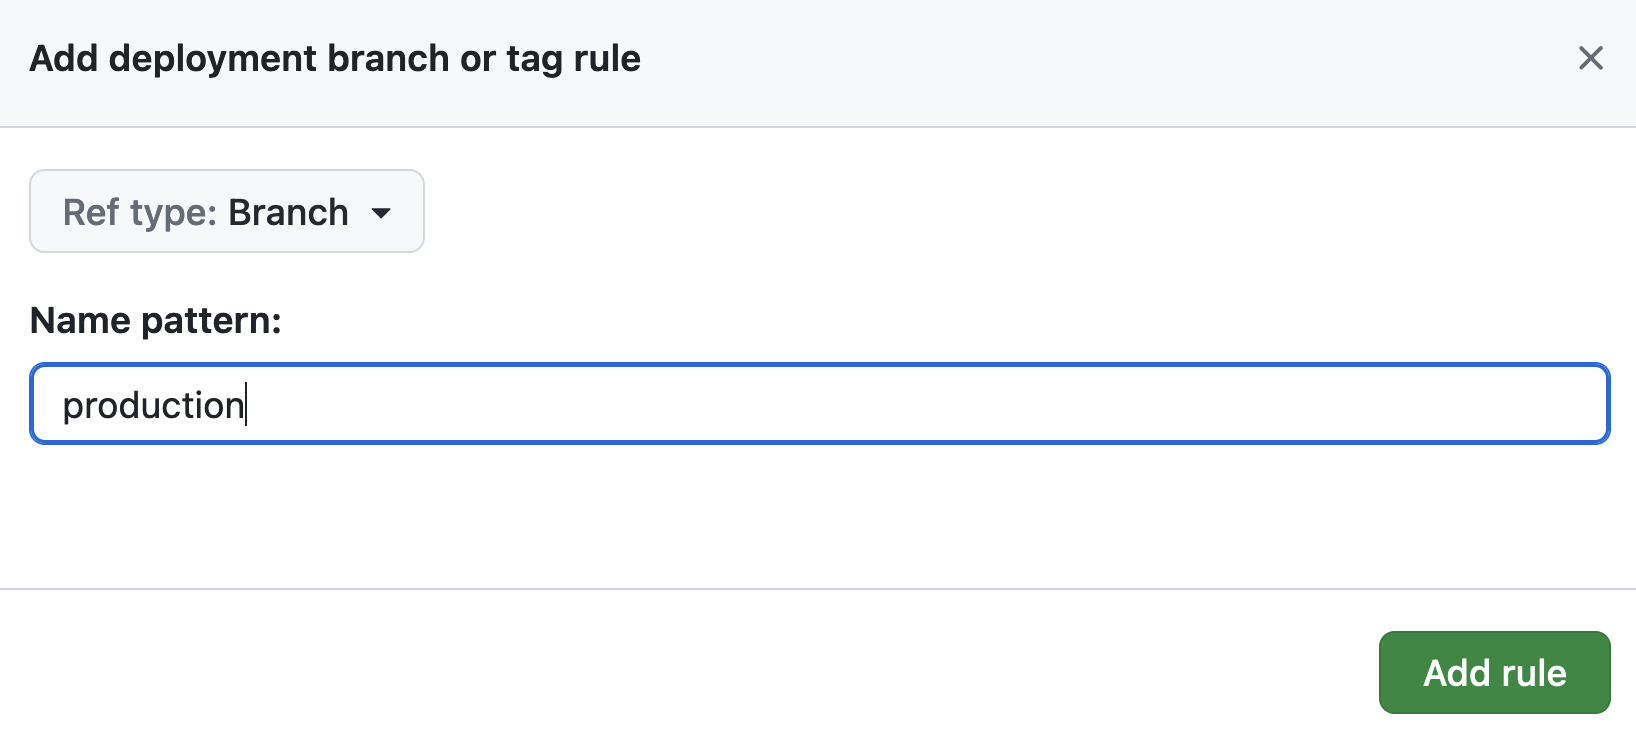 Setting environment branch
Next, in Environment secrets, click on Add secret.
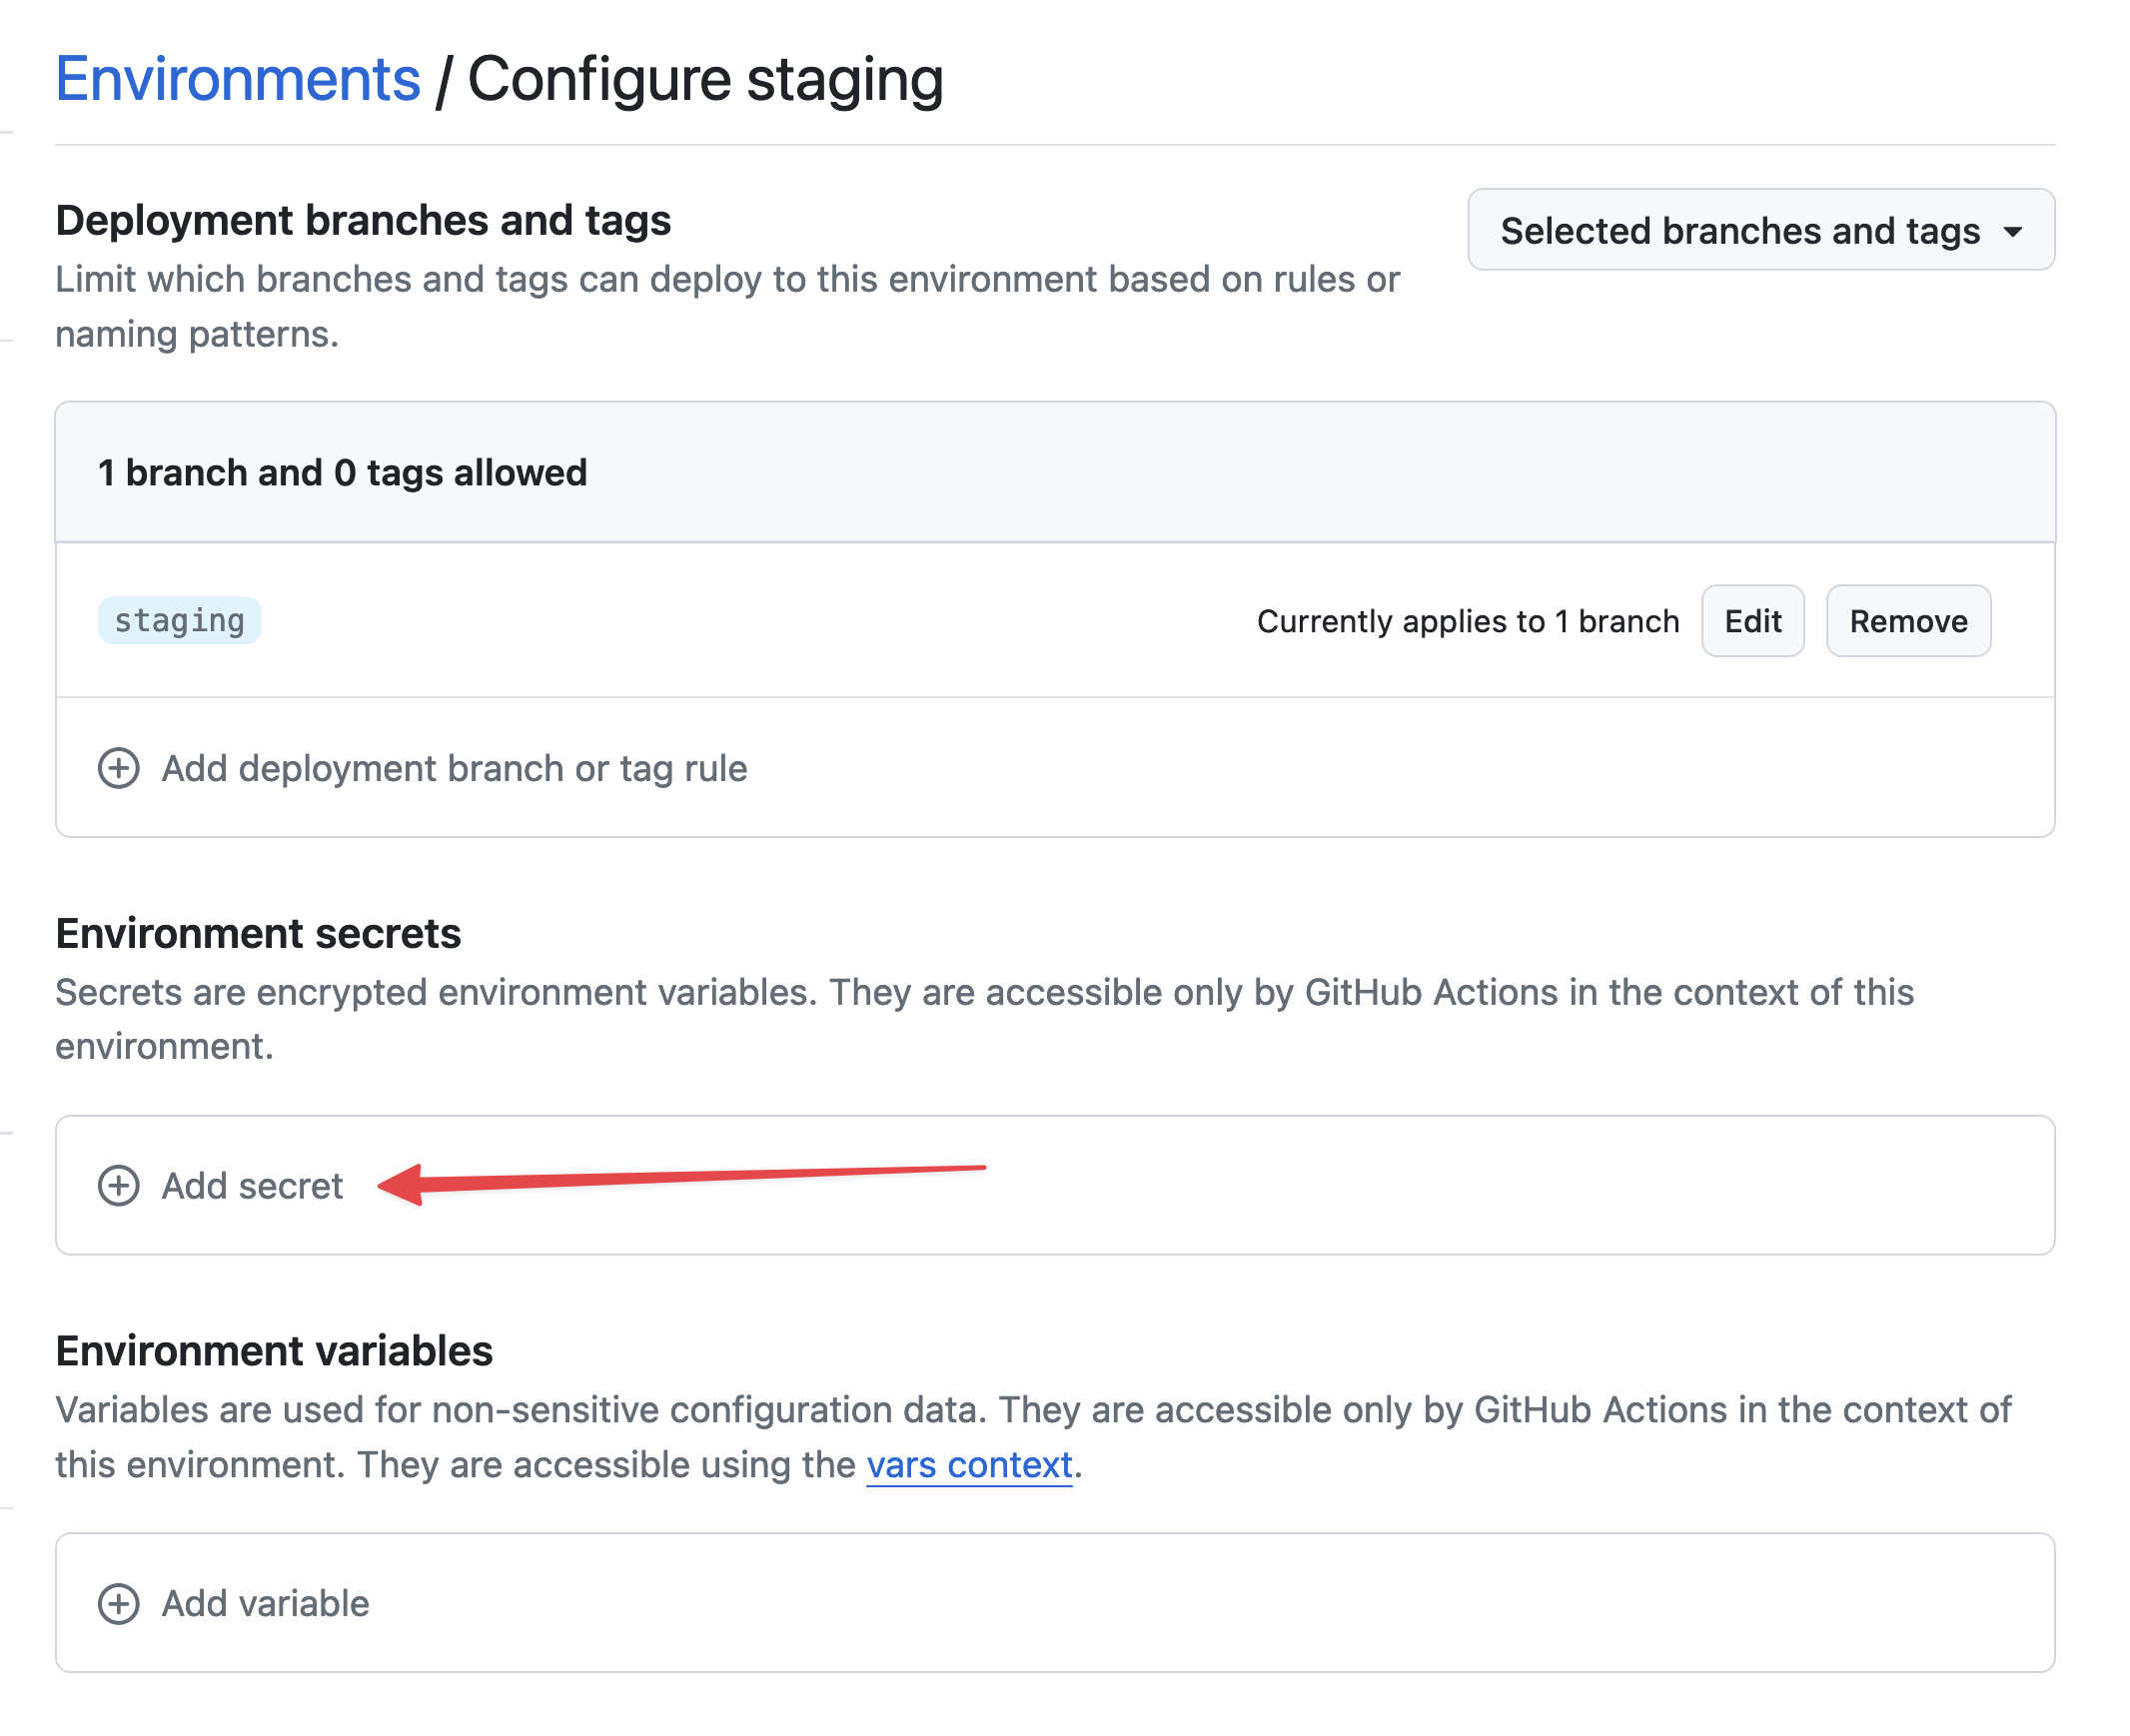 Add secret
Retrieve the private key you generated by running:
cat /tmp/ssh_key
In GitHub, enter STACKHERO_SSH_PRIVATE_KEY as the Name and paste your private key into the Value field.
 Setting the SSH private key secret
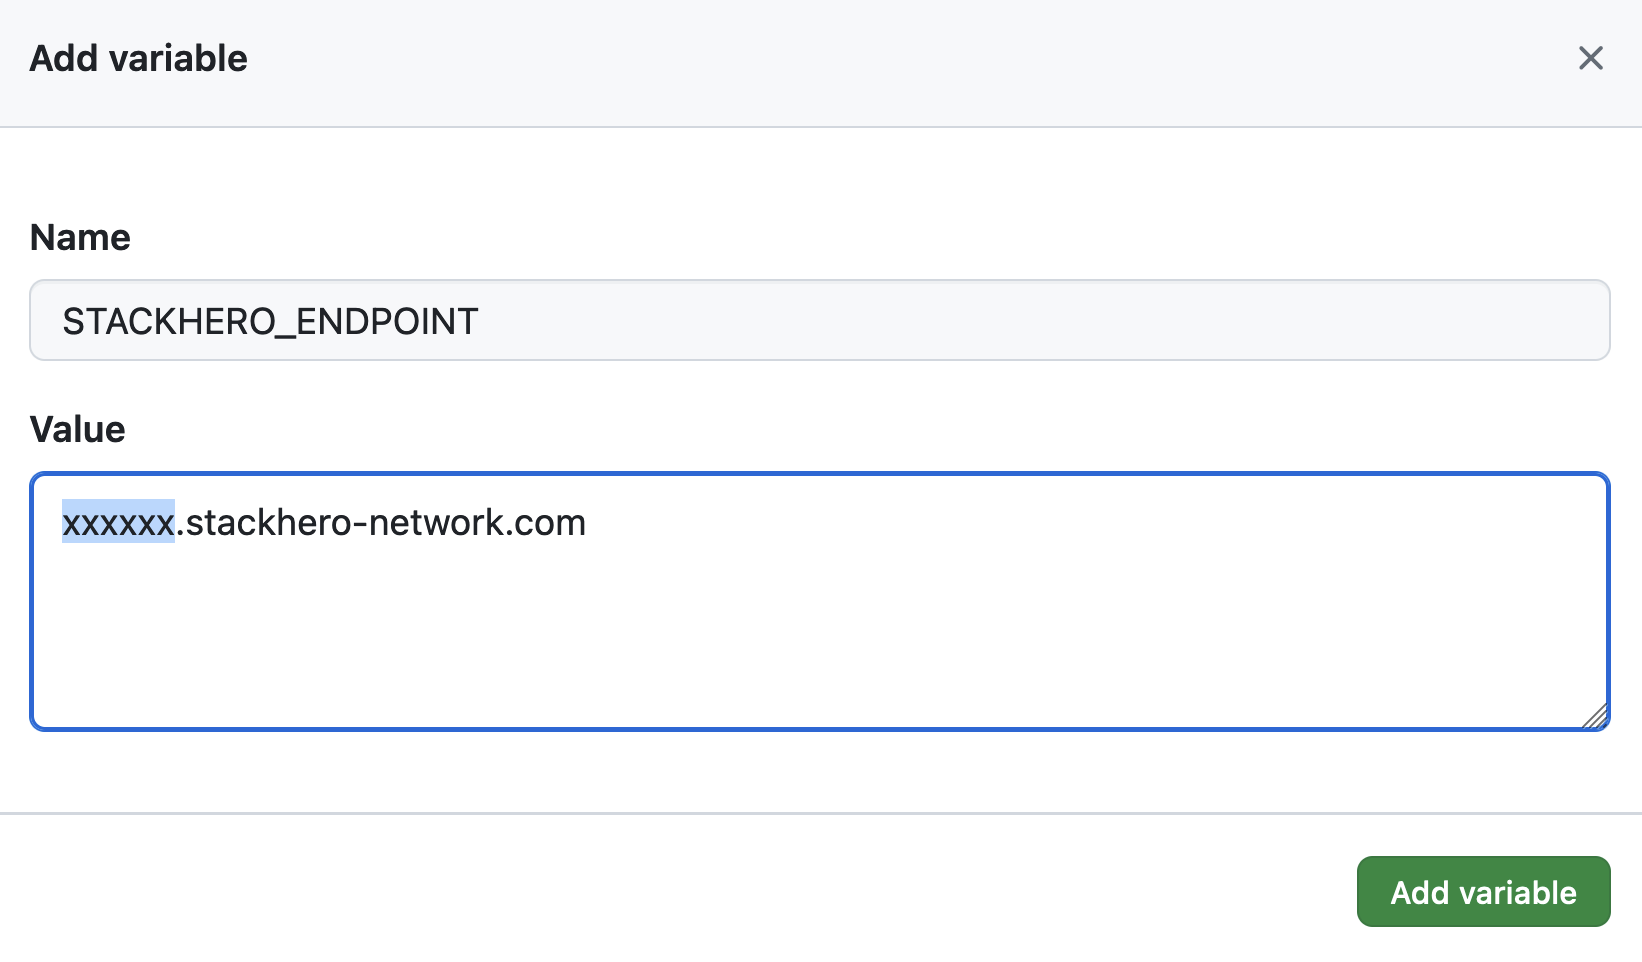
Then, in Environment variables, click on Add variable.
 Setting variables
Enter STACKHERO_ENDPOINT as the Name and paste your Node.js service endpoint into the Value field. You can find this endpoint in your Stackhero dashboard.
 Setting the endpoint variable
If you have customised your service domain name, use the customised version instead of xxxxxx.stackhero-network.com.
Delete the generated keys
For security reasons, remove the SSH keys from your computer once you have set them up on Stackhero and GitHub:
rm /tmp/ssh_key /tmp/ssh_key.pub
Configure the GitHub Actions workflow
Within your Git repository, create a directory called .github/workflows and add a file named deploy-to-stackhero.yml.
# File: .github/workflows/deploy-to-stackhero.yml

name: Deploy to Stackhero
run-name: Deploy branch "${{ github.ref_name }}" to Stackhero

on:
  push:
    # List the branches that trigger the deployment action. Ensure an environment exists in GitHub (under "Settings" > "Environments") for each branch.
    # Then add the corresponding secret STACKHERO_SSH_PRIVATE_KEY and variable STACKHERO_ENDPOINT in that environment.
    branches: [ "production", "staging" ]

jobs:
  Deploy:
    environment: ${{ github.ref_name }}
    runs-on: ubuntu-latest
    steps:
    - uses: stackhero-io/github-actions-deploy-to-stackhero@v1
      with:
        # STACKHERO_SSH_PRIVATE_KEY and STACKHERO_ENDPOINT should be set in the respective GitHub environment.
        ssh_private_key: ${{ secrets.STACKHERO_SSH_PRIVATE_KEY }}
        endpoint: ${{ vars.STACKHERO_ENDPOINT }}
After creating the workflow file, commit your changes with the following commands:
git add -A .
git commit -m "Add GitHub Actions to deploy to Stackhero"
Create a production branch with:
git checkout -b production
Finally, push your changes to GitHub:
git push --set-upstream origin production
This push sends your code to the production branch and triggers GitHub Actions to deploy your code to the Stackhero service. To verify the deployment, navigate to your project on GitHub and click on Actions.
 GitHub Actions that deployed to production
Congratulations! Your code is now set up for automatic deployment to production via GitHub Actions.
Creating the staging environment
Setting up the staging environment is similar to the production environment. Repeat the steps above, replacing production with staging as needed.
Begin by creating a staging branch with:
git checkout -b staging
Then push your staging branch to GitHub:
git push --set-upstream origin staging
GitHub Actions will automatically deploy your staging branch to the designated Node.js service.
Going further
It is good practice to protect the production and staging branches to avoid direct pushes. Instead, create a pull request for the staging branch and merge changes from your development branch. Once you have validated the changes on the staging platform, merge the pull request into the production branch.
This approach helps ensure that only authorized individuals can push to staging and production. It also makes sure new features are thoroughly tested before going live.